• Skip to primary navigation
  • Skip to main content
  • Skip to primary sidebar

Nourished

  • Home
  • Recipes
  • Book Reviews
  • Restaurants
    • 3 Michelin Stars
    • 2 Michelin Stars
    • 1 Michelin Star
  • Journal
    • Art Journal
    • The Renaissance Diary
  • About
    • Contact Me
    • Instagram
    • Loves
    • Suppliers
    • Masterchef Links

Baking

October 12, 2014 Baking

Doughnuts, the Justin Gellatly way…

OLYMPUS DIGITAL CAMERAAmazingly, I’ve made doughnuts several times before and the results were very disappointing, and certainly not worth repeating.  I knew I’d followed the instructions properly, so something else was going wrong.  Hmmn. Maybe doughnuts weren’t for me.

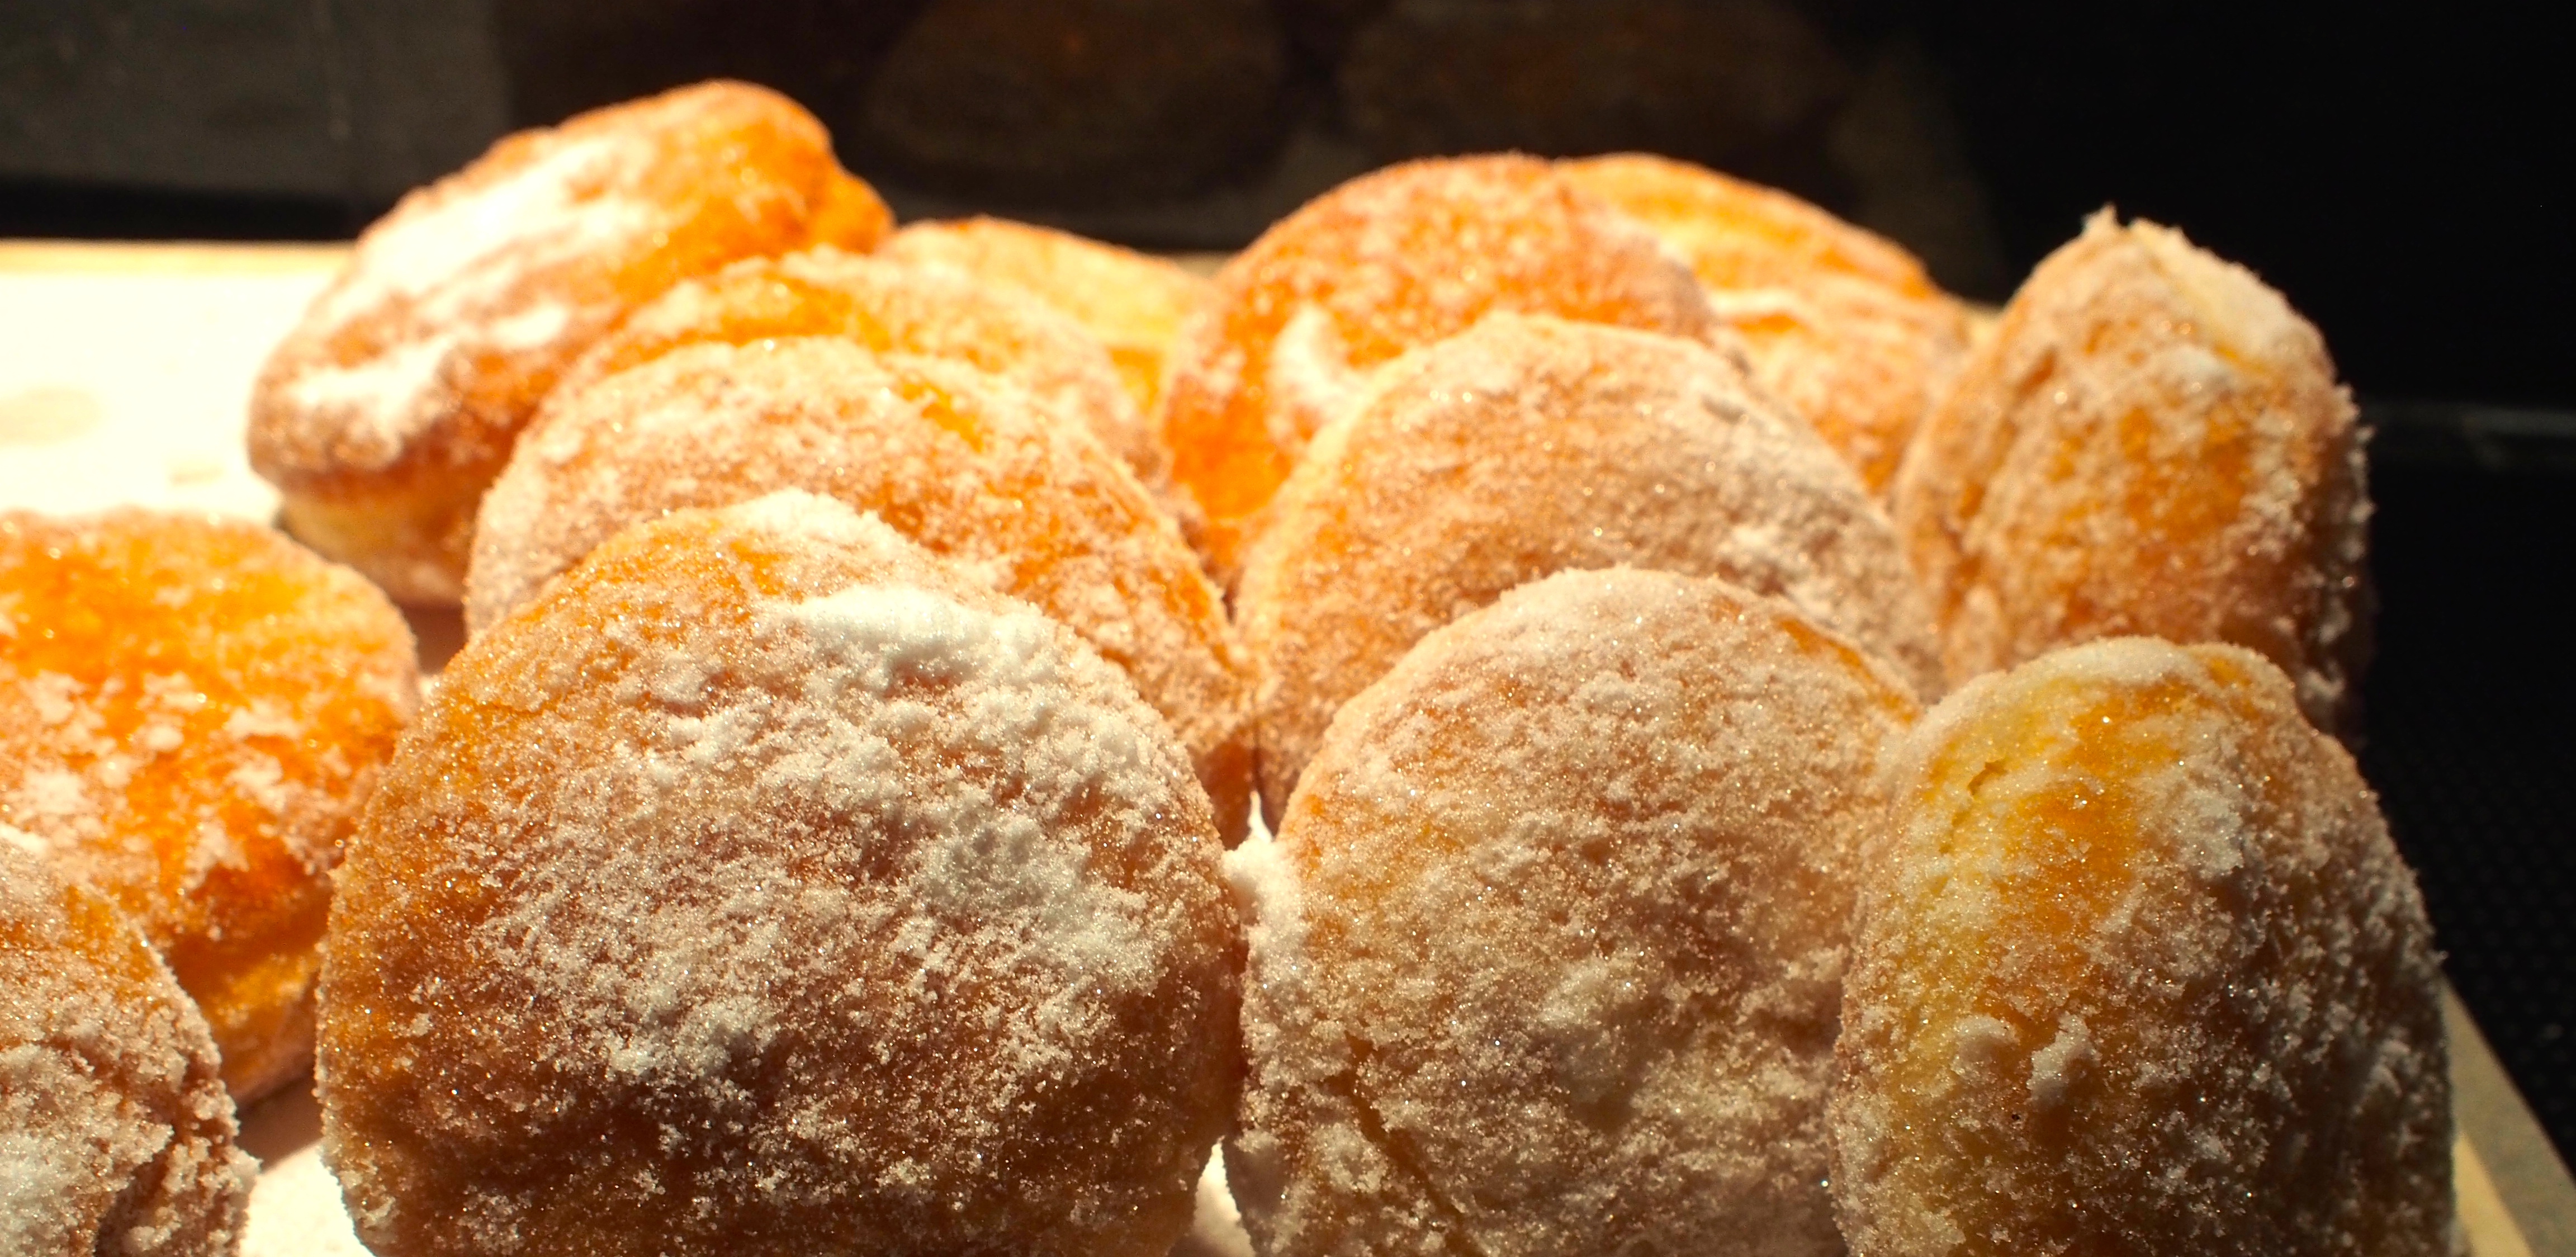
I became aware of Justin Gellatly on twitter (of course) – famous for his doughnuts at the St John’s Bakery, he left after a decade to set up his own Bread Ahead in Borough Market.  Soon the twittersphere was flooded with instagram pics of his ridiculously good combinations, and though not  a huge doughnut fan, I became quietly obsessed with checking out the pics.  When he released his book earlier this year, it quickly made its way to the top of my pile.  But still – no doughnuts.

…

Read More

November 4, 2013 Baking

Lemon Drizzle Cake

All bow to Mary Berry, the queen of baking.  And it’s true, if I’m looking for a traditional bake, I’ll usually look at her recipe first and then move on to check out any variations.  In this case we’ve never moved beyond Mary’s recipe, and it’s the cake the children ask for most.  If made using the all-in-one method in a food processor, it literally can be in the oven in five minutes… C’mon – who doesn’t have time for a five minute cake???

The basic mixture is what the Americans call pound cake – that is that the four main ingredients weigh the same as each other.  Although this can result in a slightly heavier cake than others, it is here lightened with a little baking powder.  The sugar glaze also sinks into the cake, and forms a crust which keeps the moisture inside the cake.

For the cake:
3 large eggs
175g (6 oz) self-raising flour
175g (6 oz) caster sugar
175g (6 oz) softened butter
1.5 level tsp baking powder
Finely grated zest of 1 lemon

For the crunchy lemon icing:
100g (4 oz) granulated sugar
Juice of 1 lemon

You’ll also need:
900g (2lb) loaf tin, greased and lined (or smaller presentation cases, as I have used)

Method

  • Preheat the oven to 180ºC / 350ºF / Gas Mark 4.
  • Beat together the eggs, flour, caster sugar, butter, baking powder and lemon zest until smooth in a large mixing bowl and turn into the prepared tin
  • Bake in the pre-heated oven for about 35 mins, or until golden brown, shrinking away from the sides of the tin and springy to the touch.
  • While the cake is still warm, make the lemon drizzle topping. Mix together the sugar and lemon juice, and pour over the warm cake
  • Do keep going back to top up the glaze until you can see it isn’t being absorbed any more.  In my photographs, the cake on the left was glazed a couple of minutes before that on the right – both had the same amount of glaze, but you can see that the one on the left has absorbed more glaze
  • Leave to cool a little and loosen the sides of the cake, then lift the cake out of the tin (or, if using presentation cases, clearly you can leave the cake alone until you need it.  This will keep it fresher for longer
Notes
  • If the mixture looks too thick, add a little milk to slacken it
  • If using a food processor, try not to over mix the batter, as it will over-develop the gluten – just mix the batter for long enough to bring it together
  • If you do make it in the traditional way (beating the butter and sugar) you will get a better cake – depends how much of a purist / sadist you are – I now do it the full form way!
  • My batter looks a little orange.  Because I was using small eggs, I’d put in four to make it up to the right quantity, giving me one extra yolk.  I was also using Clarence Court eggs, and their yolks are a very rich colour
  • I don’t use the recommended quantities for the glaze, as I often have very large lemons (from lovely Natoora – yummy Amalfi lemons!).  So, I juice my lemon, and then add enough sugar to give you a firm enough glaze.  Works perfectly well, and doesn’t seem to overdo the sugar glaze – of course this may be because I’m putting it across two smaller cakes
  • If using slightly smaller cases, do reduce the cooking time accordingly
  • The mixture makes two cakes in the cases I use, and they take around 25 minutes to cook
  • The little presentation cases are available in bulk from Bakery Bits
  • This makes an excellent tray bake too – if using the tray bake size from Lakeland, give the cake about 20-22 minutes…


This recipe is taken from Mary Berry’s Stress-free Kitchen

    September 13, 2012 Baking

    Swiss Meringue Buttercream Icing [Thermomix]

    I’ve been making a lot of macarons lately, and when I’m completely happy with the process, I’ll put a post up.  But in the meantime I’ve come to realise that whilst a perfect macaron shell is lovely, actually what the majority of people remember are the fillings.  Macarons are vehicles for flavour, and I guarantee most people won’t know if your ‘feet’ have separated, or your shells are hollow.  What they will remember is the texture! 


    So far I’ve played with freshly made jam (meh), buttercream (meh – too buttery), Italian meringue buttercream (still a bit buttery) and agar gels (lots of potential here).

    But then I stumbled across a recipe by Karen Scott on the Australian thermomix forum for Italian meringue buttercream, and I had to give it a go.  The idea that you can get on with making your macaron whilst the Thermo is making the filling is just too tempting!

    I followed the recipe exactly as it stated, and oh my word!  I’m really not a buttercream icing kind of girl, it’s always a bit to rich in my experience – but this is absolutely exceptional.  Perhaps I should elaborate?  It’s still incredibly buttery and creamy, but the quality of the meringue lifts it beyond anything I’ve seen made at home before.  I’m not a massive cake eater, but when I’ve had them forced on me the overwhelming taste of the icing is either icing sugar, or butter (or worse still, both).  In this there is an instant melt-in-the-mouth affect, with no one thing dominating – this allows the actual flavour to completely sing!  I made passionfruit puree, then salted caramel – they taste nothing like each other – each tastes of its own component.  This makes a large batch of this the perfect vehicle for flavouring several batches of macarons or cupcakes.

    The meringue produced by the Thermo was way beyond my expectations, and I’m seriously considering using it to make macaron…  In the meantime, I will never make buttercream any other way!  Clearly you need a Thermomix to make the magic happen, but if you do have one – you just have to try this!

    Ingredients
    Swiss Meringue Buttercream
    100 g egg whites
    200 g Sugar (white or raw)
    300 g unsalted butter cubed

    Preparation

    • Place egg whites and sugar into the TM Bowl. Mix for 5 minutes at 70c Speed 2.
    • Check that all the sugar has dissolved by rubbing a bit between your fingertips. You should not be able to feel any sugar crystals. if you can, beat for 2-3 more minutes and check again.
    • Place the butterfly into the bowl and mix for 10 minutes at speed 4. At this stage the mixture should be smooth and glossy and form stiff peaks.
    • If the mix has not yet cooled to room temperature, keep beating until the bowl is no longer warm to touch. This could take another 10-20 minutes. If you are short on time, transfer the mix to a stainless steel or glass bowl and sit in a basin of cold water. Once the bowl is cool to touch, tranfer the mix back to your TM bowl and continue.
    • Mix for 3-4 minutes at speed 4, slowly adding the butter bit by bit through the lid. Don’t worry if it looks a little curdly along the way, it should all come back together.
    • At this stage you can add colour or flavour of your choice. Suggestions are; vanilla extract (1 tsp), chocolate (100g melted and cooled), orange oil, lemon oil etc. I split my bacth in half and added chocolate to one half.
    • Pipe or spread onto your cake or cupcakes and enjoy.  You can put it in the fridge if you are not going to use it straight away but bring it back to room temperature and whip it again before using.
    • You can increase the quantities to whatever you need, just keep the egg whites, sugar and butter in the ratio of 1:2:3. An 8 inch cake will take about 150g egg whites depending on the type of piping you use.

    This is the first stage of the meringue, you can see the dense meringue consistency

    Following the addition of the butter, the meringue icing is a much richer colour and density

    I’ve now made several batches of this and it really is the best icing.  One thing I have noticed is that if you keep beating the meringue until it’s completely cold, it does seem to re-liquify slightly.  I’d be tempted to remove the jug and the lid to speed up the cooling process, but without over-whipping.  I’ve also now made this with equal quantities of the buttercream and melted chocolate, and it’s ridiculously good.  The kids have been flavouring it with all kinds of flavourings – great fun!

    August 26, 2012 Baking

    The Scandilicious Chelsea Bun…

    I’ve been following Signe on twitter for ages now, and there’s always something very familiar about her flavour combinations and recipes…  That’s not to say that I’ve found them available widely, on the contrary, but having grown up in Germany there’s something about the Scandinavian palate that resonates strongly with my childhood.  We spent a lot of time living around Bremen, and Hamburg, right at the top of Germany and not far from Scandinavia proper.  And since Signe released her new Baking book, I’ve been dying to delve into it to try something.

    Originally I’d said that I’d cook a pavlova, and I will at some point, but it’s the spiced things that have been drawing me in…  In a quick poll on twitter at 7am this morning, the consensus (of two) was that I should go for the Chelsea buns first.  I must admit the cardamom twists are still calling to me, like a baking siren…

    So, Chelsea buns first…  Of course I made a few variations, not to the spicing, but to the fruitiness – just because of my kids, but Signe did give us the option to play with the tea etc.

    Dough
    340ml whole milk
    75g butter
    550g refined spelt or plain flour (I used 50/50)
    60g of golden caster sugar
    1.5 tsp cinnamon

    0.5 tsp mixed spice
    1.5 tsp fine sea salt
    20g fresh yeast or 10g of fast action dried yeast
    2 medium eggs, beaten

    Filling
    80g currants (actually, I used craisins)
    80g sultanas (I used orange river)
    1 large mug (at least 250ml) strong Lady Grey Tea (I used mandarin and cranberry)
    150g buter
    100g light brown muscovado sugar
    1 tsp vanilla salt
    1.5 tsp cinnamon
    0.5 tsp mixed spice
    demerara sugar or natural sugar crystals for sprinkling (optional) (I used cinnamon sugar)

    Glaze
    1 jar marmalade (284g)
    40g butter
    zest of 1 lemon (and lemon juice, optional)


    Method (cheekily lifted from Signe’s website, though the photo’s are my own))
    “In a saucepan scald the milk and allow the butter to melt in the hot milk. Set aside to cool to below 50 C otherwise the heat will kill off your yeast.

    In a large bowl sieve flour, sugar, dried yeast (if using fresh yeast add a spoonful of sugar to it in a small bowl before adding to the mixture just to check it’s alive), spices, salt and stir thoroughly to distribute all the ingredients.


    Once the milk has cooled to below 50 C, add the beaten eggs (and fresh yeast if using), milk and stir for 5 minutes using a large metal spoon. You can knead it for 5 minutes on the table but it’s not absolutely essential with spelt flour I find, and sometimes a good thrashing with a large spoon does the trick, a good way to release any tension! 

    Cover the dough and set aside to rise for an hour or so. It should double in size. You can also just leave it in the fridge overnight to bubble and ferment for a slower maturation and slightly more complex flavour. Soak the currants and sultanas in tea (or whisky!) and cover for 1 hour or so or leave overnight. 

    Once the dough has doubled in size knock back by kneading for 1 minute or so. Using a rolling pin roll the dough out to 40 cm x 20cm for bunlets rather than big buns. They still end up being about 5cm in diameter so you’re not depriving anyone by making them this size, plus there’s a better yield from all this work!

    Drain the fruit of excess liquid. In a separate bowl mix the filling ingredients, minus the soaked fruit. Spread in an even layer across the rectangular dough and then scatter the soaked fruit in another even layer over the filling. Now using a dough scraper or a palette knife gently roll the dough up like a swiss roll and make sure the seal is on the bottom before you start slicing the dough into buns.


    Line one very large rectangular tin or two smaller 30 cm x 20cm tins with baking parchment. Using a sharp knife slice the buns into 1 inch discs. Place each bun into the baking tin, allowing a bit of space between each one (they will squish together while proving), once filled, cover the baking tin with cling film and set aside to prove for 30 mins or so until the buns have puffed and doubled in size. Touch one on its lower side, when you remove your finger it should leave an imprint on the dough. Preheat the oven to 220 C 10 minutes before the end of proving.  
    When the buns are proved, sprinkle with demerara sugar or sugar crystals and bake on the upper middle shelf of the oven.  Turn the heat down from 220 C to 190 C after 5 minutes of baking so they don’t scorch. Bake a further 20 or so minutes until the buns look golden brown and sound hollow when you tap them.


    Remove from the oven and set aside while you warm the marmalade, butter and a splash of water in a small saucepan. If you want a tangier glaze add the juice of a lemon to the mixture. Using a pastry brush generously glaze the buns with your marmalade mixture and then use a microplane zester to add lemon zest on top. You can of course use orange zest or omit the zest altogether but I like the extra citrus note, lifts the buns to something more than the sum of their parts…”

    So, amazing, sticky, tart, sweet and spicy – love them – really tangy with the marmalade!  I popped mine back into the oven as it cooled, to allow the glaze to seep into the buns…

    You can find this and lots of other yummy recipes in Signe’s book >

    January 16, 2012 Baking

    Lemon Meringue Tart

    The quest for a suitable pudding for Sunday lunch is a long and arduous one – with four children to please, let alone the Hubby – I’m never going to please everyone all of the time.  But we seem to have discovered a new favourite: lemon meringue pie!  A couple of weeks ago I bought one, and frankly it was pretty meagre and insipid.  I didn’t want them to think this was actually lemon meringue pie, and I remembered that there had been a tart in the Great British Bake-Off book.  Not being a massive pudding fan, I knew a tart would work for the grownups too!  The result? A zingy, luscious curd, a crisp base, a dense high tower of soft meringue…

    Ingredients:
    Pâte sucrée (sweet shortcrust pastry)
    175g plain flour
    pinch of salt
    115g of butter, chilled and diced
    1 medium free range egg yolk,
    mixed with 2 tablespoons of ice-cold water
    1 tablespoon of  caster sugar

    Filling:
    3 medium unwaxed lemons
    40g cornflour

    50g unsalted butter, diced
    85g caster sugar
    3 medium free range egg yolks
    300ml water

    Meringue:
    4 medium free range egg whites
    200g caster sugar

    And a 22cm loose-based deep flan tin

    Method:

    For the pastry:

    Sift the flour and salt onto a large bowl. Make a well in the centre and add the butter, egg yolks and sugar. Using just your fingertips, rub everything together until you form breadcrumbs, and then lightly bring the dough together. Knead lightly until smooth, wrap in cling film and leave to rest in the refrigerator for at least 30 minutes.  Roll out the pastry on a lightly floured surface and line a 9 inch fluted flan tin. Prick the base with a fork, then again for chill for 30 mins. Bake blind at 190′C for 25-30 mins until cooked and lightly browned.  Don’t forget, you could also cheat this stage, either buying ready-made shortcrust pastry (make sure it is a sweet shortcrust), or buying a pre-prepared tart base.

    Filling*:


    Grate the lemon zest into a heatproof bowl, with the juice from the lemons, and the cornflour.  Mix together until the mixture is smooth.  Heat 400ml of water until just boiling, and then pout onto the lemon juice and cornflour.  
    Stir until well mixed, and then tip the mixture back into the saucepan.  Bring the entire mixture back to the boil and allow to thicken. Allow to cook out for a further minute.  
    Remove the mixture from the heat, beat in the egg yolks gradually, then beat in the butter bit by bit, then beat in the caster sugar.  You should now be left with a smooth lemon curd (smooth apart from the zest, obviously). 

    Meringue:

    Whisk the egg whites in a bowl until they form stiff peaks. Gradually whisk in the sugar, a little at a time, whisking well between each addition, until very stiff and shiny.  If you feel a little of the mixture between your fingers there will be no grittiness if the sugar has dissolved into the egg whites.


    Make sure that you’re making the meringue mixture at the same time, and when reaching the finishing point for both, pour the curd mixture into the tart case. You’re to place the tart onto a pre-heated oven tray, so I already had my tart on a sheet of baking parchment. This allowed me to pull it straight onto the tray when required.


    I looked at my very full case and then wondered how on earth to tip all that meringue onto the tart without displacing the filling.  I decided to spoon the blobs of meringue around the outside of the tart and then gradually work my way to the centre.  That achieved, I swirled a few peaks up and popped it into the oven.  Bake in the oven at 190′C for 20 minutes until a light gold colour. Leave to cool before serving.


    *Now for the advice bit: bread makers weigh everything.  When we say 4 eggs whites, we generally give an equivalent weight, because obviously not all eggs are the same size.  Herein lies the problem with the recipe for me.  My lemon curd was a little too loose, and I think this is because the quantity of lemon juice isn’t specified exactly. When you make the curd, make sure that it is thicker than perhaps you’d expect it to be.  As soon as it started to thicken, I removed it from the heat and gave it a thorough beating :0).  Perhaps given that I was then to add further liquids (in the form of the beaten egg yolks and the butter which would melt) I should have ensured that the first stage of the curd was much thicker than it needed to be.  I would also say, make sure you have a deep enough tart case!  I made a very short tart, which of course meant that I had a very fine layer of lemon in the finished product.  It also left me with a little spare lemon curd (hurrah).  Personally I preferred it that way, but it really is a lemon tart then, not a lemon meringue pie.  I think you also end up with far too great meringue to curd ratio.  Having said that, the tart was delicious, and very popular.

    You can buy the Great British Bake-Off here >

    January 15, 2012 Baking

    Bara Brith

    If I’m baking, this is the recipe I must make the most often.  Bara Brith is a Welsh speckled bread made with tea soaked fruits.  It’s an absolute doddle to make, and can sit perfectly happily in an airtight container for several days.  I always have so many people in my house, that I usually double up the batch and make two loaves at the same time.  I use the recipe from The Great British Book of Baking, just because it’s always near the top of my book pile, and never makes it back onto the shelf!

    Ingredients:
    250g mixed dried fruit (and do mix up your choices, this on has giant crimson raisins, dried pineapple, orange river sultanas etc)
    100g dark muscavado sugar
    225ml strong hot tea (no milk)
    a good pinch of salt
    1/4 teaspoon ground cinammon
    1/4 teaspon grated nutmeg
    1 large free range egg, beaten
    250g self-raising white or light brown flour

    And you’ll need a 450g loaf tin.

    Put the dried fruit and sugar into a large heatproof mixing bowl. Pour over the hot tea and stir well. Cover the bowl with a clean tea towel and leave to soak overnight.

    When ready to cook, pre-heat the oven to 160ºC. Sieve the flour into a bowl and mix in the rest of the dry ingredients. Beat the eggs then mix into the fruit. Lightly mix together the dry and wet ingredients.


    Pop the mixture into your prepared tin and spread evenly.  Bake in the oven for around an hour, until a skewer comes out cleanly.  Leave to rest for a few minutes before turning out onto a cooling tray.

    Start checking your cake from around 40 minutes onwards – when I baked this during the week, it was fully cooked at 45 minutes.

    You can buy The Great British Book of Baking here…

    January 11, 2012 Baking

    Rachel Allen’s 30 Day Muffins

    Yes, more muffins.  Actually this time because I have a shocking cold, and I can’t sleep.  Seemed as though it might be fun to make breakfast muffins for everyone to have in the morning!  Adapted from Rachel Allen’s 30 day muffin mixture, the theory is that you can leave the mixture in the fridge for 30 days until you next want to make muffins… Does it work? Absolutely!

    At the weekend I made a batch of Rachel Allen’s 30 day muffin mixture, and made a batch of blueberry muffins with half of the mixture, and made breakfast muffins with the other half.

    Ingredients:
    3 eggs
    500 ml milk
    125 ml sunflower oil

    1 teaspoon vanilla extract
    125g dark brown sugar

    100g caster sugar
    460g plain flour (or 300g plain flour, 160g wholemeal flour)
    25g bran (which I omitted)
    ½ teaspoon salt
    2 round teaspoons bicarbonate of soda

    Method:

    Whisk the eggs, sugar, milk and vanilla.  Add the sunflower oil and stir well.  Sieve all of the dry ingredients into a bowl.  Tip in the wet ingredients and barely mix – store in the fridge until required.
    When you’re in a baking mood (or can’t sleep), preheat the oven to 180C/gas 4.  Decide on your variation, and ensure you stir the stored mixture before using.  I use those cafe-style muffin cases – you do need to cook them in a holey tin, or they’ll unravel.  Fill the muffin cases until three quarters full. Bake for 15-20 minutes, or until firm to the touch and golden.  In the big cases I find they take around 20 minutes.  I leave the muffins to ‘set’ in the tin for 10 minutes or so, before allowing to cool on a wire rack.
    So, in the first variation I used about half of the mixture, and stirred in about 100g of blueberries.  I put a couple on top of the muffin to ensure they didn’t sink, which is why some look as though they’ve burst, perhaps you’d want to pop them just below the surface.
    In the second variation, I really wanted a breakfast muffin, so I put in about 1 cup of Rude Health’s Top Banana Porridge mixture (which also contains roasted hazelnuts and maple flakes).  I wanted some fruit in the mixture too, just in case the oatflakes dried out the mixture too much.   I chopped in about 100g of blackberries, and distributed them through the mixture.  
    The muffins definitely were more dense than the blueberry version, and decidedly more breakfast than dessert.  Very good, and the general consensus is that they’re better than straight fruit muffins.  I assume this is what the bran would bring to the original recipe, but bran can be a little difficult to digest – so the oats are a good alternative.  The Rude Health mixture gives just a hint of the sweetness and perfume of the banana, but the acidity of the blackberry cuts through that!  Add the crunch of the hazelnuts, and the chewy oats and you’re on to a breakfast winner.
    I will definitely make up another batch of the mixture, and will keep posting variations as I think of them :0)
    You can find the recipe in Rachel’s book, Bake >

    January 1, 2012 Baking

    Toffee Fudge Muffins

    Okay, forget that New Year’s promise of dieting for a moment, and have a toffee fudge muffin on me :0)  The little fudge chunks at the bottom of the muffins turn that bottom bit into a pseudo treacle sponge – delicious!

    Ingredients:
    255g plain flour
    3 tsp baking powder
    1/2 tsp salt
    110g cinnamon sugar
    100g bag of baking mini fudge chunks
    1 egg
    240 ml milk
    90ml vegetable oil (or melted butter)

    Method:

    Place all of the dry ingredients into a bowl and mix thoroughly to ensure they are free of lumps etc.  Then pop in the fudge chunks, and coat in the dry ingredients.

    Thoroughly mix together the egg, milk and vegetable oil.  Pour into the dry ingredients, and barely mix – the idea is not to work the dough in any way, but to ‘just combine’ everything together.  Spoon into muffin wrapper – if using the kind I show here, do make sure you pop them into a holed baking tin to ensure they stay together!

    Bake for 20-25 mins at 190-200oC.  I tested mine with a cake skewer, and left them to rest for 5 minutes in the ‘holey’ tin, to let them ‘settle’ a little before popping them onto a cooling tray.

    January 1, 2012 Baking

    Lemon Poppy Seed Muffins

    Bloomin’ cheek… Pointed the toffee muffins out to the Hubby, who remarked rather pointedly that he only eats lemon poppy seed muffins.  Then he popped off for a quick run… Well.  The 10yo and I weren’t going to stand for that, so we found a recipe, and made some while he was out!!!

    I’ve adapted a recipe from The English Kitchen blog, which had a really lovely lemon zest crunch on the top, which I thought would work well.  By now I’m obviously in a hurry, so my modifications are more about timing than anything else…

    Ingredients:
    Grated zest of 5 medium lemons
    220g vanilla caster sugar (1 cup)
    335g of self raising flour (2 1/4 cup)
    2 Tbsp poppy seeds
    80ml of fresh lemon juice (1/3 cup)
    250ml of milk (1 cup)
    60g of vegetable oil (1/3 cup)
    2 large free range eggs, beaten

    Preheat the oven to 180oC.  Pop six large cafe-style muffin cases into a ‘holey’ tin (otherwise they will unfurl!)

    Rub together the lemon zest and the sugar, and then set aside 3 tablespoons for later.  Sift the flour into the remainder and stir in the poppy seeds.

    Putting lemon juice into milk has the effect of turning it into buttermilk.  I’m assuming you could substitute buttermilk here if you wished…  So, whisk together the lemon juice, milk, beaten eggs and vegetable oil. Make a well in the centre of the dry ingredients and add the liquid all at once.  

    The trick with muffins is to avoid overworking the batter, so only stir enough to combine.  Spoon it into the prepared muffin cups, dividing it equally.  (And here that Lorraine Pascal trick of using one of those old-fashioned icecream scoops really will help, especially if you have a 10yo as your pâtissier.  Sprinkle the tops of each with the reserved lemon sugar.
    Bake for 30 minutes.  I tested mine with a cake tester, but the rules about a clean skewer apply too.  I left mine in the pan to ‘settle’ for a few minutes too, before transferring them to a cooling rack.

    Et voila! Laissez mon mari manger son gâteau! (Let my husband eat his cake!!)

    Primary Sidebar

    Categories

    • ▼Recipe
      • Baking
      • Breakfast
      • Cheese
      • Dessert
      • Eggs
      • Fish
      • Heston Blumenthal
      • Italian
      • Jamie Oliver
      • Marcus Wareing
      • Mediterranean
      • Pasta
      • Patisserie
      • Risotto
      • Smoothie
      • Sous Vide
      • Squash
      • Thermomix
      • Vegan
      • Vegetarian
      • Yotam Ottolenghi

    Categories

    • ▼Book Review
      • ⭐️⭐️⭐️⭐️
      • ⭐️⭐️⭐️⭐️⭐️
      • Baking
      • Meat
      • Patisserie
      • Restaurant Cookbook
      • Vegetarian
      • Yotam Ottolenghi

    Categories

    • ▼Restaurant
      • 1 Michelin Star
      • 2 Michelin Stars
      • 3 Michelin Stars
      • British
      • Fish
      • French
      • Italian
      • Japanese
      • Peruvian

    Categories

    • 101 Cookbooks (1)
    • 3 Michelin Stars (1)
    • Advert (1)
    • Alan Murchison (2)
    • Alba Truffle (1)
    • Almond (1)
    • Angela Hartnett (1)
    • Angler (2)
    • Art Journal (2)
    • Artichokes (1)
    • Axis (1)
    • Azelia’s Kitchen (1)
    • Baking (9)
    • Baldwin (1)
    • Bara Brith (1)
    • Basics (1)
    • Beef (1)
    • Beetroot (2)
    • Ben Spalding (2)
    • Blackberry Soufflé (1)
    • Blackening Spice (1)
    • Blood Oranges (4)
    • ►Book Review (75)
      • Baking (10)
      • Meat (1)
      • Patisserie (6)
      • Restaurant Cookbook (3)
      • Vegetarian (3)
      • Yotam Ottolenghi (2)
      • ⭐️⭐️⭐️⭐️ (16)
      • ⭐️⭐️⭐️⭐️⭐️ (8)
    • Bread (3)
    • Breakfast (1)
    • Breakfast Tart (1)
    • brioche (1)
    • Brockhall Farm (1)
    • Bruschetta (1)
    • Bryn Williams (1)
    • Burrata (1)
    • Butter (1)
    • Buttercream (1)
    • Camembert (1)
    • Canapes (1)
    • caraway (2)
    • Casserole (2)
    • Chelsea Buns (1)
    • Chestnuts (1)
    • Chicken (3)
    • Chickpea (1)
    • Chocolate (4)
    • Chocolate Fondant (1)
    • Christmas (1)
    • Ciabatta (1)
    • Cinnamon (1)
    • Citrus (1)
    • Citrus Drizzle Cake (1)
    • Clams (1)
    • Coconut (2)
    • Coconut Milk (1)
    • Confectionary (1)
    • Creme Patisserie (1)
    • Dan Lepard (1)
    • Dessert (1)
    • detox (1)
    • Doughnuts (1)
    • Dried Fruit (1)
    • Drop Scones (1)
    • Ducasse (1)
    • Duck Egg (1)
    • Eggs (3)
    • El Bulli (1)
    • en Cocotte (1)
    • Epi (1)
    • Eric Treuille (1)
    • fennel (2)
    • Fettuccini (1)
    • Fish (1)
    • FrontPage (28)
    • Fruit Tea (1)
    • Glutamate (1)
    • Goat’s Cheese (1)
    • Gỏi Cuốn (1)
    • Granita (1)
    • Herbs (1)
    • Heritage Tomato (1)
    • Hibiscus Flower (1)
    • Hope and Greenwood (1)
    • Ice-Cream (3)
    • Iced Berry Souffle (1)
    • Icing (1)
    • Italian (1)
    • James Martin (1)
    • Jelly (1)
    • Journal (9)
    • Karen Scott (1)
    • King Oyster Mushroom (3)
    • Kummel (1)
    • L’Ortolan (1)
    • Lamb (1)
    • Lavender (1)
    • Laverstoke Park (1)
    • Lemon (3)
    • Lemon Drizzle Cake (1)
    • Lemon Grass (1)
    • Lemon Meringue Tart (1)
    • Lemon Poppy Seed Muffins (1)
    • Lentils (1)
    • Limewood (1)
    • Liquorice (1)
    • Liquorice Ice-Cream (1)
    • Lobster (3)
    • Lucas Hollweg (1)
    • Luke Holder (1)
    • Macarons (1)
    • Mango (1)
    • Marcus Wareing (1)
    • Mark Lloyd (1)
    • Market (1)
    • Mary Berry (1)
    • Meringue (1)
    • Michael Moore (1)
    • Michel Roux (3)
    • Mint (1)
    • Mister Truffle (2)
    • Modernist Cuisine at Home (1)
    • Moroccan (1)
    • Muffins (3)
    • Murano (1)
    • Mushroom (1)
    • Ollie Dabbous (1)
    • Ollie Fararr (1)
    • Ox cheek (1)
    • Palourde Clams (1)
    • Pancetta (1)
    • Panna Cotta (1)
    • Parmesan (1)
    • Passion Fruit (3)
    • Pasta (1)
    • Patisserie (1)
    • Paul Heathcote (1)
    • Pea (1)
    • Peter Reinhart (1)
    • Petit Fours (1)
    • Philip Howard (1)
    • Pierre Koffman (1)
    • Pierre Koffmann (1)
    • Pimms (1)
    • Pistachio (1)
    • Pistachio Soufflé (2)
    • Pistacho (1)
    • Pork (1)
    • Prawn (1)
    • Quiche (1)
    • Rachel Allen’s 30 Day Muffins (1)
    • Raspberry (2)
    • Ravioli (1)
    • Raymond Blanc (1)
    • ►Recipe (192)
      • Baking (17)
      • Breakfast (2)
      • Cheese (1)
      • Dessert (7)
      • Eggs (3)
      • Fish (2)
      • Heston Blumenthal (5)
      • Italian (3)
      • Jamie Oliver (1)
      • Marcus Wareing (2)
      • Mediterranean (3)
      • Pasta (3)
      • Patisserie (7)
      • Risotto (1)
      • Smoothie (1)
      • Sous Vide (1)
      • Squash (1)
      • Thermomix (19)
      • Vegan (1)
      • Vegetarian (20)
      • Yotam Ottolenghi (2)
    • ►Restaurant (124)
      • 1 Michelin Star (17)
      • 2 Michelin Stars (9)
      • 3 Michelin Stars (3)
      • British (19)
      • Fish (4)
      • French (4)
      • Italian (3)
      • Japanese (1)
      • Peruvian (1)
    • Richard Bertinet (1)
    • Risotto (1)
    • Roganic (1)
    • Rolls (1)
    • Roux (3)
    • salad (2)
    • Salmon (2)
    • Sardinian Cookery (1)
    • Scandiliscious (1)
    • Sea Trout (1)
    • Sherbet Dab (1)
    • Signe Johansen (1)
    • Silvana de Soissons (1)
    • Simon Rogan (1)
    • Snail Caviar (1)
    • Soda Bread (1)
    • Sorbet (1)
    • Soufflé (11)
    • Soup (1)
    • Sous Vide (2)
    • Spice (1)
    • Stew (1)
    • Stuffing (1)
    • Sugar Baby (1)
    • Sugarwork (1)
    • Sumosan (1)
    • Supper (1)
    • Sweetcorn (1)
    • Sweetcorn Fritters (1)
    • Tamarillo’s (1)
    • Texturas Fizzy (1)
    • Thai (2)
    • The Bertinet Kitchen (1)
    • The Square (1)
    • Thermomix (10)
    • Toffe Fudge Muffins (1)
    • Tom Kitchin (1)
    • Tomato Bread (1)
    • Tony Fleming (4)
    • Tribute Dish (2)
    • Truffle (1)
    • Truffles (6)
    • Umami (1)
    • Uncategorized (1)
    • Vanilla (2)
    • Vegan (1)
    • Vegetables (1)
    • Vegetarian (3)
    • Verveine (1)
    • Vietname Summer Roll (1)
    • Watermelon (1)
    • William Curley (1)
    • yeasted dough (1)

    I’m passionate about food, its provenance and its sustainability. As a technical cook, I like to see what’s happening in the kitchens of Michelin starred restaurants, but you’re just as likely to find me at home making sourdough. You can find some of my recipes in In The Mix 2, an award-winning Thermomix cookbook.

    I’m also truly blessed – I can open my fridge at any time and know it’s crammed with all manner of loveliness – but that’s not the case for everyone. There are people all around me in the UK who rely on food banks to feed their kids, and themselves, and every box of cereal or teabag makes a difference. You can donate food to your local food bank, or time, or money, and if you want more information the best starting place is http://www.trusselltrust.org.

    You can also find me here:

    Foodies100 Index of UK Food BlogsFoodies100
    The Renaissance Epicurean... London restaurants
    Top Food BlogsUK Food Bloggers Association

    The Eleven Madison Park Granola

    Copyright © 2025 · Cookd Pro Theme On Genesis Framework · WordPress · Log in

    Nourished
    • Home
    • Recipes
    • Book Reviews
    • Restaurants
    • Journal
    • About