• Skip to primary navigation
  • Skip to main content
  • Skip to primary sidebar

Nourished

  • Home
  • Recipes
  • Book Reviews
  • Restaurants
    • 3 Michelin Stars
    • 2 Michelin Stars
    • 1 Michelin Star
  • Journal
    • Art Journal
    • The Renaissance Diary
  • About
    • Contact Me
    • Instagram
    • Loves
    • Suppliers
    • Masterchef Links

FrontPage

January 21, 2013 101 Cookbooks

Oven-Baked Doughnuts and Knot Rolls

Amongst other things, one of my very dear friends gave me a doughnut pan for my birthday (because that’s what dear friends do, when you’re an obsessive baker)! The books have been read, the pictures poured over, but the unused pan has remained in my kitchen drawer – silent – mysterious – resolute.  “Try me”, it cries, when I open the drawer, “let’s make doughnuts”…
This week its silent entreaties have worked their magic on my 7 year old, who is rapidly turning into a useful little baker.  Yesterday we made cup-cakes to her ratios (fantastic), and today she really wanted to make doughnuts.  Needless to say I couldn’t find the recipes lovingly documented by Kristen, for I fear they have been snaffled into the jaws of the Trolley-of-Doom (aka my ‘books to be shelved’ trolley).  The Wilton recipe supplied with the pan seemed somewhat unappealing (though I have listed it below) – I wanted plump, yeasty golden things, puffed with air, and smelling sensational… 
I hunted for more traditional doughnut recipes, finally stumbling across this yeasted recipe from @101Cookbooks, though not intended for the tin.  I have to say, I was most impressed – whilst tray doughnuts don’t have the pillowiness of traditional doughnuts, they do taste amazing.  I only made one tray, and used the rest of the dough to make knot rolls – you can see from the photo how much they puffed up in the oven.
Ingredients:

79ml hand hot milk
7g of instant yeast

225ml of warm milk
2 Tbsp butter
158g sugar
2 eggs
1125g plain flour (I used pasta flour, as it has a lower protein content)
A pinch or two of nutmeg, freshly grated
1 teaspoon fine grain sea salt

Method:

  • Place the first quantity of warm milk in the bowl of an electric mixer. Stir in the yeast and set aside for five minutes or so. Be sure your milk isn’t too hot or it will kill the yeast. Stir the butter and sugar into the remaining warm milk and add it to the yeast mixture. With a fork, stir in the eggs, flour, nutmeg, and salt – just until the flour is incorporated. With the dough hook attachment of your mixer beat the dough for a few minutes at medium speed. This is where you are going to need to make adjustments – if your dough is overly sticky, add flour a few tablespoons at a time. Too dry? Add more milk a bit at a time. You want the dough to pull away from the sides of the mixing bowl and eventually become supple and smooth. Turn it out onto a floured counter-top, knead a few times (the dough should be barely sticky), and shape into a ball.
  • Transfer the dough to an oiled bowl, cover, put in a warm place.  Let it rise for an hour or until the dough has roughly doubled in size.
  • The original instructions were for cut doughnuts: Punch down the dough and roll it out 1/2-inch thick on your floured countertop. Most people (like myself) don’t have a doughnut cutter, instead I use a 2-3 inch cookie cutter to stamp out circles. Transfer the circles to a parchment-lined baking sheet and stamp out the smaller inner circles using a smaller cutter. If you cut the inner holes out any earlier, they become distorted when you attempt to move them. Cover with a clean cloth and let rise for another 45 minutes.
  • As I was shaping them for the pan, I rolled them into balls and then punctured the centre… Swizzle the doughnut around on your finger to increase the size of the hole.  Do not make them too big as they will increase dramatically in size on the second prove – as above, cover with a clean cloth and let rise for another 45 minutes.  Now.  I glazed mine with beaten egg – but I hadn’t thought it through – egg may give you a golden colour, but it also creates a crust.  I think you’d be better off glazing with milk, which will give you a softer crust
  • Bake at 190° C until the bottoms are just golden, 8 to 10 minutes – start checking around 8. 
  • Remove the doughnuts from the oven and let cool for just a minute or two. 
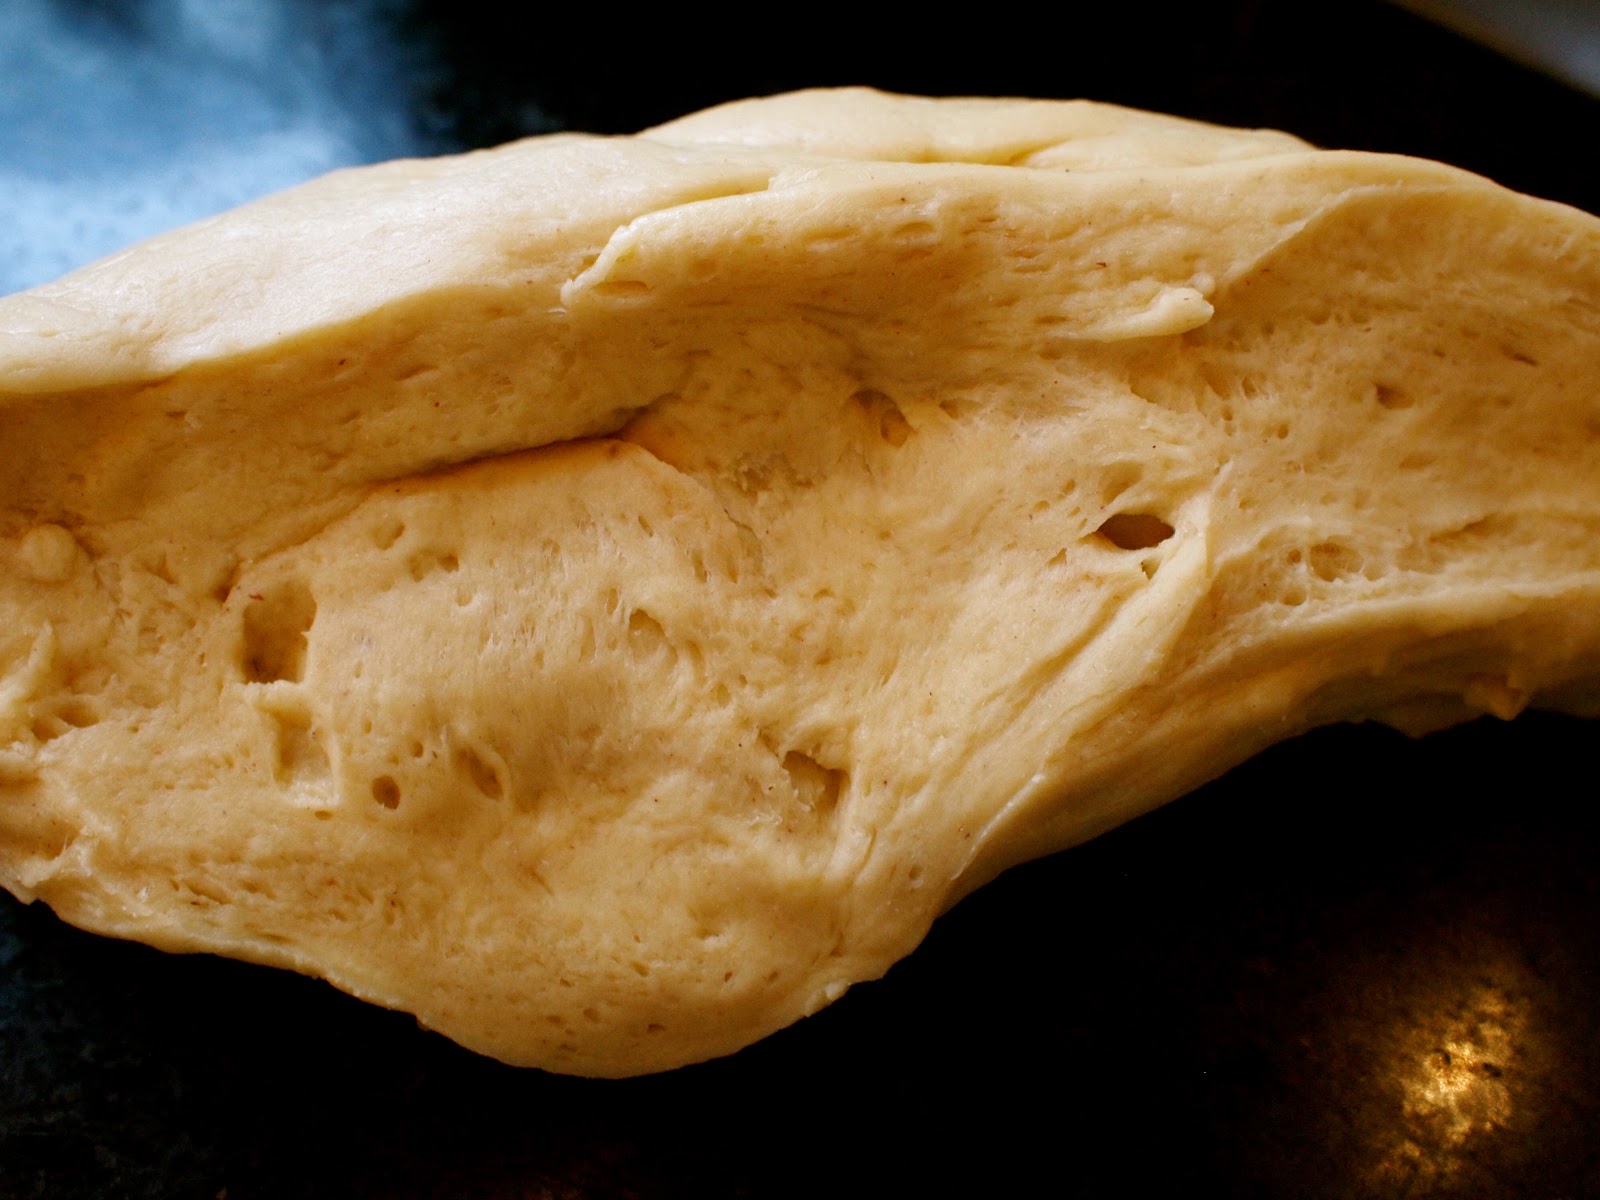
A cross-section of the dough after the first prove 
I had no idea on sizing as this was the first time, so I did a variety to see – the little one’s in the bottom right hand corner came out best – the larger one on the bottom row rose so high it lost its hole!  Don’t worry about how “scraggy” they look, the second prove takes care of that…

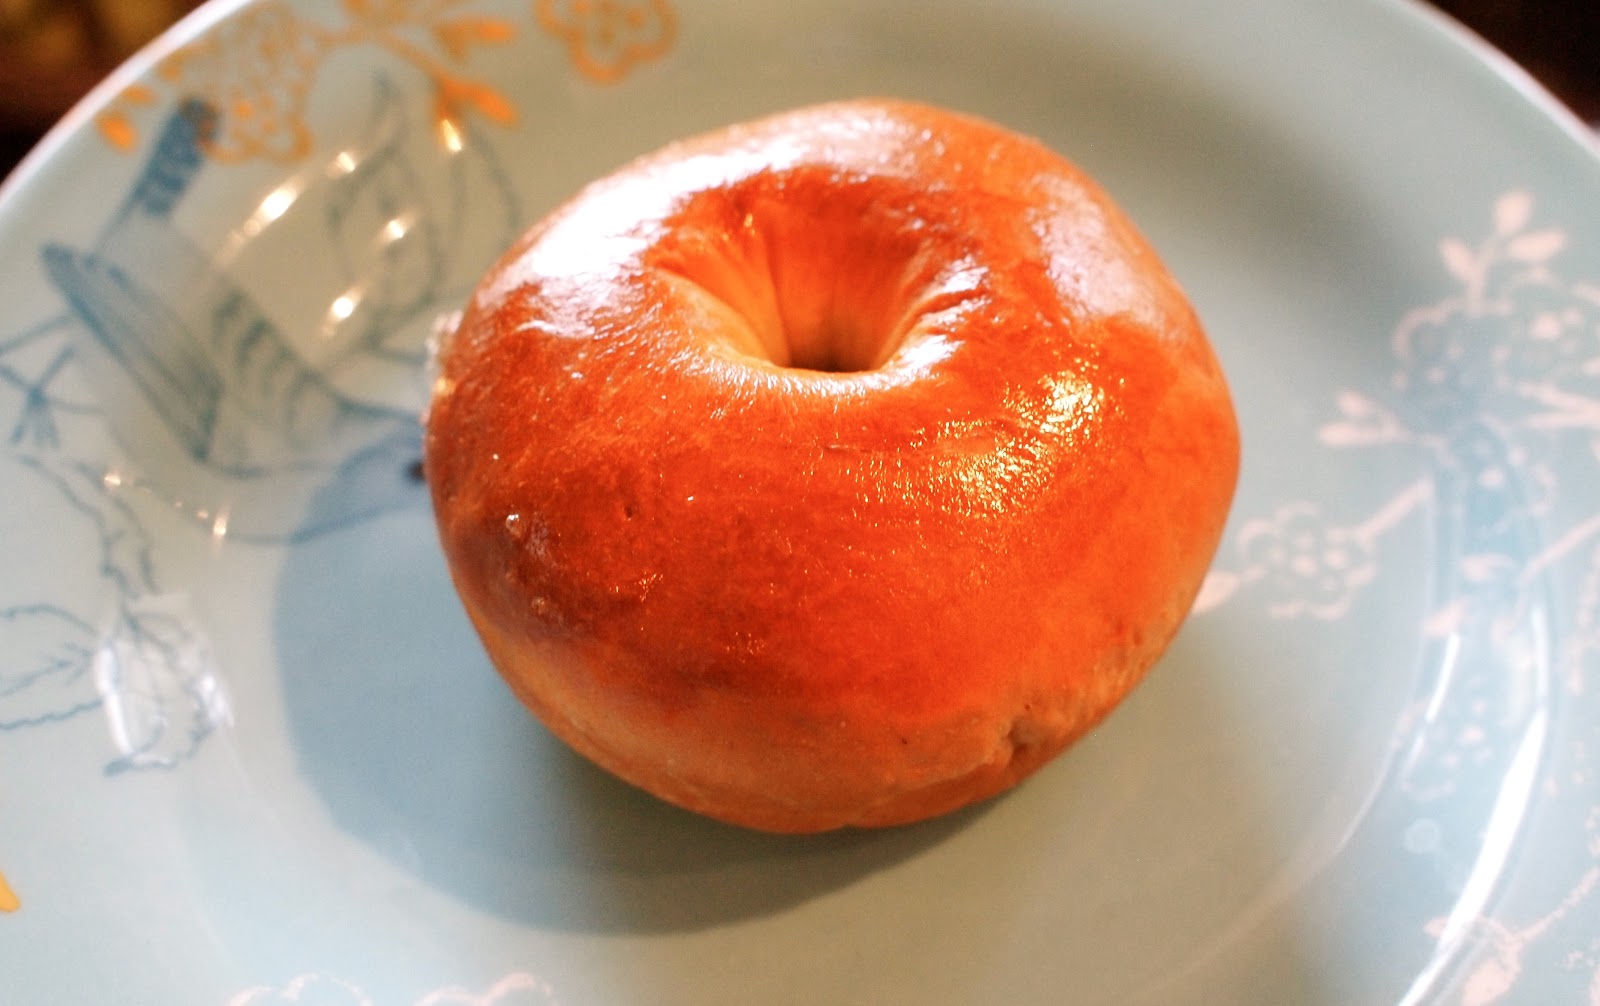
I glazed the doughnut with beaten egg, I’d glaze it with milk next time
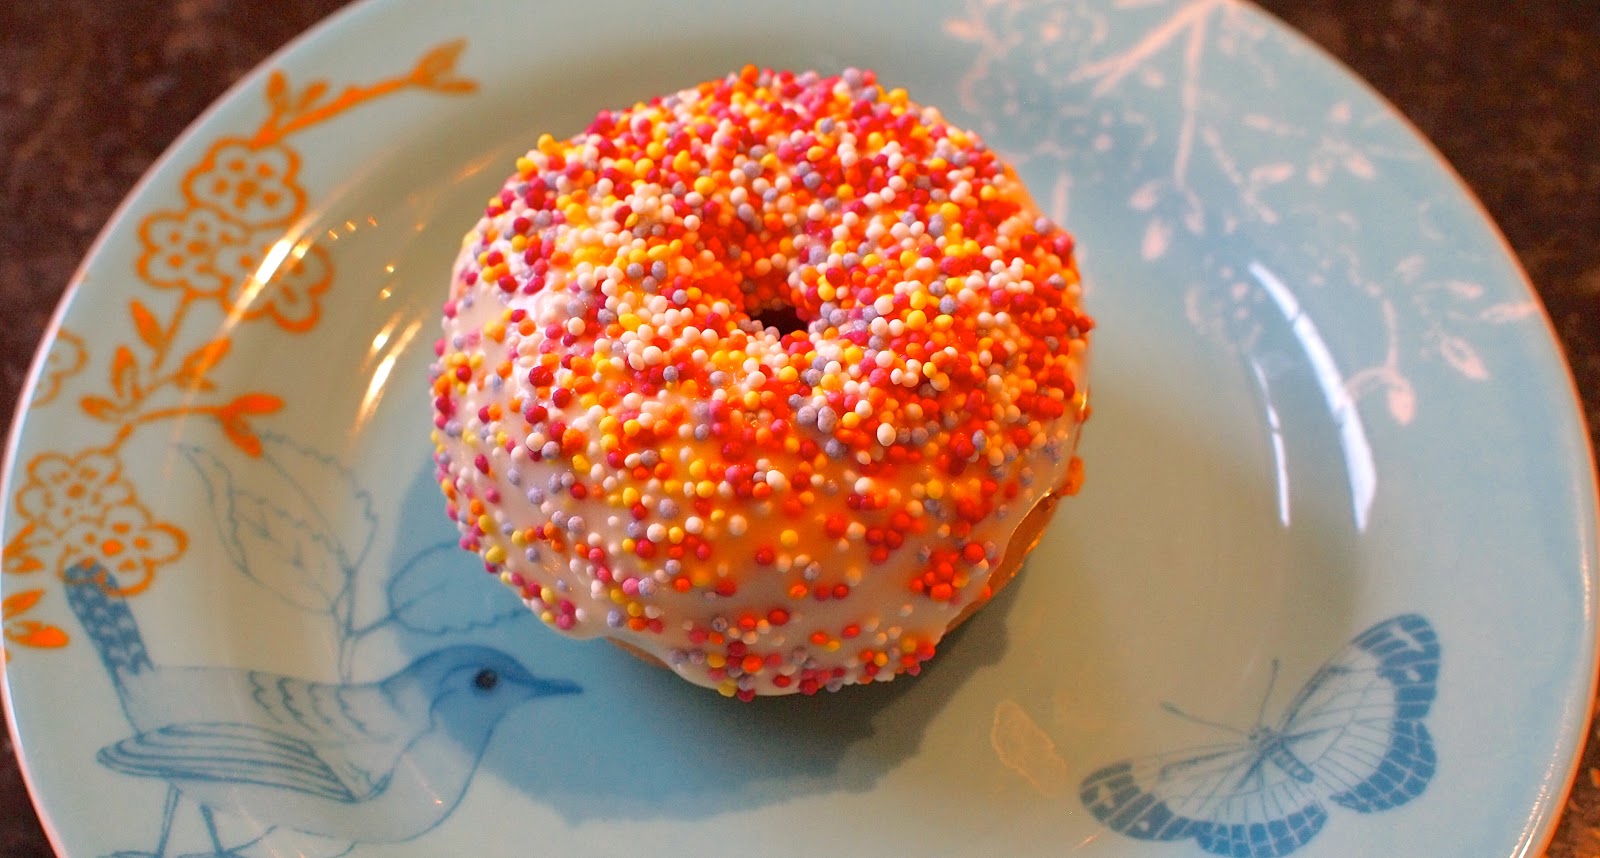
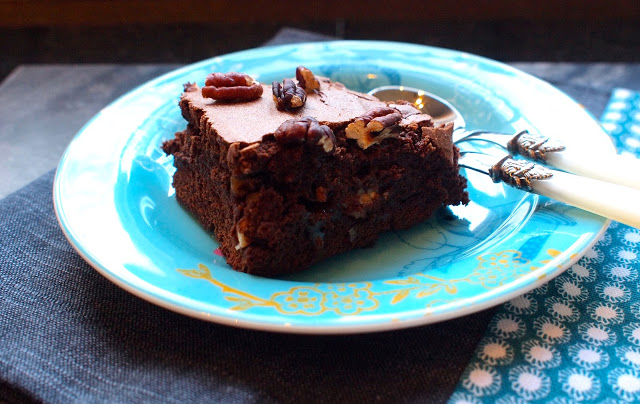
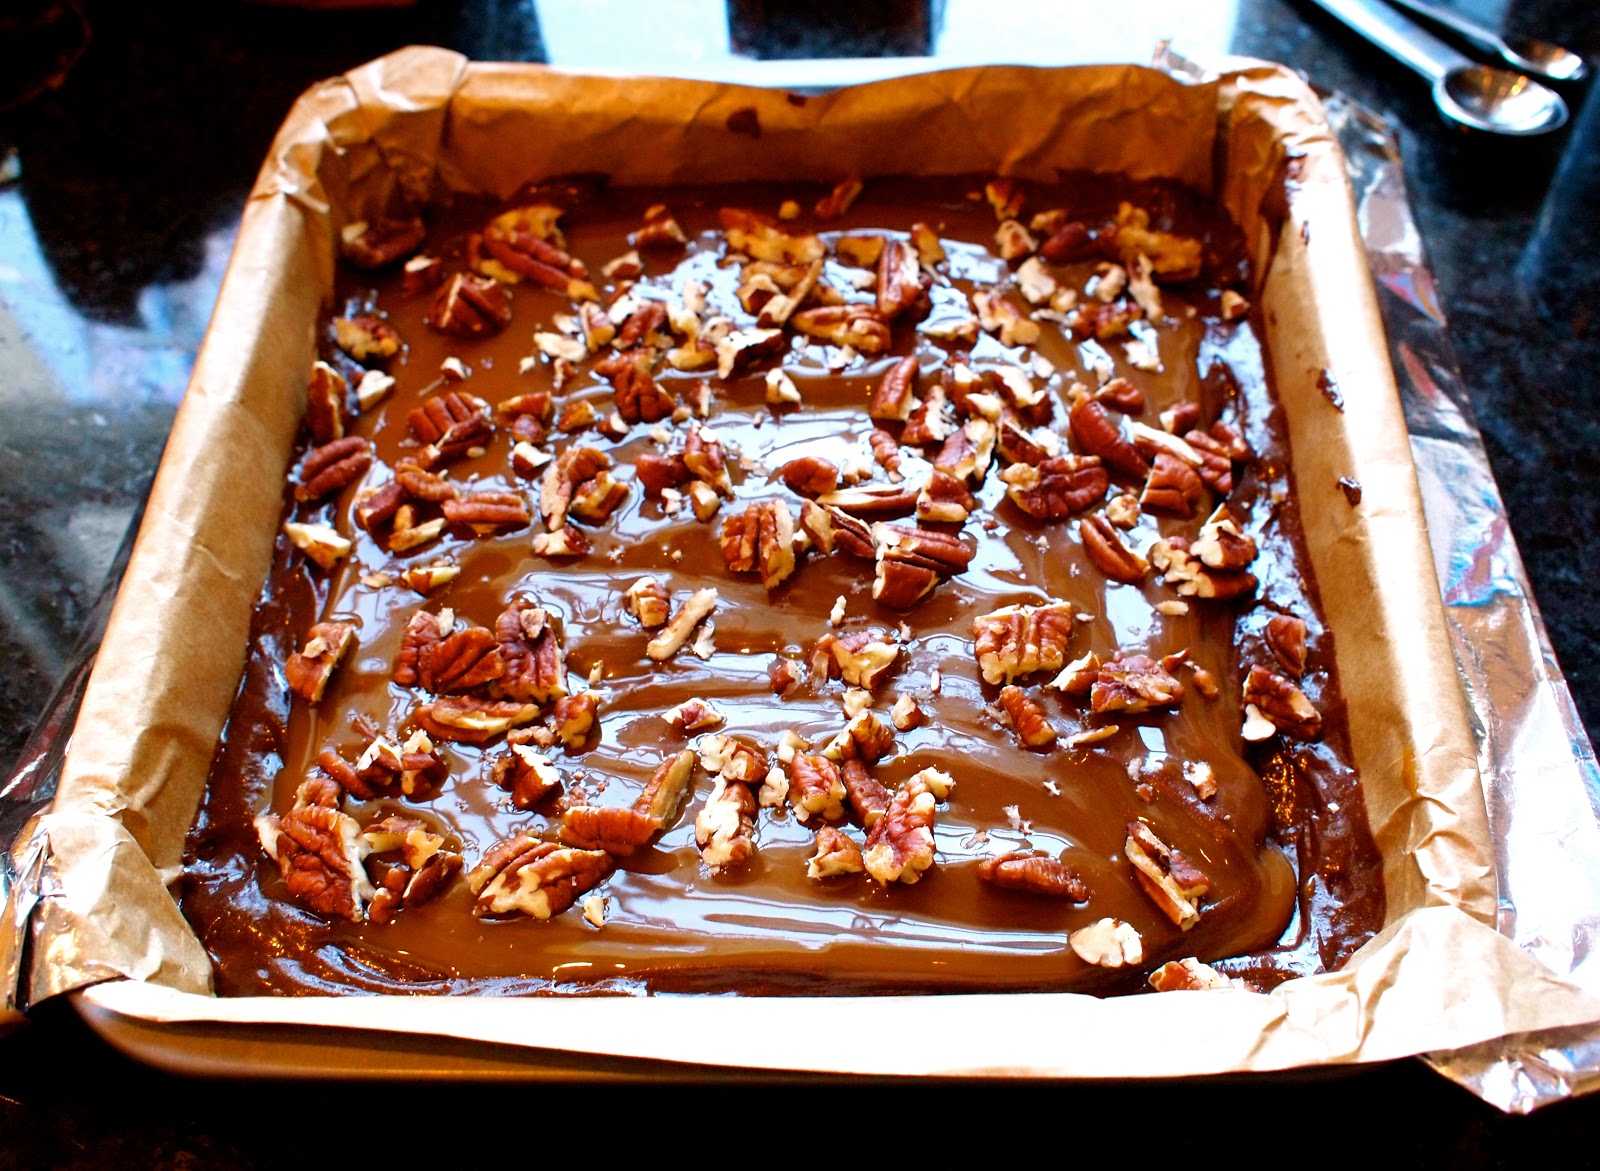
I dipped mine in cream cheese icing, and then sprinkles.
You can dip them in melted chocolate, or melted butter and cinnamon icing

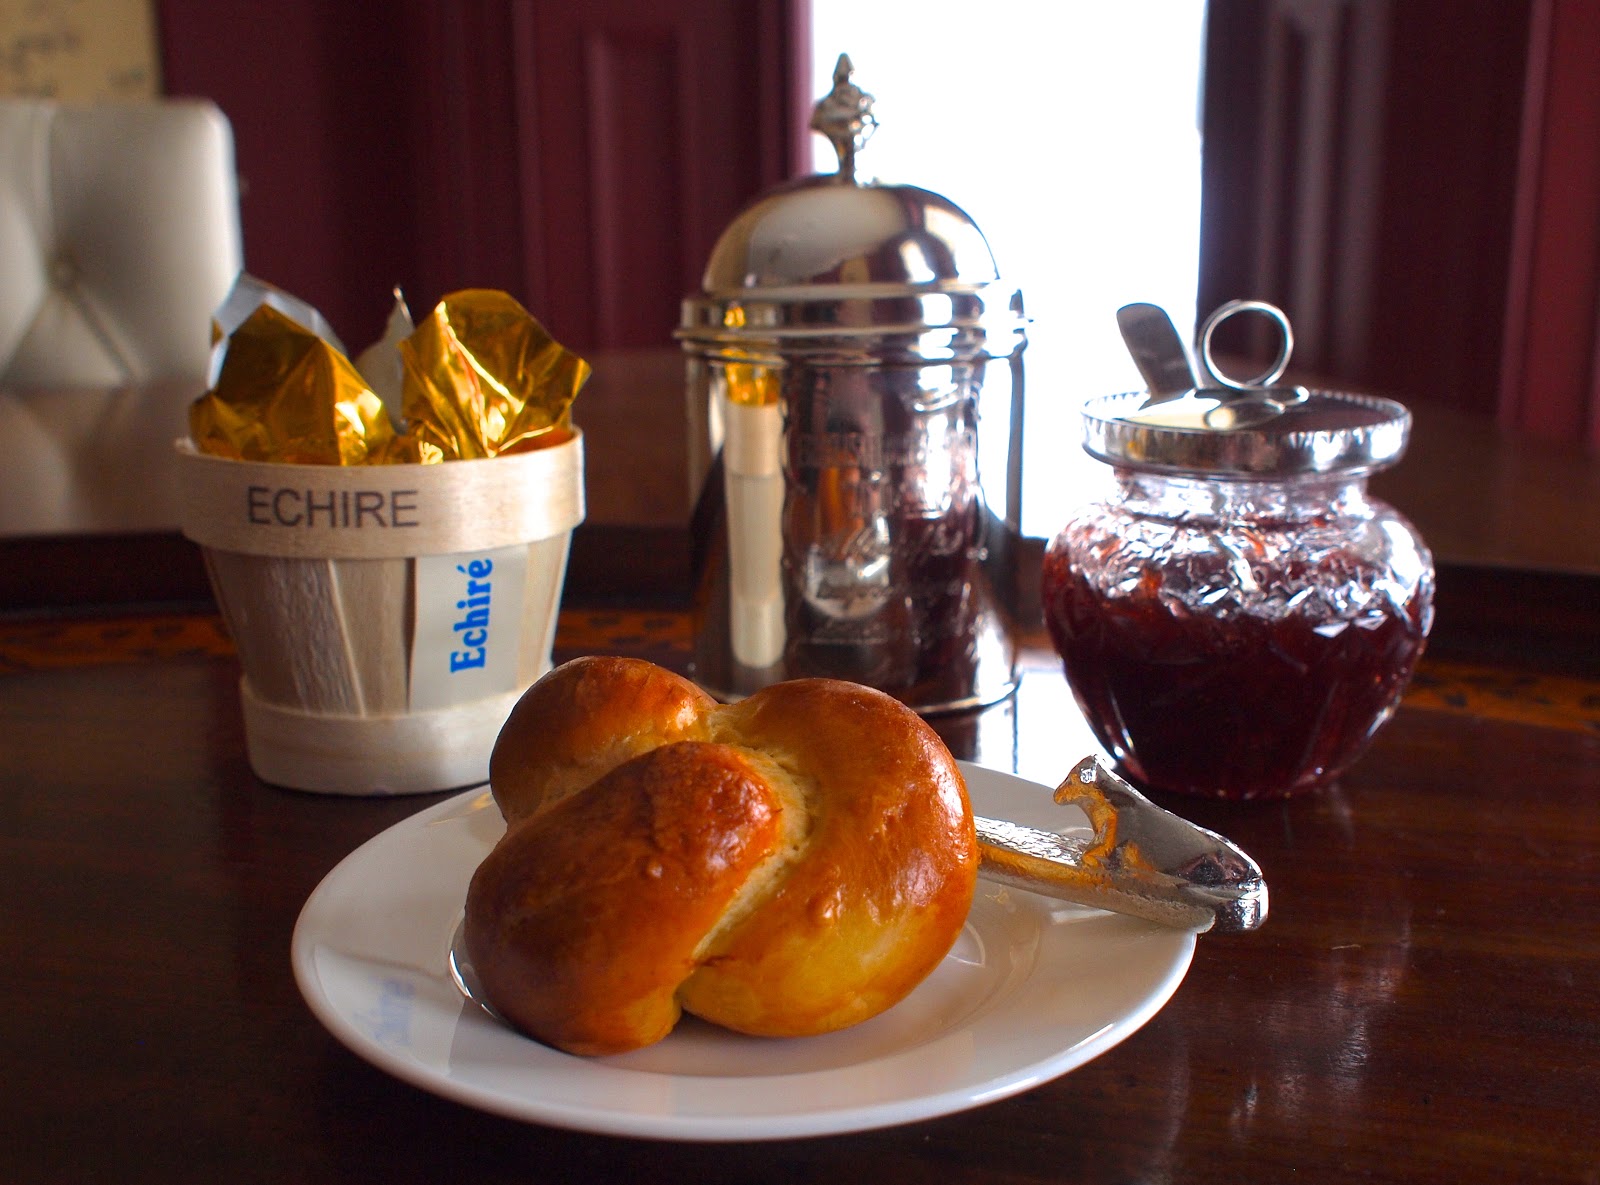
This is the same dough, left to prove as a knot roll
The Wilton Baked Cake Donuts Recipe
Ingredients:
2 cups cake flour, sifted
¾ cup granulated sugar
2 tsp. baking powder
¼ tsp. ground nutmeg
1 tsp. salt
¾ cup buttermilk
2 eggs, lightly beaten
2 tbsp. butter, melted

Method:

  • Preheat oven to 425*F. Spray doughnut pan with nonstick cooking spray. 
  • In a large mixing bowl, sift together cake flour, sugar, baking powder, nutmeg and salt. Add buttermilk, eggs and butter. Beat until just combined. Fill each doughnut cup approx. 2/3 full. 
  • Bake 7-9 minutes or until the top of the doughnuts spring back when touched. 
  • Let cool in pan for 4-5 minutes before removing. Finish doughnut with chocolate glaze, cinnamon sugar or confectioners’ sugar. Doughnuts are best served fresh. 
  • Makes 12 doughnuts 

Variations:

Cinnamon Sugar 2 tbsp. granulated sugar
1 tbsp. ground cinnamon
2 tbsp. butter, melted

In small bowl, mix sugar and cinnamon together and dip the baked doughnut in melted butter. Roll in cinnamon sugar mixture to coat.

Chocolate Glaze
¼ cup semisweet chocolate chips
1 tbsp. butter
1 tbsp. corn syrup
1 tsp. hot water

Microwave chips, butter and corn syrup on 50% power for 1 minute, stirring frequently until completely melted. Stir in hot water until the glaze is thick smooth. Add more water, a tsp. at a time to thin if glaze is too thick. Immediately glaze doughnuts.

Confectioners Sugar Doughnuts Place 2/3 cup confectioners sugar in plastic bag. Add a doughnut, seal the bag and shake to coat. Repeat with remaining doughnuts.

January 13, 2013 Baking

Pecan and Salted Caramel Brownies

1241c-p1130670
Just lately I’ve been craving Gower Cottage’s chocolate brownies, but my secret stash in the freezer was sorely depleted over Christmas!  However serendipity has struck again, as I spotted Ed Kimber‘s brownie recipe in my in-box this morning.  There’s definitely something about salted caramel… It’s my favourite filling in Laduree Macaron’s, my favourite combination in chocolate bars, there’s something about the salty sweetness that becomes utterly addictive!

It was a given then that I’d have to try these, but I thought I’d adapt the brownie recipe for the Thermomix, to see how they’d turn out.  You can find the original recipe on Ed’s site.

Salted Caramel Filling
175g caster sugar
150ml double cream
10g unsalted butter
large pinch of flaked sea salt OR
1/2 jar of Bonne Maman Confiture de Caramel

Fudge Brownies
180g plain flour
3 tbsp cocoa powder (preferably Green and Blacks, which uses the ‘Dutch’ process)
1/4 tsp salt
300g dark chocolate, around 65-75% cocoa solids
150g unsalted butter
220g light brown sugar
150g caster sugar
4 large eggs
1 tsp vanilla extract
100g pecans, chopped (optional extra, half inside the brownie, half on top)

Method

  • I’m not going to make caramel today, and instead I’m using the jar – okay, stop shouting at me – I’m baking with the 4 year old and I don’t like making caramel when he’s climbing up the counters!  If you want more information on the cooking temperatures for caramel, please have a look at my fudge post…
  • For the brownies preheat the oven to 180°C/160°C fan. Grease a 9×9 inch pan and line with a strip of parchment.  Leave a ‘handle’ over the pan’s edge to ease removal. [The Lakeland foiled parchment is perfect for this!]
  • Pulse the butter and chocolate in the Thermomix bowl for 5 seconds / Speed 5, and scrape down the bowl.
  • Melt the butter and chocolate together for 4 mins / Speed 1 / 70° C
  • Add the eggs, vanilla, salt and sugar and mix for 10 seconds / Speed 3
  • Add the flour and cocoa powder and mix for 10 seconds / Speed 4.  Scrape down the bowl (inevitably some of the flour will have been thrown up), and repeat for a further 10 seconds.
  • Pour half of the mixture into your prepared tin, and then pour the caramel over the batter, leaving a 1 1/2 cm border.  Scatter the chopped pecans over the caramel if using… [I like the combination of pecans and salted chocolate, and I wanted some additional texture in the brownie.]  Pour the remaining batter over the caramel mixture to cover it.  Ed does this by piping it over, otherwise when you spread the second layer of batter you inevitably push the caramel out to the edge, where it can boil over the batter.  Until I’ve perfected a cheats way, I suggest you pipe too…
  • Bake in the preheated oven for 35-40 minutes, until a cake tester or skewer (just) comes out cleanly (you don’t want them overdone).  Don’t forget, the caramel will be scalding hot, so allow the brownies to cool fully before cutting into squares.
Alternatives:
  • Scatter chocolate chips in on top of the caramel, and again over the surface before baking
  • If like me you have thousands of blood oranges in your kitchen – don’t waste the skin and oils – zest the oranges into the batter before using them.
  • You can use chopped salted Brindisa’s salted almonds – quite a grownup taste, but absolutely amazing.  Pulse them for the briefest of moments in the thermo and set aside, before melting the chocolate and butter
  • If you’re a complete salt addict, you can use salted butter, but in that case, please remember to take the salt out of the other ingredients.
A couple of little brownie tips:
  • If you’ve managed not to scoff the lot straight away, you can revive your brownies for around 20 seconds in the microwave; and
  • A great little tip I spotted on the lovely Azelia’s blog, if you have any type of cake which hasn’t quite cooked through, you can finish them off for a few seconds in the microwave… As Azelia points out in her recent doughnut post, the microwave cooks from the inside out… Clever eh?
Now fend off your children and friends with a rolling pin…
Melting the chocolate and butter together
This is the batter once mixing is completed – it’s quite a thick batter
Spoon the caramel over the batter, and scatter with pecans
Cover with the remaining batter and bake
Yummy! And I like the pecans in it!
Heston Blumenthal's perfectly poached egg

December 30, 2012 Eggs

Eggs Benedict and Heston Blumenthal’s Perfectly Poached Eggs

Hubby is mildy addicted to eggs Benedict – he frequently orders it for working breakfasts, and you can see from some of his comments that he has many, many criteria he applies to the dish.  Consequently I’m often reluctant to cook it at home – but hey, it’s Christmas – the man deserves his favourite breakfast at Christmas surely?!

I’ve been working on Thermomix versions of Bearnaise and Hollandaise, made with home-made tarragon vinegar, and a reduction base for both sauces…

I’ve also been obsessing about Heston Blumenthal’s How to Cook Like Heston, and was watching his episode on eggs again.  It seemed like the perfect excuse to combine techniques…

There are many variations on eggs Benedict – instead of the ham you can use blanched spinach for eggs Florentine, Eggs Mornay uses a Mornay cheese sauce instead of Hollandaise – you can play around with your favourite combination.  Here I’m using Pata Negra, that perfect ham from Spain – made from the blackfooted pig who’s been fed a diet of acorns – amazing stuff!

The freshest possible eggs make the best poached eggs – the white is firmer, less watery, and holds together better in the pan.  I had originally preferred Marcus Wareing’s method of poaching eggs, but having tried Heston’s, I think it just has the edge.  In his method you drain off the watery bit of the white, before poaching at 80oC for four minutes.  Reaching exactly 80oC on an induction hob was perhaps the most challenging aspect of the task – everything else worked exactly as he said…

Ingredients: 
2 tsp salt
large eggs, as many as you require
Salt and black pepper

Method:

  • Fill a saucepan with approximately 15-20cm of water then add the salt. Place a plate upside down in the bottom of the pan then place the pan over a medium heat and bring the water up to 80ºC.
  • One at a time, crack each egg into a ramekin dish and pour it into a slotted spoon with small holes. Allow to drain any residual white for approximately 1–2 minutes.
  • Lower the slotted spoon into the warm water and slide the spoon out. Allow to poach for 4 minutes.
  • Remove with the slotted spoon and place on kitchen paper to drain the excess water. Season with salt and freshly ground black pepper.
  •  

    It’s important to toast your muffins to some semblance of brown – you need them to form a crisp and tasty base for your eggs, not a soggy waterlogged layer

    Jamon Ibérico di Bellotta, or Pata Negra – no matter what you want to call it, the ham of the Spanish Black-Footed pig, fed on acorns, is silky, pack full of flavour and melt-in-the-mouth texture
    Mid-way through assembly – you can see I have less white than normal – this is because my eggs were a few days old… However the yolks are perfect.
    I’m not massively keen on eggs Benedict, but I’m not going to miss the opportunity to put some of that Bellotta ham under my poached eggs 

    Eggs Benedict, with Hollandaise sauce

    December 26, 2012 Bread

    Black Olive, and Caraway and Onion Rolls

    I have several, no, many bread books, which get used to varying degrees. However when I need a basic do-ahead recipe which will be transformed into a variety of uses, I head straight for Peter Reinhart’s Artisan Breads Every Day.

    I’ve made any number of variations of this recipe – sun blushed tomato bread, cinnamon and raisin, but my favourites are onion and caraway, and olive bread. The joy of this recipe is that the dough can sit in your fridge until you’re ready…
    I like to speed the process up further by cheating – we all know I like a good cheat! The olive bread is made using half a jar of these olives kneaded into the dough.
    The onion and caraway contains onions softened in olive oil, and about a tablespoon of caraway seeds.  You will need to add a little additional flour to the dough to compensate for the olive oil.  The onion adds a warmth to the front of the palate, and the caraway breathes cool fragrance onto the back – my personal favourite…
    You can add anything you like – and as you can use the dough in batches, you can take out as much as you need, and varying according to what you fancy.  I keep meaning to try blue cheese and walnuts for example.  Have a play – let me know your favourite combinations…

    French Bread Recipe

    Ingredients:
    5-1/3 cups (24 oz / 680 g) unbleached bread flour
    2 teaspoons (0.5 oz / 14 g) salt, or 1 tablespoon coarse kosher salt
    2-1/4 teaspoons (0.25 oz / 7 g) instant yeast
    2 cups (16 oz / 454 g) lukewarm water (about 95°F or 35°C)

    Ahead of time:

    • Combine all of the ingredients in a mixing bowl. If using a mixer, use the paddle attachment and mix on the lowest speed for 1 minute. If mixing by hand, use a large spoon and stir for 1 minute, until well blended and smooth. If the spoon gets too doughy, dip it in a bowl of warm water. The dough should form a coarse shaggy ball. Let it rest, uncovered, for 5 minutes.
    • Switch to the dough hook and mix on medium-low speed for 2 minutes or knead by hand for about 2 minutes, adjusting with flour or water as needed. The dough should be smooth, supple, and tacky but not sticky.
    • Whichever mixing method you use, knead the dough by hand on a lightly floured work surface for about 1 minute more, then transfer it to a clean, lightly oiled bowl. Cover the bowl with plastic wrap, then immediately refrigerate overnight or for up to 4 days. If the dough feels too wet and sticky, do not add more flour; instead, stretch and fold it one or more times at 10-minute intervals, as shown on page 18, before putting it in the refrigerator. (If you plan to bake the dough in batches over different days, you can portion the dough and place it into two or more oiled bowls at this stage.)

    On Baking Day:

    • Remove the dough from the refrigerator about 2 hours before you plan to bake. Gently transfer it to a lightly floured work surface, taking care to degas it as little as possible. For baguettes and batards, divide the cold dough into 10-ounce (283 g) pieces; for 1 pound boules, divide the dough into 19-ounce (53 g) pieces; and for freestanding loaves, use whatever size you prefer.
    • Form the dough into batards and/or baguettes (see pages 21 and 22) or boules (see page 20). Mist the top of the dough with spray oil, loosely cover with plastic wrap, and proof at room temperature for about 1-1/2 hours, until increased to 1-1/2 times its original size.
    • About 45 minutes before baking, preheat the oven to 550°F (288°C) or as high as it will go, and prepare the oven for hearth baking (see page 30).
    • Remove the plastic wrap from the dough 15 minutes prior to baking; if using proofing molds, transfer the dough onto a floured peel.
    • Just prior to baking, score the dough 1/2 inch deep with a serrated knife or razor. Transfer the dough to the oven, pour 1 cup of hot water into the steam pan, then lower the oven temperature to 450°F (232°C).
    • Bake for 12 minutes, then rotate the pan and bake for another 15 to 25 minutes, until the crust is a rich golden brown, the loaves sound hollow when thumped, and the internal temperature is about 200°F (93°C) in the center. For a crisper crust, turn off the oven and leave the bread in for another 5 minutes before removing.
    • Cool the bread on a wire rack for at least 45 minutes before slicing or serving.

    Variation:

    • By simply varying the method so that the shaped loaves undergo cold fermentation, rather than the freshly mixed bulk dough, you can create a spectacular loaf with a distinctive blistered crust. After the dough is mixed and placed in a clean, oiled bowl, let it rise at room temperature for about 90 minutes, until doubled in size. Divide and shape as described above, mist with spray oil, then cover the shaped dough loosely with plastic wrap and refrigerate it overnight, away from anything that might fall on it or restrict it from growing.
    • The next day, remove the dough from the refrigerator 1 hour before baking. It should have grown to at least 1-1/2 times its original size. Prepare the oven for hearth baking, as described on page 30. While the oven is heating, remove the plastic wrap and let the dough sit uncovered for 10 minutes. Score the dough while it’s still cold, then bake as described above.
    Black olive rolls
    Onion and caraway rolls
    Glazed knot rolls

    There are lots more excellent recipes in Peter’s book – you can buy it here >

    December 19, 2012 Beetroot

    Beetroot and Kummel Cured Salmon, with a cucumber salad

    I was at a shooting party recently and was served beetroot and vodka cured salmon as a starter – it was absolutely delicious.  Light, tangy, the cucumber salad adding a refreshing bite.  I found a number of variations on-line which I’ve adapted to produce my perfect variation – it’s a bit more Scandinavian than the original, and a little more fragrant.

    For the salmon
    500-600g (1lb 2oz-1lb 5oz) side of salmon, boned, with skin left on
    1tbsp coriander seeds
    1tbsp fennel seeds

    1tbsp caraway seeds
    1tbsp cumin seeds
    ½tsp black peppercorns
    2tbsp coarse sea salt
    1½tbsp granulated sugar

    3tbsp Kummel
    zest ½ lemon
    150g (5oz) raw beetroot, peeled and grated (wear gloves)
    3tbsp grated horseradish
    2 sprigs flat-leaf parsley, roughly chopped

    For the cucumber salad 1 cucumber, peeled, deseeded and ribboned
    Handful of breakfast radishes, finely sliced (optional)
    A few candy beetroot, finely sliced (optional)

    For the salad dressing

    3tbsp white wine vinegar
    1tbsp caster sugar
    3 sprigs dill, roughly chopped 

    Preparation:

    • Check the salmon for any small pin bones, and remove with fish tweezers if necessary
    • Mix together the spices, grinding to a not too-fine powder in a pestle and mortar or spice blender
    • Add the remaining ingredients and mix together until evenly distributed
    • If using a chamber vacuum packer, distribute a small amount of the mixture on the bottom of the bag, and put in the salmon fillet, skin side down.  Put the remaining mixture into the bag and seal at normal pressure.  The salmon can remain like this in the fridge for several days.
    • If you don’t have a vac-pac, line a baking tray with cling film, and place the salmon fillet onto it, skin side down.  Cover with the marinade, and wrap fully in cling film.  The cure will draw out some of the fish’s moisture, and result in a firmer flesh.  To enhance this, you can place another baking sheet on top of the fish and weight it down.  The mixture needs to be left for at least 24 hours, and the colour will develop the longer you leave it.  On colour, you could also consider using golden beetroot at this time of the year, which will give the salmon a brighter colour.
    • Open (or uncover) the fish, and clean off the marinade under cold water… Try to avoid getting too much water into the grain of the fish, and then pat dry with kitchen paper. 
    • Prepare the cucumber by slicing it finely on a mandolin.  Pop it into a colander and sprinkle it with 2tsp of salt.  This will crisp up the cucumber and draw out any excess fluid… Rinse of the cure and dry the cumber (I usually spin mine gently in a salad spinner, rather than squeezing it). 
    • If using the radishes, slice them to a similar thickness on a mandolin or by hand.  They accentuated the pepperiness of the horseradish, and echo the pinkness of the salmon cure 
    • If using the candy beetroot, keep them away from the other ingredients until the last minute, as the colours can leech from the candy stripes
    • Mix together the dressing, and when you’re ready to serve, dress the cucumber (and optional elements) with the dressing and leave for 5 minutes.
    • Slice the salmon finely with a salmon knife – do not put your hand on the salmon, and cut the pad off your finger, as I did one Christmas morning!  Serve the salmon and salad together.  You could also grate chilled horseradish over the dish at the last minute – Alain Passard did this on one dish we had, and it made a delightful addition!
    This is the slightly spicier cure for the red beetroot salmon 
    This is the lighter and more citrussy cure for the golden beetroot cured salmon

    The top piece of salmon has the golden beetroot and lighter cure,
    the second piece the red beetroot and slightly spicier cure.

    The top piece of salmon has the golden beetroot and lighter cure,
    the second piece the red beetroot and slightly spicier cure.

    December 10, 2012 Chocolate

    Chocolate Fondant

    Chocolate fondant, the nemesis of many a Masterchef contestant!  I’ve no idea why they will insist on trying to make a fondant without choosing a recipe which guarantees success.  This recipe by the charming Mark Lloyd is delicious (I had it at his pop-up in London), and it’s always struck me as more likely to succeed because of the addition of the liquid glucose.  I can assume you it works perfectly!

    Ingredients
    75g unsalted butter, cut into dice
    115g dark, dark chocolate (72%) , broken into even chunks
    50mls or large tablespoon of liquid glucose, just slightly warmed
    2 large, free range eggs, beaten to break the yolks
    45g of Plain Flour

    Method

    • Melt together the chocolate and butter over a pan of simmering water, making sure the water is gently simmering and isn’t touching the bottom of the bowl…
    • In a bowl or food processor, whisk the eggs and glucose together until mixed completely.
    • Now whisk in the flour, then add the melted butter and chocolate, keep stirring until the mix is even coloured.
    • When you are ready to cook them have you oven set at 190c and ¾ fill your frozen mould, gently tap to remove any air bubbles and bake for 7-8 minutes, remove from the oven, leave them for a minute to relax, then place the plate over the mould, tip over and they should turn out out, now get them to the table quick as there is nothing worse than bursting them before they get there!

    Mixing the glucose, eggs and melted chocolate

    Fill the dariole mould 3/4 full, having
    coated it twice in melted butter and cocoa powder

    Leave the fondant for one minute in its mould, before turning out 

    Et voila, oozing unctuous chocolate, pouring from a crisp shell

    November 25, 2012 Fish

    Steamed turbot, crushed potatoes with crab, and buerre noisette…

    My on-going lack of a gas supply has resulted in me turning to some alternative methods of cooking.  I wanted to pan-fry some turbot, in a loose tribute to Tony Fleming’s dish, but actually as his was steamed, it suddenly motivated me to get the steamer out of the cupboard – I’m quite sure it’s not even been used a dozen times – but now it was going to come into it’s own!  Needless to say the children had eaten all my lovely tomatoes – so the sauce vierge was also going out of the window.  I swapped over to a beurre noisette and capers – and here you have it…

    The potatoes would apparently take 45 minutes in a steamer (45 minutes ?!?!?!), and the thickness of the turbot looked as though it would take 15 minutes.

    I cooked the buerre noisette on a portable induction hob, ensuring that the butter had gone to a golden colour – then throw in some capers – and in my case, a little white balsamic vinegar, my new addiction.

    The potatoes were crushed with a little white crab meat, and some sorrel and butter….

    Overall, actually pretty quick, extremely effective and the steamer may find a place slightly higher in my list of gadgets than previously…


    November 12, 2012 Angler

    Lobster and Scallop Ravioli, with Buerre Blanc…

    The lovely Tony Fleming kindly gave me the recipe he uses at the Angler restaurant, and it was delicious.  I agreed not to print his recipe in full, so instead I’ve included a couple of master recipes that are very similar to help you along your way, and I can show you the pics…

    Beurre Blanc

    Ingredients

    2 shallots, finely chopped
    60ml/2fl oz white wine vinegar
    60ml/2fl oz dry white wine
    125g/4½oz cold unsalted butter, cut into small chunks
    salt and freshly ground white pepper
    fresh chives, finely chopped, to garnish

    Preparation method

    • For the beurre blanc, place the shallots, vinegar, wine and 60ml/2fl oz water into a saucepan. Set over a moderate heat until almost no liquid remains. 
    • Turn the heat down to a low setting and whisk in the butter one piece at a time, allowing each piece to melt and homogenise before adding the next (it is also a good idea to occasionally take the pan off the heat, then returning it when it is becoming too cool.) 
    • Once all the butter has been used the sauce should be pale and have a thin, custard-like consistency. Keep warm. 

    Lobster Ravioli

    Ingredients

    300g/10½oz ’00’ pasta flour, plus extra for dusting
    4 free-range eggs
    2 x 750g/1lb 10oz cooked lobster
    200g/7oz raw shelled king prawns
    75ml/3fl oz double cream
    salt and freshly ground black pepper
    1 small bunch basil
    olive oil

    Preparation method

    • For the ravioli, place the flour and three of the eggs into a food processor and pulse until it forms small crumbs. Remove the mixture from the food processor and pull together to form a dough. 
    • Knead the dough lightly for 2-3 minutes until it is smooth and elastic then wrap in cling film and place in the fridge for 20 minutes. 
    • Flour the pasta machine and turn it to the lowest (thickest) setting. Feed the dough through the machine, turning the handle with one hand and holding the dough as it comes through the machine with the other. 
    • Change the setting on the pasta machine to the next-thickest setting, flour it again and feed the pasta sheet through the machine again, as before. Repeat this process 3-4 more times, flouring the machine and changing the setting down each time – it helps to cut the pasta into smaller pieces as you work to prevent it drying out. Cover any pasta you are not working on with cling film. Set the pasta aside. Any extra dough can be frozen for use on another occasion. 
    • Cut the lobster in half lengthways and remove all the meat – taking care to keep the claw meat intact. Cut the lobster meat into 1cm/½in thick slices. 
    • Place the prawns and cream into a food processor and blend to a purée, then season with salt and freshly ground black pepper. 
    • Lay a sheet of pasta onto a lightly-floured work surface and place spoonfuls of the prawn mixture at intervals along the sheet, leaving a gap of about 6cm2½in between each pile. Top each pile with a piece of lobster and a basil leaf. 
    • Beat the remaining egg in a small bowl or cup. Brush the pasta around the seafood with the beaten egg. 
    • Top with a second sheet of pasta and press down lightly around the edges of the seafood. Stamp out the ravioli using a circular cutter about 5cm/2in diameter, lay them on a baking tray and cover with cling film until ready to cook. You should have 20 ravioli. 
    • To cook the ravioli, bring a large pan of salted water to the boil and gently lower the ravioli into the pan. Cook for 1-2 minutes until they float to the top of the water then remove with a slotted spoon and drain on kitchen paper. Toss with a little olive oil, salt, and freshly ground black pepper and keep warm. 
    The pasta dough, with dill interleaved between the sheets and re-rolled
    Lobster and scallop mousse, with chives

    Parcelling up the ravioli 
    The ravioli(o)
    The finished product, served with samphire and a chive beurre blanc
    • « Go to Previous Page
    • Go to page 1
    • Go to page 2
    • Go to page 3

    Primary Sidebar

    Categories

    • ▼Recipe
      • Baking
      • Breakfast
      • Cheese
      • Dessert
      • Eggs
      • Fish
      • Heston Blumenthal
      • Italian
      • Jamie Oliver
      • Marcus Wareing
      • Mediterranean
      • Pasta
      • Patisserie
      • Risotto
      • Smoothie
      • Sous Vide
      • Squash
      • Thermomix
      • Vegan
      • Vegetarian
      • Yotam Ottolenghi

    Categories

    • ▼Book Review
      • ⭐️⭐️⭐️⭐️
      • ⭐️⭐️⭐️⭐️⭐️
      • Baking
      • Meat
      • Patisserie
      • Restaurant Cookbook
      • Vegetarian
      • Yotam Ottolenghi

    Categories

    • ▼Restaurant
      • 1 Michelin Star
      • 2 Michelin Stars
      • 3 Michelin Stars
      • British
      • Fish
      • French
      • Italian
      • Japanese
      • Peruvian

    Categories

    • 101 Cookbooks (1)
    • 3 Michelin Stars (1)
    • Advert (1)
    • Alan Murchison (2)
    • Alba Truffle (1)
    • Almond (1)
    • Angela Hartnett (1)
    • Angler (2)
    • Art Journal (2)
    • Artichokes (1)
    • Axis (1)
    • Azelia’s Kitchen (1)
    • Baking (9)
    • Baldwin (1)
    • Bara Brith (1)
    • Basics (1)
    • Beef (1)
    • Beetroot (2)
    • Ben Spalding (2)
    • Blackberry Soufflé (1)
    • Blackening Spice (1)
    • Blood Oranges (4)
    • ►Book Review (75)
      • Baking (10)
      • Meat (1)
      • Patisserie (6)
      • Restaurant Cookbook (3)
      • Vegetarian (3)
      • Yotam Ottolenghi (2)
      • ⭐️⭐️⭐️⭐️ (16)
      • ⭐️⭐️⭐️⭐️⭐️ (8)
    • Bread (3)
    • Breakfast (1)
    • Breakfast Tart (1)
    • brioche (1)
    • Brockhall Farm (1)
    • Bruschetta (1)
    • Bryn Williams (1)
    • Burrata (1)
    • Butter (1)
    • Buttercream (1)
    • Camembert (1)
    • Canapes (1)
    • caraway (2)
    • Casserole (2)
    • Chelsea Buns (1)
    • Chestnuts (1)
    • Chicken (3)
    • Chickpea (1)
    • Chocolate (4)
    • Chocolate Fondant (1)
    • Christmas (1)
    • Ciabatta (1)
    • Cinnamon (1)
    • Citrus (1)
    • Citrus Drizzle Cake (1)
    • Clams (1)
    • Coconut (2)
    • Coconut Milk (1)
    • Confectionary (1)
    • Creme Patisserie (1)
    • Dan Lepard (1)
    • Dessert (1)
    • detox (1)
    • Doughnuts (1)
    • Dried Fruit (1)
    • Drop Scones (1)
    • Ducasse (1)
    • Duck Egg (1)
    • Eggs (3)
    • El Bulli (1)
    • en Cocotte (1)
    • Epi (1)
    • Eric Treuille (1)
    • fennel (2)
    • Fettuccini (1)
    • Fish (1)
    • FrontPage (28)
    • Fruit Tea (1)
    • Glutamate (1)
    • Goat’s Cheese (1)
    • Gỏi Cuốn (1)
    • Granita (1)
    • Herbs (1)
    • Heritage Tomato (1)
    • Hibiscus Flower (1)
    • Hope and Greenwood (1)
    • Ice-Cream (3)
    • Iced Berry Souffle (1)
    • Icing (1)
    • Italian (1)
    • James Martin (1)
    • Jelly (1)
    • Journal (9)
    • Karen Scott (1)
    • King Oyster Mushroom (3)
    • Kummel (1)
    • L’Ortolan (1)
    • Lamb (1)
    • Lavender (1)
    • Laverstoke Park (1)
    • Lemon (3)
    • Lemon Drizzle Cake (1)
    • Lemon Grass (1)
    • Lemon Meringue Tart (1)
    • Lemon Poppy Seed Muffins (1)
    • Lentils (1)
    • Limewood (1)
    • Liquorice (1)
    • Liquorice Ice-Cream (1)
    • Lobster (3)
    • Lucas Hollweg (1)
    • Luke Holder (1)
    • Macarons (1)
    • Mango (1)
    • Marcus Wareing (1)
    • Mark Lloyd (1)
    • Market (1)
    • Mary Berry (1)
    • Meringue (1)
    • Michael Moore (1)
    • Michel Roux (3)
    • Mint (1)
    • Mister Truffle (2)
    • Modernist Cuisine at Home (1)
    • Moroccan (1)
    • Muffins (3)
    • Murano (1)
    • Mushroom (1)
    • Ollie Dabbous (1)
    • Ollie Fararr (1)
    • Ox cheek (1)
    • Palourde Clams (1)
    • Pancetta (1)
    • Panna Cotta (1)
    • Parmesan (1)
    • Passion Fruit (3)
    • Pasta (1)
    • Patisserie (1)
    • Paul Heathcote (1)
    • Pea (1)
    • Peter Reinhart (1)
    • Petit Fours (1)
    • Philip Howard (1)
    • Pierre Koffman (1)
    • Pierre Koffmann (1)
    • Pimms (1)
    • Pistachio (1)
    • Pistachio Soufflé (2)
    • Pistacho (1)
    • Pork (1)
    • Prawn (1)
    • Quiche (1)
    • Rachel Allen’s 30 Day Muffins (1)
    • Raspberry (2)
    • Ravioli (1)
    • Raymond Blanc (1)
    • ►Recipe (192)
      • Baking (17)
      • Breakfast (2)
      • Cheese (1)
      • Dessert (7)
      • Eggs (3)
      • Fish (2)
      • Heston Blumenthal (5)
      • Italian (3)
      • Jamie Oliver (1)
      • Marcus Wareing (2)
      • Mediterranean (3)
      • Pasta (3)
      • Patisserie (7)
      • Risotto (1)
      • Smoothie (1)
      • Sous Vide (1)
      • Squash (1)
      • Thermomix (19)
      • Vegan (1)
      • Vegetarian (20)
      • Yotam Ottolenghi (2)
    • ►Restaurant (124)
      • 1 Michelin Star (17)
      • 2 Michelin Stars (9)
      • 3 Michelin Stars (3)
      • British (19)
      • Fish (4)
      • French (4)
      • Italian (3)
      • Japanese (1)
      • Peruvian (1)
    • Richard Bertinet (1)
    • Risotto (1)
    • Roganic (1)
    • Rolls (1)
    • Roux (3)
    • salad (2)
    • Salmon (2)
    • Sardinian Cookery (1)
    • Scandiliscious (1)
    • Sea Trout (1)
    • Sherbet Dab (1)
    • Signe Johansen (1)
    • Silvana de Soissons (1)
    • Simon Rogan (1)
    • Snail Caviar (1)
    • Soda Bread (1)
    • Sorbet (1)
    • Soufflé (11)
    • Soup (1)
    • Sous Vide (2)
    • Spice (1)
    • Stew (1)
    • Stuffing (1)
    • Sugar Baby (1)
    • Sugarwork (1)
    • Sumosan (1)
    • Supper (1)
    • Sweetcorn (1)
    • Sweetcorn Fritters (1)
    • Tamarillo’s (1)
    • Texturas Fizzy (1)
    • Thai (2)
    • The Bertinet Kitchen (1)
    • The Square (1)
    • Thermomix (10)
    • Toffe Fudge Muffins (1)
    • Tom Kitchin (1)
    • Tomato Bread (1)
    • Tony Fleming (4)
    • Tribute Dish (2)
    • Truffle (1)
    • Truffles (6)
    • Umami (1)
    • Uncategorized (1)
    • Vanilla (2)
    • Vegan (1)
    • Vegetables (1)
    • Vegetarian (3)
    • Verveine (1)
    • Vietname Summer Roll (1)
    • Watermelon (1)
    • William Curley (1)
    • yeasted dough (1)

    I’m passionate about food, its provenance and its sustainability. As a technical cook, I like to see what’s happening in the kitchens of Michelin starred restaurants, but you’re just as likely to find me at home making sourdough. You can find some of my recipes in In The Mix 2, an award-winning Thermomix cookbook.

    I’m also truly blessed – I can open my fridge at any time and know it’s crammed with all manner of loveliness – but that’s not the case for everyone. There are people all around me in the UK who rely on food banks to feed their kids, and themselves, and every box of cereal or teabag makes a difference. You can donate food to your local food bank, or time, or money, and if you want more information the best starting place is http://www.trusselltrust.org.

    You can also find me here:

    Foodies100 Index of UK Food BlogsFoodies100
    The Renaissance Epicurean... London restaurants
    Top Food BlogsUK Food Bloggers Association

    The Eleven Madison Park Granola

    Copyright © 2025 · Cookd Pro Theme On Genesis Framework · WordPress · Log in

    Nourished
    • Home
    • Recipes
    • Book Reviews
    • Restaurants
    • Journal
    • About