• Skip to primary navigation
  • Skip to main content
  • Skip to primary sidebar

Nourished

  • Home
  • Recipes
  • Book Reviews
  • Restaurants
    • 3 Michelin Stars
    • 2 Michelin Stars
    • 1 Michelin Star
  • Journal
    • Art Journal
    • The Renaissance Diary
  • About
    • Contact Me
    • Instagram
    • Loves
    • Suppliers
    • Masterchef Links

Heston Blumenthal

May 6, 2013 Heston Blumenthal

Heston Blumenthal’s Perfect Burger

Yay, it’s finally BBQ season… It may look like I only cook chocolate delice and frangipane tarts, but hey, my kids like a burger as much as the next person.  Of course that wouldn’t be a generic supermarket burger, and so finally the opportunity to try Heston’s perfect burger recipe.  I’d seen this recipe on his How to Cook Like Heston show, but we didn’t fire our BBQ at all last year, and so the itch grew and grew.

Why this recipe in particular? Well, to cut to the chase, Heston lines the minced meat in such a way that when you bite into the burger, the burger breaks down in your mouth… Confused?  Trust me – this is one technique that’s worth having in your BBQ arsenal.  I’ve subsequently added additional flavourings to the burger, but the basic principle remains the same. You can watch the technique here.

To go with the perfect burger, the best burger bun recipe I’ve found to date.  This enriched dough recipe comes courtesy of The Fabulous Baker Brothers, and really is an incredibly simple dough to make.  On the second occasion I used the same recipe to make hot dog bus too, just leave off the egg glaze and shape them into longer batons.  I quick dusting with flour will ensure that you end up with a soft bun.

The one thing I have learnt after a weekend barbecuing, don’t spend hours making all those sides.  I soon realised that all people were interested in were the burgers, hot dogs and ribs… Soul destroying – my amazing coleslaw with grated apple and a touch of orange zest will end up as tomorrow’s lunch.  Even jacket potatoes were jettisoned by most people as they headed straight for the protein.  And let’s face it – this protein overload won’t matter in the long run – because this weather won’t last…  So – get your BBQ on and get baking…

For the buns:
500g strong white flour
1 tbsp caster sugar
25g lard [I substituted butter]
10g salt
200ml tepid milk
5g dried yeast
100ml tepid water
1 egg, beaten
Sesame seeds, to sprinkle over

[Additions: I added an egg to the dough, and used golden caster sugar.  I also used poppy seeds rather than sesame seeds because one guest had an allergy] 

Method

  • Weigh the flour, sugar, lard and salt into a large bowl and add the milk. Mix the yeast with the tepid water and mix thoroughly into a dough. Turn it out onto a lightly floured surface and knead for 10 minutes until your dough is soft and elastic. Leave to rise for 1 hour in a covered bowl left in a warm place.
  • Divide the dough into 10 pieces and on a lightly floured surface roll into balls with your hands. Then using a rolling pin flatten into 10cm baps on a floured surface. Place on baking trays lined with baking paper and brush beaten egg over each bap. Cover loosely with cling film and leave them in a warm place for 30 minutes
  • Brush with a second coat of beaten egg and sprinkle a pinch of sesame seeds onto each bap. Cover loosely with cling film and leave for a final 30 minutes to rise.
  • Meanwhile preheat your oven to 200°C/fan 180°C/gas mark 6. Bake the baps until they are perfectly golden, about 10-15 minutes

For the burgers
1.8kg sirloin, cut into 3x3cm cubes
13g salt

For the sauce

90g tomato ketchup
145g mayonnaise
15g French’s mustard

To serve

10 sliced burger buns, toasted
10 slices gruyère cheese
2 baby gem lettuces, broken into leaves
2 vine-ripened tomatoes, sliced
½ sweet onion, peeled and finely sliced
2 dill pickles, sliced lengthways

Method

  • Place 600g of the cubed sirloin in a bowl and sprinkle with the salt. Mix together, cover with clingfilm then place in the fridge for 4 hours. The salt will penetrate the meat during this time and begin to draw out some of the moisture.
  • Using a meat grinder fitted with a 3mm plate, grind the unsalted sirloin then refrigerate this meat until very cold. Combine the cold ground meat with the cold, salted sirloin cubes and mix well.
  • Before you begin the final grinding, place two layers of clingfilm across a chopping board or baking sheet and position it under the mouth of the grinder. Using a coarser, 8mm grinding plate, pass the meat mixture through the grinder. This will retain some larger pieces of the sirloin.
  • As the meat comes out of the grinder, have a second person use their hands to lay out the strands of meat on the clingfilm. Try to keep the grain of the individual strands running lengthwise in the same direction without getting tangled together. To do this, start laying the meat down at the edge of the sheet furthest from the grinder and work towards the closest edge.
  • Wrap the meat up tightly in the clingfilm, twisting the ends tightly to form a log. Prick a few holes in the clingfilm with a pin to release any air pockets trapped inside, then continue to twist the ends to tighten until the log is about 12cm in diameter.
  • Wrap the log in another layer of clingfilm to keep it from coming apart, and refrigerate for at least 2 hours, or until needed.
  • When ready to cook, place the still-wrapped log on a cutting board and use a very sharp knife to cut slices that are approximately 2cm in thickness. (The clingfilm helps to keep the meat from falling apart.) Place the finished burgers on a baking tray and refrigerate until needed. If you have more burgers than you need, they can be individually wrapped in clingfilm at this point and frozen until needed.
  • To cook the burgers, rub each one with a little oil and place them on the barbecue or a really hot frying pan, and flip them every 15–20 seconds. Cook to your liking or for medium rare, take the burger to 45ºC in the centre. Immediately after the last flip, place a slice of cheese on top of each burger and allow to melt for the final 15 seconds.
  • To make the sauce, combine the ketchup, mayonnaise and mustard in a bowl and mix thoroughly.
  • To serve, place the bottom half of a bun on a plate and put a burger with melted cheese on top. Place a couple of slices of tomato and onions followed by a couple of leaves of lettuce and a couple of slices of pickles. Finish with a spoon full of sauce. Place the top half of the bun on top and serve.
Notes
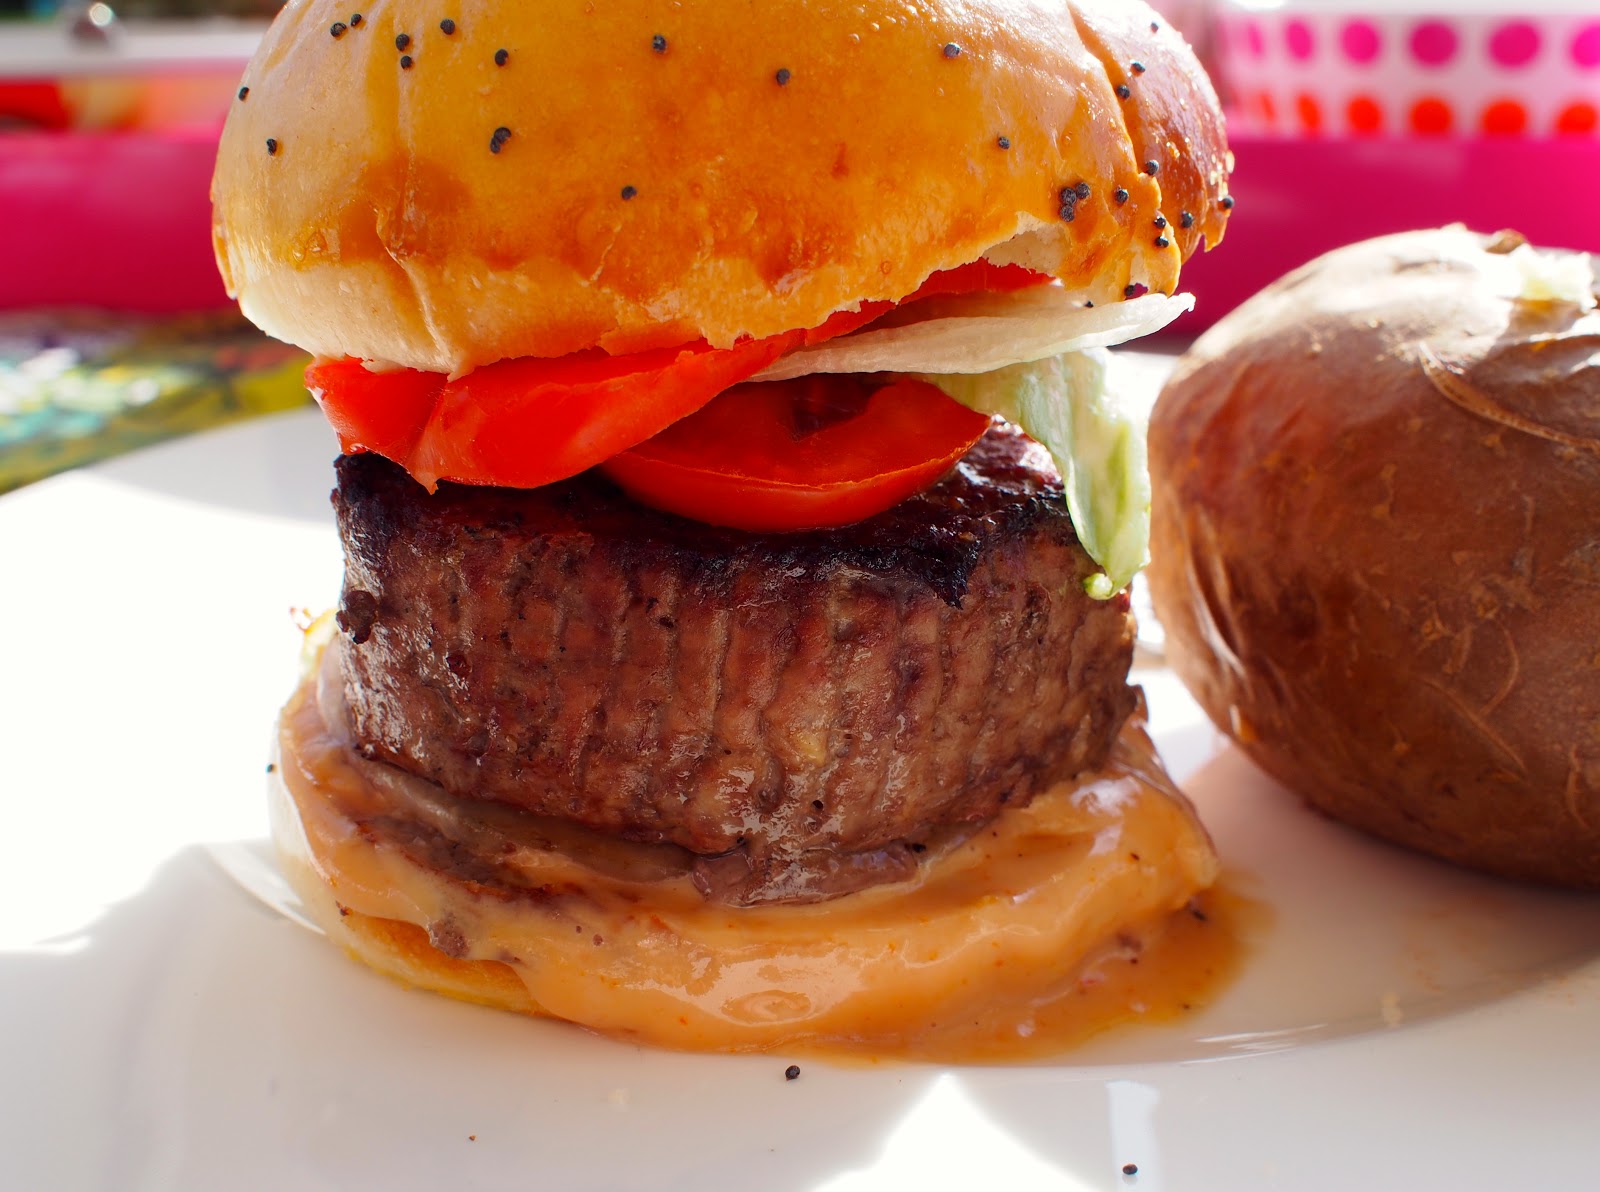
  • The structure of the burger really does work as you bite into it, but you still have the distinct texture of mince. Not sure how to get around that… I think the method works well because it allows you to get a really good crispy crust on the outside, but it looks a little… unusual…  I think worth a go to see for yourself.
  • The bun will now be my default bun.  I have made these on just one prove – they’ll be okay at a push, but they’re much nicer if given the full treatment.
  • I did make the sauce Heston uses too – delicious, though mine was a little sloppy, as you’ll see from the photographs… Yummy though…
The buns, before the second prove
Light, fluffy and soft – great burger buns
You can see the structure of the burger
Heston Blumenthal's perfectly poached egg

December 30, 2012 Eggs

Eggs Benedict and Heston Blumenthal’s Perfectly Poached Eggs

Hubby is mildy addicted to eggs Benedict – he frequently orders it for working breakfasts, and you can see from some of his comments that he has many, many criteria he applies to the dish.  Consequently I’m often reluctant to cook it at home – but hey, it’s Christmas – the man deserves his favourite breakfast at Christmas surely?!

I’ve been working on Thermomix versions of Bearnaise and Hollandaise, made with home-made tarragon vinegar, and a reduction base for both sauces…

I’ve also been obsessing about Heston Blumenthal’s How to Cook Like Heston, and was watching his episode on eggs again.  It seemed like the perfect excuse to combine techniques…

There are many variations on eggs Benedict – instead of the ham you can use blanched spinach for eggs Florentine, Eggs Mornay uses a Mornay cheese sauce instead of Hollandaise – you can play around with your favourite combination.  Here I’m using Pata Negra, that perfect ham from Spain – made from the blackfooted pig who’s been fed a diet of acorns – amazing stuff!

The freshest possible eggs make the best poached eggs – the white is firmer, less watery, and holds together better in the pan.  I had originally preferred Marcus Wareing’s method of poaching eggs, but having tried Heston’s, I think it just has the edge.  In his method you drain off the watery bit of the white, before poaching at 80oC for four minutes.  Reaching exactly 80oC on an induction hob was perhaps the most challenging aspect of the task – everything else worked exactly as he said…

Ingredients: 
2 tsp salt
large eggs, as many as you require
Salt and black pepper

Method:

  • Fill a saucepan with approximately 15-20cm of water then add the salt. Place a plate upside down in the bottom of the pan then place the pan over a medium heat and bring the water up to 80ºC.
  • One at a time, crack each egg into a ramekin dish and pour it into a slotted spoon with small holes. Allow to drain any residual white for approximately 1–2 minutes.
  • Lower the slotted spoon into the warm water and slide the spoon out. Allow to poach for 4 minutes.
  • Remove with the slotted spoon and place on kitchen paper to drain the excess water. Season with salt and freshly ground black pepper.
  •  

    It’s important to toast your muffins to some semblance of brown – you need them to form a crisp and tasty base for your eggs, not a soggy waterlogged layer

    Jamon Ibérico di Bellotta, or Pata Negra – no matter what you want to call it, the ham of the Spanish Black-Footed pig, fed on acorns, is silky, pack full of flavour and melt-in-the-mouth texture
    Mid-way through assembly – you can see I have less white than normal – this is because my eggs were a few days old… However the yolks are perfect.
    I’m not massively keen on eggs Benedict, but I’m not going to miss the opportunity to put some of that Bellotta ham under my poached eggs 

    Eggs Benedict, with Hollandaise sauce

    December 30, 2012 Heston Blumenthal

    Heston Blumenthal’s Macaroni Cheese

    Whenever I get a little bored, or I’m sitting in the bath, I delve into my i-pad espisodes of How to Cook Like Heston…  I like the combination of science, technique and, ultimately, gastronomy – it always has my food brain working overtime… After a particularly late night hosting our annual Christmas quiz, I delved into the episodes again, and looking at my groaning cheese boards (yes, plural), thought I’d better get stuck into some of his cheese recipes.

    Feeling slightly jaded, it was definitely the macaroni cheese which caught my attention… Not normally something I’d crave, but the thought of fat-laden carbs was definitely appealing to some bit of me!  Mmmm…. Macaroni cheese – definitely comfort food! [There’s a bit more about the science of cheese melting at the bottom]

    Ingredients
    200g macaroni
    ½ tsp salt
    15ml truffle oil
    300ml dry white wine
    300ml brown chicken stock, infused for 20 minutes with Berkswell cheese rind, keep warm
    80g Spenwood cheese, finely grated [okay, I’m using Parmesan, a similar style]
    10g cornflour [coating the cheese in cornflour prevents clumping together]
    80g soft cream cheese
    Black pepper
    15g goat’s cheese, diced (I’m using the fabulous Fresco Angelico from Brockhall Farm!!)
    Berkswell cheese, for gratinating (and this will be my Keene’s cheddar in this instance)

    Method

    • Preheat the grill. Place 400ml of water, the pasta and the salt in a pan over medium-high heat. Cook until the pasta is done and all of the water has disappeared. Toss the pasta with the truffle oil. [This releases the starch into the pan, rather than rinsing it away in any drained water]
    • In a small saucepan, reduce the white wine over a high heat to 30ml. Add the warm chicken stock to the reduced wine. Mix the grated cheese with the cornflour and add to the pan. Stir until the cheese has been incorporated into the sauce, then add the pasta.
    • Cook over a medium heat until the pasta is warmed through, then stir in the cream cheese. Season with freshly ground black pepper.
    • Half fill an ovenproof baking dish with the pasta, sprinkle with diced goat’s cheese and add the remaining macaroni on top. [Heston bakes his inside a hollowed cheddar wheel]
    • Sprinkle some more cheese on top and place under the grill to melt and gratinate the cheese. Serve immediately.
    What can I tell you? Feeling jaded? Reach for this ultra-rich, flavoured-packed, mac and cheese! It was everything I wanted it to be!

    [Make sure you use the right macaroni – I happened to have small gluten-free macaroni made with maize and rise flour, which I’d bought in for my gluten-intolerant niece.  It would have worked much better with a durum wheat, larger style macaroni.]

    Coating the hard cheese in cornflour prevents it clumping together

    You can see the starch released around the sides of the pan

    Adding cream cheese increases the creaminess of the sauce

    You can clearly see the unmelted goat’s cheese cubes in the gratinated mac

    This dish is very rich, you wouldn’t want a huge helping!!
    Lot of cheese to use up!

    Part of the point of the show was to discuss the properties of different kinds of cheese, and their suitability for different dishes.  Heston, Otto and Jockey each ironed a different type of cheese (yes, ironed), to test their melting points.  The medium cheese melted on the lowest setting of the iron, but the fresh, soft goats cheese wouldn’t melt at all – the water merely evaporated and left a layer of cheese behind.  The hard cheese did melt, but only after Heston moved the temperature up significantly.

    The goal in most of his cheese recipes is to either release the fat and protein, or to impair that release.  In this dish Heston coats the hard cheese in cornflour to restrict the release of the protein and fat – resulting in a much smoother sauce with no clumping.  The sauce shouldn’t be boiled, as that would begin to release the fat and protein again, resulting in a less silky sauce.

    The goat’s cheese was added in cubes to the dish precisely because it didn’t melt like the others – and the resulting pockets of spiky goats cheese enhance the overall cheesiness of the dish.

    If you’re reading this outside of the United Kingdom, I think you can watch the relevant section on You Tube – but the copyright is protected inside the United Kingdom, sorry!  You can find more of the recipes from the series here >

    July 8, 2012 Heston Blumenthal

    Heston Blumenthal’s Meat Fruit

    I recently had dinner at Dinner, by Heston Blumenthal. For various reasons the Hubby and I weren’t actually going to order “Meat Fruit”, but the kitchen sent us one, and we were completely blown away by the texture of the parfait, and the contrasting acidity of the jelly.  The dish is light, but rich, moreish, very slightly palate cleansing – and yes – I accept that those are complete contradictions.  It’s the mandarin jelly – it really does release something in the palate that allows the very rich parfait to not become overly cloying.

    When I wrote my restaurant review I searched for the recipe, intrigued about how it was made – everyone knows I’m a complete sucker for a culinary challenge :0)

    Not only did I found the actual recipe given to the Guardian by Heston, but I also found a tiny bit of video clip which showed it being dipped, a video blog by a Thermomix blogger, and a variation by the Cumbrian Foodie on his blog.  I suggest you look at them all. If you’re serious about making this at home, it’s worth making the parfait a week or so before you need it, and perhaps doubling the quantify to allow you time to play with the jelly dipping.  All of the procedures up to the jelly are incredibly easy – do give it a go – it’s much easier than it might seem.

    Key stages and timings:

    • Put the marinade ingredients together, leave for 24 hours
    • Make the chicken liver parfait, leave for 24 hours
    • Put the parfait into the moulds, and freeze until solid (6 hours maybe?)
    • Assemble the two halves of the parfait ‘sphere’, and refreeze (1 hour maybe?)
    • Dip the spheres into the mandarin jelly, then leave to defrost in the fridge for 6+ hours
    There are some additional photos of the key stages at the end of this post
    For the chicken liver parfait:
    100g shallots, finely sliced
    3g minced garlic
    15g sprigs of thyme, tied with string
    150g dry Madeira
    150g ruby port
    75g white port
    50g brandy
    18g table salt
    400g chicken livers (trimmed weight)
    240g eggs
    300g unsalted butter, melted

    1. Place the shallots, garlic and thyme in a saucepan with the Madeira, ruby port, white port and brandy. Set aside to marinate for 24 hours.
    2. Heat the marinated mixture until nearly all the liquid has evaporated, stirring regularly to prevent the shallots and garlic from burning. Remove from the heat and discard the thyme.
    3. Preheat the oven to 100C/gas mark ¼. Fill a bain-marie with 5cm water and place in the oven.
    4. Preheat a water bath to 50C.
    5. Sprinkle the table salt over the livers and put them in a sous-vide bag. Put the eggs and the alcohol reduction in a second sous-vide bag, and the butter in a third. Seal all the bags under full pressure, then place in the water bath for 20 minutes. Remove the bags from the water bath.
    6. Combine the eggs, alcohol reduction and meat in a Thermomix and blend until smooth at 50C. Slowly blitz in the butter and blend until smooth. Pass the mix through a fine sieve using the back of a small ladle.
    7. Pour into a terrine dish and place in a bain-marie and cover the bain-marie with aluminium foil. Cook the parfait until the temperature in the centre reaches 64C.
    8. Remove from the oven and allow to cool. Refrigerate for 24 hours before serving.

    For the mandarin jelly: 

    45g leaf gelatine
    500g mandarin purée (I used half a pack of Boiron’s mandarin purée)
    80g glucose
    0.4g mandarin oil
    1.5g paprika extract (the paprika is to colour the gel – instead I used a specialist cake decorating gel, in egg yolk yellow)

    1. Place the gelatine in cold water to soften.
    2. Gently heat the mandarin purée and glucose in a pan to combine.
    3. Add the softened gelatine and stir well until dissolved.
    4. Remove from the heat and add the mandarin oil and paprika extract and stir well.
    5. Pass the mix through a fine sieve and reserve in the fridge until required.

    To make the fruits:

    1. Using a spoon, fill dome moulds with parfait, ensuring there is enough pressure to create a completely smooth surface. Level off the tops so that they are flat, and cover with cling-film. Gently press the clingfilm directly onto the surface of the parfait. Place in the freezer until completely frozen. (if you put half the moulds onto a flat tray, you can achieve a slightly inverted dip on top of the fruit – see my photograph below)
    2. Gently de-mould the parfait domes. Place on a board with the flat sides facing upwards. Very briefly run the flame of a blow torch over the flat side, being careful only to just melt the surface of the parfait. Join two halves together and compress using a square of cling-film. Wrap well in cling-film and place back in the freezer until required.
    3. Gently push a wooden cocktail stick into the middle of the rounded surface and re-wrap until all the parfaits are complete.
    4. Gently melt the mandarin jelly in a saucepan and allow to cool to room temperature. Remove the cling-film and dip each ball of parfait into the jelly and stand the sticks, covered in cling-film, into a piece of Oasis (the green material you get in florist shops to help the flowers stand up). Place in the fridge for a minute, then repeat the dipping process.
    5. Dip three times, then gently remove the cocktail stick and place the balls onto a tray covered in cling-film. Place a lid over the tray and leave in the fridge to defrost for at least six hours.
    6. Once defrosted, gently push the top of the ball using your thumb to create the shape of a mandarin. Place a stalk and leaf in the top centre of the indent to complete the fruit.

    Not this is the point where I show you a perfect meat fruit, the one I prepared earlier… But I don’t want to do that just yet :0) Instead here are the things I’ve learnt, which you might like to consider, with photo’s to illustrate the points.  After all what’s the point of blogging if we don’t share our experiences?

    So, example 1.  If the parfait ball is too smooth to start off with, the resulting mandarin looks somehow quite fake. I took to roughing up the parfait slightly in the cling-film with my hands before dipping it. Also in this example, the jelly was definitely too warm – I thought it was room temperature, it wasn’t. At this point I decided to take one parfait and dip it every ten minutes. As a result this parfait sat on the side for over half an hour, and you can see that effectively defrosting it at room temperature causes the shape to slump.  There’s still not quite enough colour in the gel to cover all the flaws (you can’t see it as well here, because I re-dipped it), but I had to boost the colour to a practically fluorescent orange colour – you’re not looking for natural – you really are looking for an unnatural intensity.  You can see all of the above in the photograph.

    “Too Smooth” Meat Fruit

    In this next example the jelly was far too cool, and it set around the parfait instantly in a slightly monstrous and lumpy version of the skin! Amusing though – we thought this one was great fun.  It may look as though you can get away with this, but bear in mind it will have a very thick jelly coating!

    “Monster” Meat Fruit

    In the next example we whisked the jelly until it was smooth again and a fraction warmer, and then repeated… This was among the better examples.

    Meat Fruit

    I didn’t make many, but I think you can see that it’s the dipping that requires the work – everything else was easy. I have seen other examples where people just went with the smooth jelly, and if this is your preference, stick to it all the way through to ensure consistency.

    The one good thing is that you can keep the parfait balls in the freezer until your ready – I think in future I’ll make everything up to that point at least a week in advance (and make more than I need), and then just keep them in the freezer until they’re required. Pate can be stored for up to a month in the freezer, so you could keep a batch on the go, as long as you date them appropriately.

    Does it taste like the real thing? Well, it’s chicken liver and doesn’t have the fois gras included in the restaurant version, but I think it’s a pretty accurate recipe.

    As a quick aside, I do have a water bath, sous vide equipment and thermomix, so I followed the recipe on that basis – you can adapt the recipe easily if you don’t have them.  Like everyone else, my silicone moulds were too large – you really would be better off trying smaller moulds, and next time I shall try these…

    Update: I spoke to Ashley Palmer-Watts on twitter about the dipping process, and this was his advice:

    @APWChef Not bad, just need to not rush at the end, let them re freeze between dips and keep the gel at a steady temp pic.twitter.com/aYfFe7cD

    @Bebejax Ah, of course, hadn’t occurred to keep it constant! Don’t suppose you’d care to reveal the magic number?

    @APWChef 28c but you must not over heat the gel much more than 50

    @Bebejax Thanks! Will try it again and post pics! And yes, took the gel above 50, but was using gold
    @APWChef bronze gelatine is the one we use

    Now that you’re a Heston expert, don’t forget I have his lemon tart recipe on the blog, and for the more adventurous, I’ve just come across his snail porridge recipe!  Yes.  Good luck with that…

    May 13, 2012 Baking

    Heston Blumenthal’s Lemon Tart [Thermomix]

    Without doubt the best lemon tart I’ve had, light, just set and vibrant with citrus flavours.

    I’ve actually made this recipe several times now, and have gradually refined the process so that now the 11yo actually makes it on her own! The first time I ignored all of the instructions about sticking it into the freezer, and I paid the price. Firstly the dough was far too soft to handle, and broke as I was transferring it to the case. Secondly it went golden far too quickly, and lastly it absolutely fell apart when I mis-handled the tin. Make sure you follow the instructions exactly, use an oven thermometer, your digital thermometer, and if you have one, your laser thermometer too!

    Ingredients:

    For the pastry:
    300g plain flour
    150g unsalted butter
    ½ tsp salt
    120g icing sugar
    3 large egg yolks
    Seeds from ½ vanilla pod
    Finely grated zest of ½ lemon
    1 egg for the egg wash

    Method:

    1. Using a mixer fitted with a paddle attachment, mix the flour, butter and salt on low speed until it becomes a sand like texture (approximately 2-3 minutes). [Actually, I did this by hand]
    2. In the meantime, in a tall container blitz together the icing sugar and egg yolks with a hand blender.
    3. Add the vanilla seeds and lemon zest to the egg yolk mixture and then add to the bowl in the mixer and continue to mix on low speed until fully combined and a very soft dough has formed (approximately 3-5 minutes).
    4. Mould the dough into a flat rectangle and wrap it in clingfilm before placing in the fridge for at least 1 hour. [Did mine overnight, was pretty firm when I rolled it out]
    5. Roll the pastry between two sheets of baking paper to a thickness of 2mm, using two stacked 2 pence coins as guides, then place in the freezer for 30 minutes.
    6. Pre-heat the oven to 190ºC/gas mark 5. Line a 26cm tart tin (2.5cm deep) with the pastry making sure to press it into the edges and leaving the pastry hanging over the edge.
    7. Take a sheet of baking paper and scrunch it up several times to eliminate any sharp edges. Prick the dough with a fork all over the surface. Place the baking paper on top and add enough coins (or baking beans) to fill the casing ¼ of the way up. Place in the preheated oven to bake for approximately 20 minutes or until fully cooked. [Be careful with the coins – once nearly put a watch battery in the oven which someone had dumped in the coin pot – check them!]
    8. In the meantime, mix some of the leftover dough with an egg using a hand blender.
    9. After 20 minutes, remove the baking paper and coins and, using a pastry brush, brush the entire surface of the tart with the dough and egg mixture. This ‘liquid pastry’ will ensure that any holes will be sealed. Return the tart to the oven for an additional 10 minutes.
    10. Remove the tart from the oven and allow to cool completely.
    11. When ready to bake, preheat the oven to 120ºC/gas mark ½. Place the baked pastry case in the oven to warm up.

    [If you’re in a massive hurry, you can use this pastry, it comes in a pre-cut disc and is the best commercial pastry I’ve found to date.  This is what the 11yo uses when we’re in a hurry, and it’s pre-rolled to a very suitable thickness]


    For the filling:
    Finely grated zest and juice of 5 lemons
    300ml double cream
    390g white caster sugar
    9 large eggs
    1 large egg yolk
    Method:
    1. Put all the filling ingredients into the thermomix and cook for 10 minutes, speed five, at 60ºC – keep a close eye on the temperature, you want to stop it at 60º – do not rely on the thermomix, check it with a digital thermometer!  At this point, strain the mixture through a fine sieve into a jug. With a spoon, remove the bubbles from the surface of the liquid.
    2. Slide the oven rack out a bit, then pour the mixture into the warm pastry case inside the oven. Fill the case to the top, slide the rack carefully back in, and bake the tart for approximately 25 minutes or until the temperature of the filling reaches 70ºC. Allow to cool completely at room temperature.  [Now. You’re supposed to check the temperature with a thermometer – DO NOT TEST THE TEMPERATURE AT THE EDGE OF THE TART! It’s cooked further than the rest of it, and will mark your custard! I’ve now made this tart several times and I actually now test it with a laser thermometer, basing the reading on the centre of the tart – you can also use the ‘wobble test’ – there should still be a noticeable wobble in the centre.]
    3. Just before serving, trim the overhanging pastry by running a sharp knife round the top of the tart tin and discard.
    Notes:
    The tart had the perfect amount of wobble, and stood upright, but it was still a little too loose for me, in terms of mouth feel.  Unless you’re going to practice it before you make it for something big, do take it a little beyond 70ºC if you want to make sure it’s more firmly set.  Also, Heston says to trim the pastry just before you serve? No, think that’s a bad idea… Firstly, I ended up with little crumbs on my tart, not matter how I held it, because the pastry is so brittle.  Secondly, I managed to break a chunk off mine at the last minute, which then meant that I was unwilling to really trim it up to the fluted edge for fear of a repeat…  Also, the pastry was still too thick… I rolled it much thinner after that.
    Make sure your sheet will cover your tin entirely


    Rolled to the thickness of two 2p pieces… Eventually…


    Remember to test your tart in the centre, not at the edge!


    Tart, with nibbled edge and that blooming crack!…
    This recipe is in Heston Blumenthal at home cookbook.  You can find it here >

    Primary Sidebar

    Categories

    • ▼Recipe
      • Baking
      • Breakfast
      • Cheese
      • Dessert
      • Eggs
      • Fish
      • Heston Blumenthal
      • Italian
      • Jamie Oliver
      • Marcus Wareing
      • Mediterranean
      • Pasta
      • Patisserie
      • Risotto
      • Smoothie
      • Sous Vide
      • Squash
      • Thermomix
      • Vegan
      • Vegetarian
      • Yotam Ottolenghi

    Categories

    • ▼Book Review
      • ⭐️⭐️⭐️⭐️
      • ⭐️⭐️⭐️⭐️⭐️
      • Baking
      • Meat
      • Patisserie
      • Restaurant Cookbook
      • Vegetarian
      • Yotam Ottolenghi

    Categories

    • ▼Restaurant
      • 1 Michelin Star
      • 2 Michelin Stars
      • 3 Michelin Stars
      • British
      • Fish
      • French
      • Italian
      • Japanese
      • Peruvian

    Categories

    • 101 Cookbooks (1)
    • 3 Michelin Stars (1)
    • Advert (1)
    • Alan Murchison (2)
    • Alba Truffle (1)
    • Almond (1)
    • Angela Hartnett (1)
    • Angler (2)
    • Art Journal (2)
    • Artichokes (1)
    • Axis (1)
    • Azelia’s Kitchen (1)
    • Baking (9)
    • Baldwin (1)
    • Bara Brith (1)
    • Basics (1)
    • Beef (1)
    • Beetroot (2)
    • Ben Spalding (2)
    • Blackberry Soufflé (1)
    • Blackening Spice (1)
    • Blood Oranges (4)
    • ►Book Review (75)
      • Baking (10)
      • Meat (1)
      • Patisserie (6)
      • Restaurant Cookbook (3)
      • Vegetarian (3)
      • Yotam Ottolenghi (2)
      • ⭐️⭐️⭐️⭐️ (16)
      • ⭐️⭐️⭐️⭐️⭐️ (8)
    • Bread (3)
    • Breakfast (1)
    • Breakfast Tart (1)
    • brioche (1)
    • Brockhall Farm (1)
    • Bruschetta (1)
    • Bryn Williams (1)
    • Burrata (1)
    • Butter (1)
    • Buttercream (1)
    • Camembert (1)
    • Canapes (1)
    • caraway (2)
    • Casserole (2)
    • Chelsea Buns (1)
    • Chestnuts (1)
    • Chicken (3)
    • Chickpea (1)
    • Chocolate (4)
    • Chocolate Fondant (1)
    • Christmas (1)
    • Ciabatta (1)
    • Cinnamon (1)
    • Citrus (1)
    • Citrus Drizzle Cake (1)
    • Clams (1)
    • Coconut (2)
    • Coconut Milk (1)
    • Confectionary (1)
    • Creme Patisserie (1)
    • Dan Lepard (1)
    • Dessert (1)
    • detox (1)
    • Doughnuts (1)
    • Dried Fruit (1)
    • Drop Scones (1)
    • Ducasse (1)
    • Duck Egg (1)
    • Eggs (3)
    • El Bulli (1)
    • en Cocotte (1)
    • Epi (1)
    • Eric Treuille (1)
    • fennel (2)
    • Fettuccini (1)
    • Fish (1)
    • FrontPage (28)
    • Fruit Tea (1)
    • Glutamate (1)
    • Goat’s Cheese (1)
    • Gỏi Cuốn (1)
    • Granita (1)
    • Herbs (1)
    • Heritage Tomato (1)
    • Hibiscus Flower (1)
    • Hope and Greenwood (1)
    • Ice-Cream (3)
    • Iced Berry Souffle (1)
    • Icing (1)
    • Italian (1)
    • James Martin (1)
    • Jelly (1)
    • Journal (9)
    • Karen Scott (1)
    • King Oyster Mushroom (3)
    • Kummel (1)
    • L’Ortolan (1)
    • Lamb (1)
    • Lavender (1)
    • Laverstoke Park (1)
    • Lemon (3)
    • Lemon Drizzle Cake (1)
    • Lemon Grass (1)
    • Lemon Meringue Tart (1)
    • Lemon Poppy Seed Muffins (1)
    • Lentils (1)
    • Limewood (1)
    • Liquorice (1)
    • Liquorice Ice-Cream (1)
    • Lobster (3)
    • Lucas Hollweg (1)
    • Luke Holder (1)
    • Macarons (1)
    • Mango (1)
    • Marcus Wareing (1)
    • Mark Lloyd (1)
    • Market (1)
    • Mary Berry (1)
    • Meringue (1)
    • Michael Moore (1)
    • Michel Roux (3)
    • Mint (1)
    • Mister Truffle (2)
    • Modernist Cuisine at Home (1)
    • Moroccan (1)
    • Muffins (3)
    • Murano (1)
    • Mushroom (1)
    • Ollie Dabbous (1)
    • Ollie Fararr (1)
    • Ox cheek (1)
    • Palourde Clams (1)
    • Pancetta (1)
    • Panna Cotta (1)
    • Parmesan (1)
    • Passion Fruit (3)
    • Pasta (1)
    • Patisserie (1)
    • Paul Heathcote (1)
    • Pea (1)
    • Peter Reinhart (1)
    • Petit Fours (1)
    • Philip Howard (1)
    • Pierre Koffman (1)
    • Pierre Koffmann (1)
    • Pimms (1)
    • Pistachio (1)
    • Pistachio Soufflé (2)
    • Pistacho (1)
    • Pork (1)
    • Prawn (1)
    • Quiche (1)
    • Rachel Allen’s 30 Day Muffins (1)
    • Raspberry (2)
    • Ravioli (1)
    • Raymond Blanc (1)
    • ▼Recipe (192)
      • Baking (17)
      • Breakfast (2)
      • Cheese (1)
      • Dessert (7)
      • Eggs (3)
      • Fish (2)
      • Heston Blumenthal (5)
      • Italian (3)
      • Jamie Oliver (1)
      • Marcus Wareing (2)
      • Mediterranean (3)
      • Pasta (3)
      • Patisserie (7)
      • Risotto (1)
      • Smoothie (1)
      • Sous Vide (1)
      • Squash (1)
      • Thermomix (19)
      • Vegan (1)
      • Vegetarian (20)
      • Yotam Ottolenghi (2)
    • ►Restaurant (124)
      • 1 Michelin Star (17)
      • 2 Michelin Stars (9)
      • 3 Michelin Stars (3)
      • British (19)
      • Fish (4)
      • French (4)
      • Italian (3)
      • Japanese (1)
      • Peruvian (1)
    • Richard Bertinet (1)
    • Risotto (1)
    • Roganic (1)
    • Rolls (1)
    • Roux (3)
    • salad (2)
    • Salmon (2)
    • Sardinian Cookery (1)
    • Scandiliscious (1)
    • Sea Trout (1)
    • Sherbet Dab (1)
    • Signe Johansen (1)
    • Silvana de Soissons (1)
    • Simon Rogan (1)
    • Snail Caviar (1)
    • Soda Bread (1)
    • Sorbet (1)
    • Soufflé (11)
    • Soup (1)
    • Sous Vide (2)
    • Spice (1)
    • Stew (1)
    • Stuffing (1)
    • Sugar Baby (1)
    • Sugarwork (1)
    • Sumosan (1)
    • Supper (1)
    • Sweetcorn (1)
    • Sweetcorn Fritters (1)
    • Tamarillo’s (1)
    • Texturas Fizzy (1)
    • Thai (2)
    • The Bertinet Kitchen (1)
    • The Square (1)
    • Thermomix (10)
    • Toffe Fudge Muffins (1)
    • Tom Kitchin (1)
    • Tomato Bread (1)
    • Tony Fleming (4)
    • Tribute Dish (2)
    • Truffle (1)
    • Truffles (6)
    • Umami (1)
    • Uncategorized (1)
    • Vanilla (2)
    • Vegan (1)
    • Vegetables (1)
    • Vegetarian (3)
    • Verveine (1)
    • Vietname Summer Roll (1)
    • Watermelon (1)
    • William Curley (1)
    • yeasted dough (1)

    I’m passionate about food, its provenance and its sustainability. As a technical cook, I like to see what’s happening in the kitchens of Michelin starred restaurants, but you’re just as likely to find me at home making sourdough. You can find some of my recipes in In The Mix 2, an award-winning Thermomix cookbook.

    I’m also truly blessed – I can open my fridge at any time and know it’s crammed with all manner of loveliness – but that’s not the case for everyone. There are people all around me in the UK who rely on food banks to feed their kids, and themselves, and every box of cereal or teabag makes a difference. You can donate food to your local food bank, or time, or money, and if you want more information the best starting place is http://www.trusselltrust.org.

    You can also find me here:

    Foodies100 Index of UK Food BlogsFoodies100
    The Renaissance Epicurean... London restaurants
    Top Food BlogsUK Food Bloggers Association

    The Eleven Madison Park Granola

    Copyright © 2025 · Cookd Pro Theme On Genesis Framework · WordPress · Log in

    Nourished
    • Home
    • Recipes
    • Book Reviews
    • Restaurants
    • Journal
    • About