• Skip to primary navigation
  • Skip to main content
  • Skip to primary sidebar

Nourished

  • Home
  • Recipes
  • Book Reviews
  • Restaurants
    • 3 Michelin Stars
    • 2 Michelin Stars
    • 1 Michelin Star
  • Journal
    • Art Journal
    • The Renaissance Diary
  • About
    • Contact Me
    • Instagram
    • Loves
    • Suppliers
    • Masterchef Links

Recipe

July 2, 2012 Recipe

The Harwood Arms Venison Scotch Egg

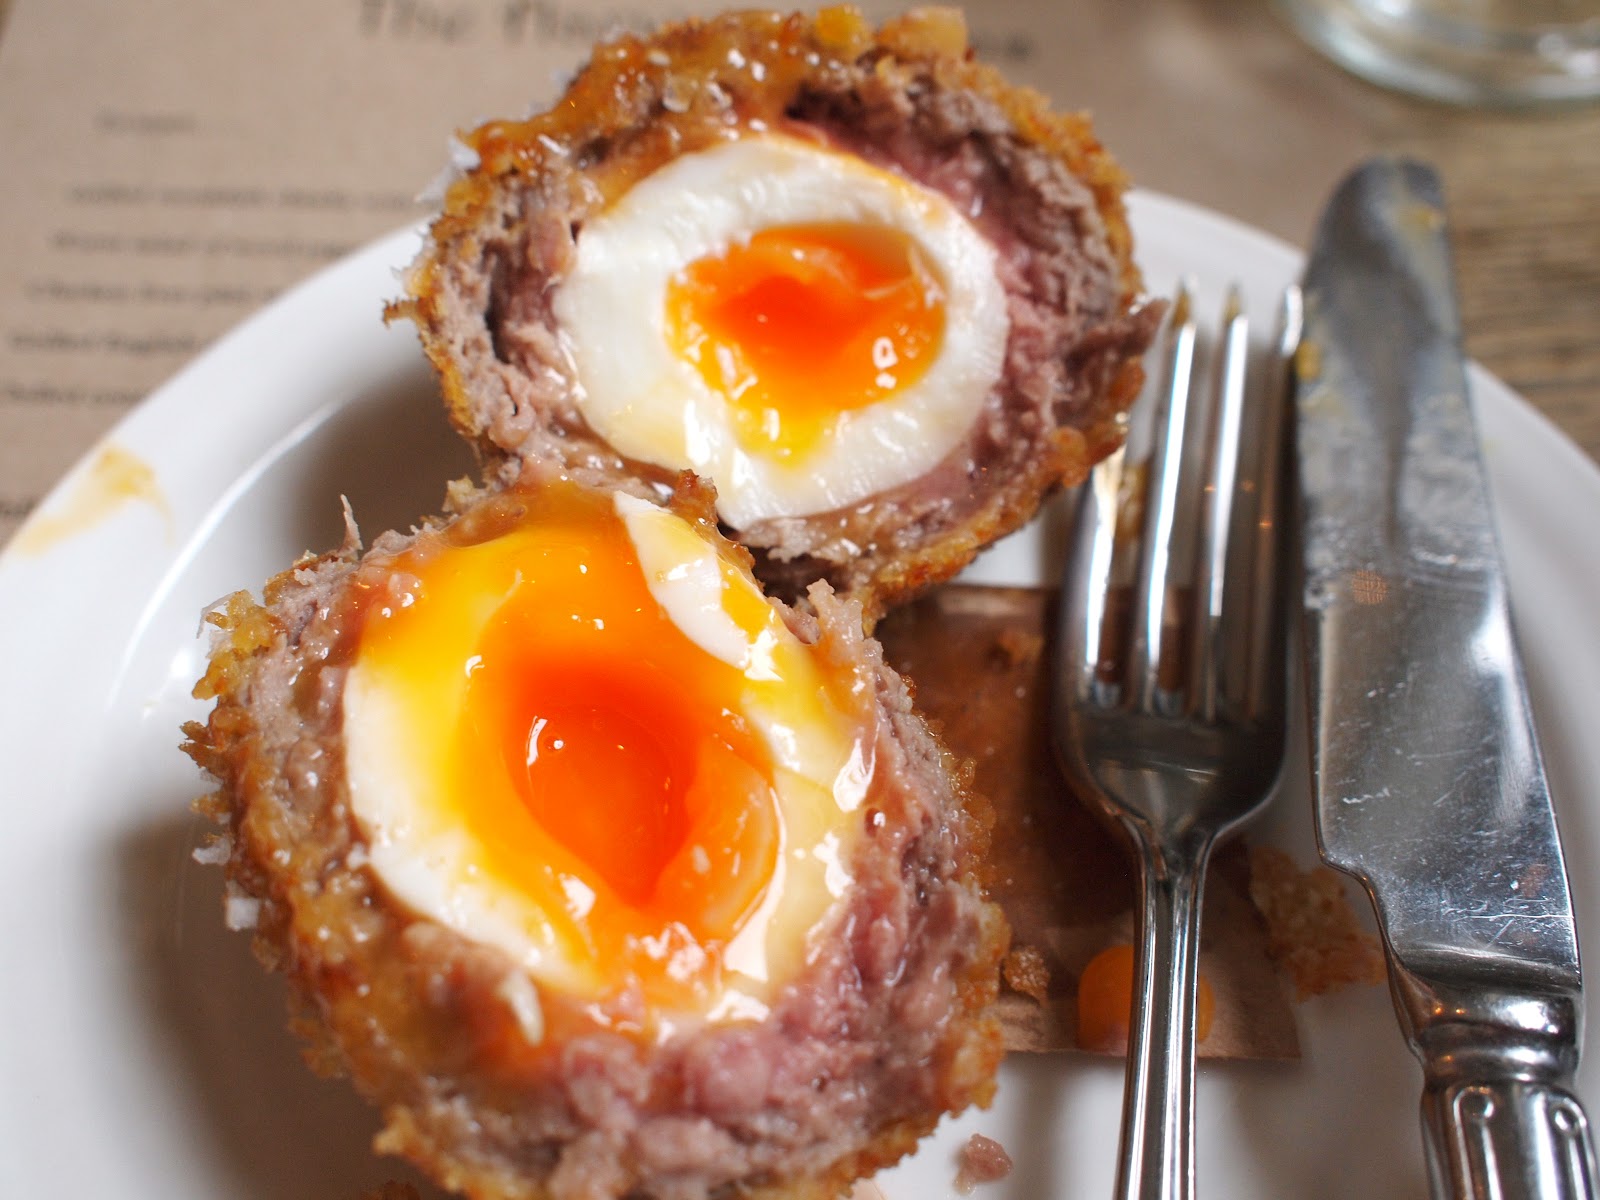
I had lunch at the Harwood Arms recently, and arrived late :0) What a marvel – to arrive late and to be presented with a gorgeous Scotch egg within moments of being seated, and having spent nearly an hour in traffic to travel about four miles!  It was delicious, spicy, well flavoured and with a soft gorgeous yolk in the centre – yummy!

The Harwood Arms is London’s only Michelin starred pub, and jolly good it is too.  The pub is part owned by Mike Robinson of the PotKiln (we’d also had Mike’s venison at the Royal Berkshire Shooting School – excellent produce).  Hubby wasn’t with me that day, which is a shame, as he’s much more into Scotch eggs than me – this made me determined to make him some.  When I googled ‘venison Scotch egg recipes’ I was delighted to find Mike’s own recipe in The Field magazine!

Ingredients 
8 medium hen’s eggs
150g (5oz) venison mince
300g (101⁄2oz) pork sausage meat
Salt and pepper
Herbs
200g (7oz) plain flour
100ml (31⁄2fl oz) milk
3 eggs, beaten
250g (9oz) coarse white breadcrumbs [I used Japanese panko breadcrumbs]
Makes 8 scotch eggs

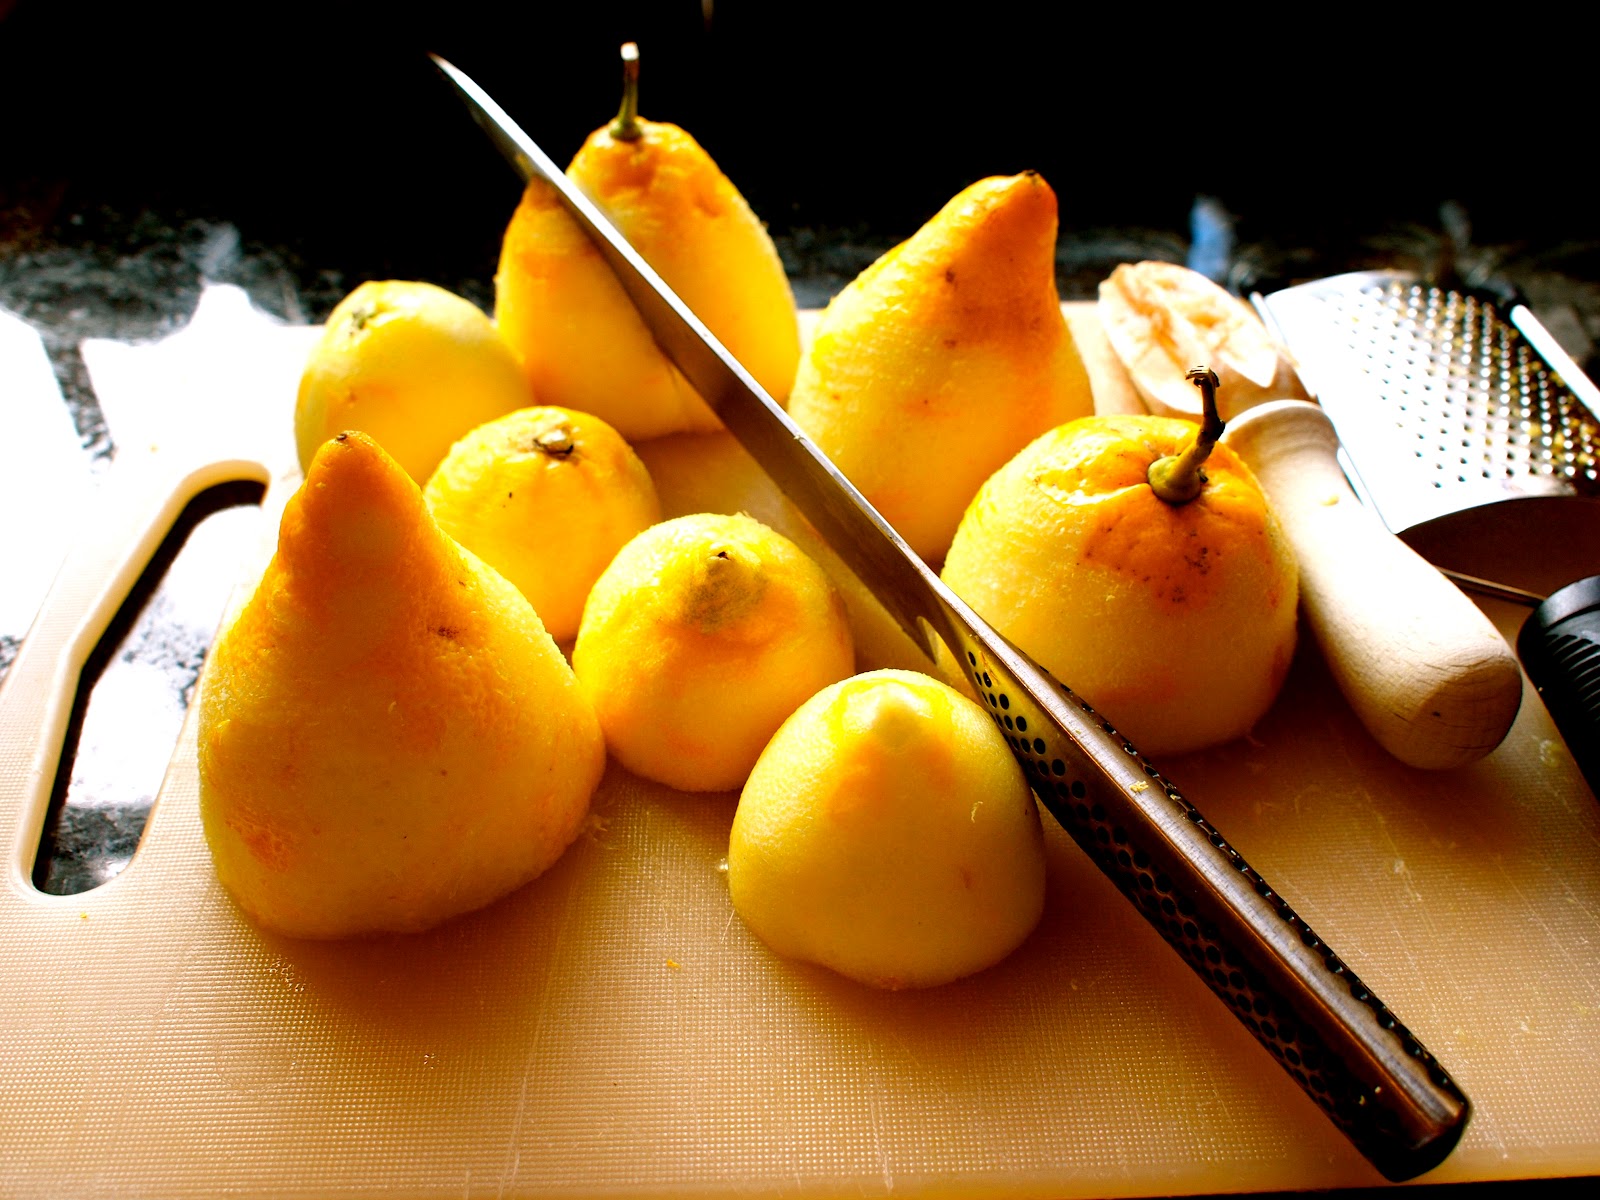
Start by removing your eggs from the fridge at least an hour before cooking. Cooking from room temperature is the key to getting the yolks just so. Boil the eggs in water for five and a half minutes exactly. If you are at high altitude, this timing may change. Take the eggs out of the water and plunge into iced water to stop them cooking. When cool, peel them carefully and leave the peeled eggs in water.  [I definitely overcooked my first batch of eggs, but I was using Clarence Court legbar eggs, which are perhaps a little smaller.  On the second batch I cooked an extra egg, whipped it out and cracked it open before removing the others, to double check the state of the yolk.  I also found it difficult to peel my eggs as they were so fresh, so I cracked the shells a little, leaving the eggs in the water for a few minutes.  Once the cold water seeps around the egg, it’s a lots easier to peel them]

Prepare the sausage meat by mixing the venison and pork together. Season the mix with salt and pepper and any herbs you choose. Form the meat into balls the same size as the eggs.

Flour the eggs. Squidge the balls of sausage meat into flat circles about 5in in diameter and encase each egg in a thin layer of meat. Mix the milk and beaten eggs together, then flour the enrobed eggs again and dip them in the mix before dunking the lot in breadcrumbs.

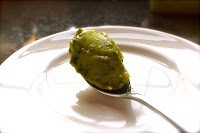
Repeat the process so the crumb armour is two layers thick. Deep fry the eggs in plain oil at 175°C/347°F for six minutes. They should be deep brown in colour but not burnt. Serve hot and whole with a sprinkling of sea salt on the top. [These timings and temperature worked perfectly for my eggs – the yolk was still runny, but they were definitely warm and heated through]

Do give them a go, they were yummy.

Homemade Scotch eggs…
Homemade Scotch eggs… 

June 29, 2012 Mister Truffle

Risotto, with mushrooms, cep roasted chicken, and summer truffle

Risotto, with mushrooms,
cep roasted chicken, and summer truffle

There are a thousand different ways to make risotto, but how do you make risotto memorable?  In the last twenty years there are three that I can recount in vivid detail:

  • In Lucca, we had an amazing barolo risotto with gorgonzola – umami heaven – salty, blue notes, rich, dense, it was utterly heavenly.
  • When Ramsey at Claridges was still a restaurant, and not a tourist destination, we had an amazing risotto with guinea fowl. The risotto was rich and dark – with a jus poured over it at the table – intense, meaty, the guinea fowl succulent and yielding.
  • There used to be an amazing little restaurant just above Picadilly, on the first floor at the apex of the junction of Picadilly and Regent Street – I have absolutely no memory of its name. Here we had a complete contrast – a light spring risotto of new peas, broad beans and asparagus… It was still rich and flavoursome, but I think had been lightened with something like marscapone, so it was silky and rich, but didn’t swamp the spring vegetables…
  • All of these are some time ago and I’d all but given up on risotto – for heavens sake – you can buy risotto in a tub now to be microwaved! But at Dinner we had an incredible saffron risotto that was so eye-wateringly rich and moreish that I decided it had to reappear on my menu.

The opportunity presented itself when I couldn’t decide what to do with the truffle I’d bought from @mistertruffle. I always automatically stick a truffle straight into my risotto rice when it arrives – an opportunity that can’t be missed – so it was already delicately scented before I began. There were a number of factors that made me decide on risotto, not least of which is a well-stocked larder, and some exceptional suppliers.

Ingredients:
Aquerello carnaroli rice from Infusions for Chefs
Morels from Mrs Tee
Summer truffle from @MisterTruffle
True Foods veal jus
Cep powder from Fine Food Specialists
Wine or Noily Prat
Cornfed chicken breasts
And a jar of my standby favourite mixed mushrooms – I use the oil to boost the mushroom flavour in stews, soups etc.  With ingredients like that, how could you go wrong?
Method:
  1. Before you begin, pop the jus into a pan to warm, I think I used three packets, they’re not huge, but substitute good stock if you don’t have this
  2. Brush the chicken with oil, and dust with a coating of the cep powder, pop in the oven
  3. Puree the morels and cook them out in a separate pan with the drained oil from the jar of mushrooms, or some olive oil
  4. Pop in the risotto rice, and cook it until the rice becomes translucent
  5. Pour in a small glass of wine at this point, and allow the rice to absorb it – actually I usually use noilly prat because I have it to hand…
  6. Once the rice has absorbed all of the alcohol, gradually ladle in the stock, two ladles at a time, until the liquid is absorbed
  7. Once the rice is cooked, grate some truffle over the top of the risotto and stirred it in, off the heat.  I’ve added it at the end because this is a summer truffle, and the scent and flavour is much more delicate than the winter – you don’t want to lose it in the rice
  8. Plate, with the roasted chicken, and top with finely sliced truffles… Oh, and a tiny drizzle of truffle oil…  Fabulous!
Summer truffles….
The rice, after the stock is added for the first time…
The colour comes from the morel puree and the oil from the mushrooms
The cornfed chicken, roasted in a coating of cep powder
The risotto receives it’s adornment of grated summer truffle
Risotto, with mushrooms, cep roasted chicken, and summer truffle

June 23, 2012 Fish

Roasted Salmon in African Volcano PeriPeri Sauce

OLYMPUS DIGITAL CAMERAI’ve been eating for two weeks… This may seem like a bit of a dream for some people, but my palate is jaded, I needed something much more comforting and zingy.  I’ve also been up since 4am this morning, and I’m definitely not in the mood for one of my elaborate cookery sessions – so it has to be fast!

At this time of the year my fridge is full of summery seasonal produce, but the weather speaks much more of autumn.  So, what to make? I check what I have – a large salmon fillet, Jersey royals of course, English asparagus, etc… Not really what I’m after I must admit…

I eye up my last remaining bottle of my favourite African Volcano peri peri marinade, and wonder when I will actually see Grant again to get some replacements…  But it’s too late.  My palate is already craving the rounded heat of Grant’s sauce, and there will be no alternative.

I decide to make a variation of one of my regular ‘quick’ dishes, here with a swift kick of spice to bring it alive.  I always have a large fillet of salmon in my fridge – it’s an incredibly versatile ingredient… You can marinade it in white miso, or brown miso, teriyaki, olive oil and herbs… Anything you fancy really, so I knew it would take to Grant’s marinade with aplomb.

I popped the fillet into a food bag with the marinade, but I also added a small handful of crushed pink peppercorns – I wanted that tart piquancy that they add, and of course the colour doesn’t look strange here either.  Then I wandered off for half an hour.  Pop the salmon in a roasting tray covered in foil for 10 minutes, then uncover it for the remaining 15 to allow the skin to crisp up.  I also popped in some lime quarters as roasted lime is delicious with fish.

While the fish was cooking I peeled the asparagus and popped that in a foil parcel to roast alongside the salmon, and prepared some boiled and crushed Jersey royals with olive oil.  How simple is that?

Now.  Jamie Oliver has a sweet potato mash that would have worked perfectly with this, but I didn’t have sweet potatoes in my fridge today.  We make this mash regularly, it has a spicy kick, and an amazing tangy savoury contrast via a combination of lime, mango chutney and soya sauce…  Next time I will definitely make this dish using that mash and not the Jersey royals, lovely though they were.  The recipe is in Jamie’s 30 Minute Meals, but I’ve included a link below from the Daily Mail website for ease.

Line your trays with foil, and the whole thing will take you about 15 minutes of prep, and about the same of actual cooking.  Result.

If you want to try the African Volcano marinade or sauce for yourself (and you should!), you can pop along to the Maltby Street Market on a Saturday, or contact Grant directly for a clandestine handing over of bottles…

Jamie’s Sweet Potato Mash

Ingredients:

700g (1lb 9oz) sweet potatoes
A small bunch of fresh coriander
2tbsp mango chutney
Soy sauce
2 limes

Wash the sweet potatoes, trim off any gnarly bits, then stab them a few times with a knife. Put in a large microwave-safe bowl, halve one of the limes and add to the bowl, then cover with a double layer of clingfilm and microwave on full power for 12 minutes, or until cooked through.

Finely chop the coriander on a large wooden chopping board, setting a few leaves aside for the garnish. Add the mango chutney, a good splash of soy sauce, a drizzle of extra virgin olive oil, the juice from ½ a lime and the reserved chopped chilli. Chop and mix everything together on the board.

Get the sweet potatoes out of the microwave and check they are cooked through, then use tongs to squeeze over the juice from the hot lime halves and discard them.

Carefully tip the sweet potatoes on top of the mango chutney mixture and use a knife or masher to chop and mash everything together, including the skins. Season to taste, adding more fresh lime juice if needed.

OLYMPUS DIGITAL CAMERA

OLYMPUS DIGITAL CAMERA

This is last week’s salmon by the way, when I was clearly feeling much more summery and light :0)

June 23, 2012 Iced Berry Souffle

Michel Roux Jr’s Iced Red Berry Soufflé

18b87-screenshot2012-06-23at10-58-28Continuing with my soufflé obsession, here we have an iced soufflé.  Unlike a chilled soufflé which uses gelatine to stabilise the dish, a frozen soufflé can be much lighter because it’s obviously frozen.  The obvious drawback in the average kitchen, I would suggest, is that you need enough free shelf space to sit the dishes for 12 hours.
On the plus side, you can make it in advance, and can actually use up those bags of frozen fruit we all seem to have in our freezer.  Use the space you free up to set the soufflés!  The perfect summer dinner party dish, if we ever get enough sun to truly call it summer…

…

Read More

May 13, 2012 Baking

Heston Blumenthal’s Lemon Tart [Thermomix]

Without doubt the best lemon tart I’ve had, light, just set and vibrant with citrus flavours.

I’ve actually made this recipe several times now, and have gradually refined the process so that now the 11yo actually makes it on her own! The first time I ignored all of the instructions about sticking it into the freezer, and I paid the price. Firstly the dough was far too soft to handle, and broke as I was transferring it to the case. Secondly it went golden far too quickly, and lastly it absolutely fell apart when I mis-handled the tin. Make sure you follow the instructions exactly, use an oven thermometer, your digital thermometer, and if you have one, your laser thermometer too!

Ingredients:

For the pastry:
300g plain flour
150g unsalted butter
½ tsp salt
120g icing sugar
3 large egg yolks
Seeds from ½ vanilla pod
Finely grated zest of ½ lemon
1 egg for the egg wash

Method:

  1. Using a mixer fitted with a paddle attachment, mix the flour, butter and salt on low speed until it becomes a sand like texture (approximately 2-3 minutes). [Actually, I did this by hand]
  2. In the meantime, in a tall container blitz together the icing sugar and egg yolks with a hand blender.
  3. Add the vanilla seeds and lemon zest to the egg yolk mixture and then add to the bowl in the mixer and continue to mix on low speed until fully combined and a very soft dough has formed (approximately 3-5 minutes).
  4. Mould the dough into a flat rectangle and wrap it in clingfilm before placing in the fridge for at least 1 hour. [Did mine overnight, was pretty firm when I rolled it out]
  5. Roll the pastry between two sheets of baking paper to a thickness of 2mm, using two stacked 2 pence coins as guides, then place in the freezer for 30 minutes.
  6. Pre-heat the oven to 190ºC/gas mark 5. Line a 26cm tart tin (2.5cm deep) with the pastry making sure to press it into the edges and leaving the pastry hanging over the edge.
  7. Take a sheet of baking paper and scrunch it up several times to eliminate any sharp edges. Prick the dough with a fork all over the surface. Place the baking paper on top and add enough coins (or baking beans) to fill the casing ¼ of the way up. Place in the preheated oven to bake for approximately 20 minutes or until fully cooked. [Be careful with the coins – once nearly put a watch battery in the oven which someone had dumped in the coin pot – check them!]
  8. In the meantime, mix some of the leftover dough with an egg using a hand blender.
  9. After 20 minutes, remove the baking paper and coins and, using a pastry brush, brush the entire surface of the tart with the dough and egg mixture. This ‘liquid pastry’ will ensure that any holes will be sealed. Return the tart to the oven for an additional 10 minutes.
  10. Remove the tart from the oven and allow to cool completely.
  11. When ready to bake, preheat the oven to 120ºC/gas mark ½. Place the baked pastry case in the oven to warm up.

[If you’re in a massive hurry, you can use this pastry, it comes in a pre-cut disc and is the best commercial pastry I’ve found to date.  This is what the 11yo uses when we’re in a hurry, and it’s pre-rolled to a very suitable thickness]


For the filling:
Finely grated zest and juice of 5 lemons
300ml double cream
390g white caster sugar
9 large eggs
1 large egg yolk
Method:
  1. Put all the filling ingredients into the thermomix and cook for 10 minutes, speed five, at 60ºC – keep a close eye on the temperature, you want to stop it at 60º – do not rely on the thermomix, check it with a digital thermometer!  At this point, strain the mixture through a fine sieve into a jug. With a spoon, remove the bubbles from the surface of the liquid.
  2. Slide the oven rack out a bit, then pour the mixture into the warm pastry case inside the oven. Fill the case to the top, slide the rack carefully back in, and bake the tart for approximately 25 minutes or until the temperature of the filling reaches 70ºC. Allow to cool completely at room temperature.  [Now. You’re supposed to check the temperature with a thermometer – DO NOT TEST THE TEMPERATURE AT THE EDGE OF THE TART! It’s cooked further than the rest of it, and will mark your custard! I’ve now made this tart several times and I actually now test it with a laser thermometer, basing the reading on the centre of the tart – you can also use the ‘wobble test’ – there should still be a noticeable wobble in the centre.]
  3. Just before serving, trim the overhanging pastry by running a sharp knife round the top of the tart tin and discard.
Notes:
The tart had the perfect amount of wobble, and stood upright, but it was still a little too loose for me, in terms of mouth feel.  Unless you’re going to practice it before you make it for something big, do take it a little beyond 70ºC if you want to make sure it’s more firmly set.  Also, Heston says to trim the pastry just before you serve? No, think that’s a bad idea… Firstly, I ended up with little crumbs on my tart, not matter how I held it, because the pastry is so brittle.  Secondly, I managed to break a chunk off mine at the last minute, which then meant that I was unwilling to really trim it up to the fluted edge for fear of a repeat…  Also, the pastry was still too thick… I rolled it much thinner after that.
Make sure your sheet will cover your tin entirely


Rolled to the thickness of two 2p pieces… Eventually…


Remember to test your tart in the centre, not at the edge!


Tart, with nibbled edge and that blooming crack!…
This recipe is in Heston Blumenthal at home cookbook.  You can find it here >

May 12, 2012 Butter

Flavoured Butter [Thermomix]

Of course we all know how to make flavoured butter, but in the Thermomix it’s even more insanely easy! Today I made on flavoured with 1 lime, 1 lemon, and 1 blood orange, then chopped some herbs into it.  Used it to pop under the breast skin of my roast chicken – yum yum.

Look, this is my chicken before it even went in the oven – but it’s also a cornfed chicken, so the skin is already golden :0) Of course forgot to photo it when it came out… But you get the idea.  And yes, I loosen out all of the joints to ensure even cooking, which means I cut off the end of the wing so it doesn’t stick into the breast.

Then I popped all the herbs I hadn’t used this weekend into the Thermomix, put in 1kg of butter, cooked / chopped it at 57ºC for 10 minutes.  Perfect herb butter.

Come on, who wouldn’t want that on their fish? Or a quick version of Omelette aux Fines Herbes?

May 6, 2012 Coconut

Tribute Dish – the Roux Pre-Dessert – panna cotta, jelly and granita… [Thermomix]

At Roux Parliament Square, the pre-dessert is a panna cotta, topped with a jelly, and then a refreshing granita. On the day I went we had a coconut/passion fruit/lime, but I notice from trawling reviews that they also do apple/apple/cucumber (yum!), pineapple/coconut/kaffir lime, strawberry/strawberry/meringue.  So it’s a very successful formula, onto which you can put your own twist.  If you’re going to do this regularly, you’ll need some better glasses than mine, I’m on the lookout for something far prettier, a little like this…

I love dishes like this, you immediately wonder what flavour combinations you’d be able to get away with – is whackier better? Could you go liquorice/pernod/blackberries like some ’80’s throwback drink? How about plum/Prucia liqueur/plum… [I recently discovered Pruci at Gerry’s in Soho, the most amazing stuff! It’s made from the Japanese Ume plum, macerated in grape spirit and aged in French oak barrels – one of the most addictive things I’ve tried in ages!] How about bergamot/apple/elderflower? Earl Grey/Bergamot/Lime? Matcha/coconut/matcha?   

The Roux Panna Cotta

Actually, because I’ve been cooking all weekend, I thought I might try Fruit Tea/Pimms/Cosmopolitan Mixer and massively cheat.  That may be a bad idea, but the grand thing about a thermomix is that it will only take 20 mins or so of prep to try the whole thing out – so why not?

Fruit Tea Panna Cotta (adapted from the Daily Mail). 
3 gelatine leaves
200ml semi-skimmed milk
300ml double cream
50g caster sugar
2 fruit tea bags

A quick adaptation of the standard Thermomix panna cotta recipe gives us a combined technique of…

  1. Soak the gelatine in a bowl of cold water for 5 minutes. 
  2. Meanwhile, put the milk, cream and caster sugar into the thermomix and cook for 6 minutes / 80ºC / Speed 3
  3. Drain the gelatine and squeeze to remove the excess water. Add to the thermomix and stir for 3 minutes / speed 3 to dissolve the gelatine.
  4. Tip into a bowl, then add the tea bags and leave to infuse for 20 minutes.
  5. Remove the tea bags, pour the mixture into your glasses and leave to chill in the fridge for at least 4 hours or until set – there should be a slight wobble in the centre.
Tips: Now, getting this panna cotta neatly into the glass is going to drive you insane! Make sure you know where your funnel is, and that it fits your glass, before you begin!  I ended up using a sauce bottle, you know the kind, for putting little dots around the plate – still ended up with the odd splash…
Pimms Jelly  (adapted from the Daily Mail)
50g caster sugar
50ml water
Squeeze of lemon juice
2 gelatine leaves
100ml  Pimm’s
100ml  lemonade

Not going to do this in the thermomix.  

  1. Put the sugar, water and lemon juice into a saucepan and heat gently until dissolved. Simmer for 5 minutes. 
  2. Place the gelatine in a shallow bowl, cover with water and soak for 4 minutes. Squeeze out the excess water, then add the gelatine to the pan to dissolve. 
  3. Cool, then add the Pimm’s and lemonade. Cool at room temperature. 

Before you put the jelly onto the panna cotta, make sure it is completely set!  From past experience I’ve found it best to put a tiny layer of jelly on first, allow this one to set, then add the rest of your jelly layer – this gives you a clear jelly.  I know this picture has a frosted glass, it’s just come out of the fridge.  But look at the jelly layer – you can just make out the first, slightly milky layer, and then the clearer jelly on top. Do take the time to do this step properly if you’re doing it for guests – but hey – my kids didn’t even look at it!

Cosmopolitan Mixer Granita:
100ml Funkin passionfruit syrup
2 pouches of Funkin Cosmopolitan Mixer
Juice of 1/2 lime
Ice cubes to blend into a granita
I’m going to cheat, because I can :0)  Put the juicy bits into the thermomix and add enough ice cubes to blend into a granita.  Make sure you really get a fine grain, as the flavour is much stronger in a finer grain than a really gravelly granita (if you’re using a thermomix that is – will not apply to a normal granita if you make it in the traditional way, as your flavour is your ice!).  As usual, mine is far too ungainly, but the flavour is there. I’m going to find a more appropriate glass, and cut back on the quantity and roughness of the granita.  Having said that, the panna cotta is flipping perfect! Absolutely the right amount of wobble, smooth, creamy, so I’ll use those ratios again!  Think I’d be more inclined too to make a proper granita, the thermomix one is great if your in a hurry, but the texture is difficult to gauge like that.


May 5, 2012 Pierre Koffman

Pierre Koffman’s Pistachio Souffle [Thermomix]

Pistachio soufflé with hibiscus flower ice-cream

We all know I love a soufflé, but now I have a thermomix I’m going through my recipes seeing how I can adapt them accordingly.  This Pierre Koffman soufflé was an absolute doodle in the thermo, the creme patisserie is now so simple to do, that soufflés are now a very real option for every day eating (though perhaps not to be recommended!).  It also means that it’s a very simple and viable option for a dinner party – the creme patisserie has to be made in advance anyway, but whilst your thermo gets on with that, you can be prepping the rest of your meal!  Watch this space, soufflés are going to be flooding out of my kitchen…

Ingredients


Creme Pattiserie:
½ vanilla pod
100g caster sugar
500ml milk

120g egg yolks

50g corn flour
40g pistachio paste

For lining the dish:
25g butter, softened
25g caster sugar

For the Meringue:
4 egg whites (let’s say 140g)
1 tbsp caster sugar
Icing sugar to serve.
Preparation:
Grind together the vanilla pod and caster sugar until smooth.  Mix in the remaining creme patisserie ingredients and cook for 7 minutes at 90ºC, speed 4 until smooth.  Put in a bowl to cool and cover with cling film and cool rapidly.
Generously butter 4 individual soufflé dishes. Put the grated chocolate inside and rotate the moulds so that the chocolate completely covers the inside, sticking to the softened butter. 
In the thermomix, beat the egg whites until firm, add the tablespoon of caster sugar and whisk until stiff. Add a small quantity of the whites to the pistachio mix to soften it, then fold in the rest of the egg whites and pour into the soufflé dishes.
Bake in a hot oven 240°C/ 475°F/ gas mark 9 for 15 minutes or until well risen. (If you’re making large individual ones, 15 minutes will leave them baveuse, which is my preference anyway – if you want them slightly further along than that, you’ll need to watch the oven like a hawk.)
To serve, dust the top with icing sugar and serve with ice cream of your choice.
Serves 4

Additional notes…

I know Pierre recommends the chocolate flake lined moulds in the original recipe, but I always find they go a strange colour.  This time have melted some of the pistachio paste into the butter before double lining the moulds.  I realise these seem very heavily lined, but having recently seen Alan Murchison line his moulds for an apple and cinnamon soufflé, I’m now trying out this heavier method.  It seems to work well, and perhaps offers more ‘structure’ to the soufflé?

And yes Bruno, I know that creme patt doesn’t look smooth, but I was just forking it out :0)

I use the Sevarome purees, fantastic things, though jolly expensive.  There are lots of recipes to make your own on-line, and now I have a thermomix, I may just do that :0)

May 5, 2012 Hibiscus Flower

Hibiscus Flower Ice-Cream [Thermomix]

Having made the lavender ice-cream so easily, I thought I should see what else I could do with my thermomix!  This time hibiscus flower ice-cream.

Ingredients
1 jar of wild hibiscus flowers in syrup (140g?)
280ml whole milk
290ml double cream 
5 large organic egg yolks
100g caster sugar 
1 Tbsp hibiscus flower tea liquer
Having adjusted down the liquid ingredients a little to accommodate the hibiscus flower quantities, I pulsed the hibiscus flowers down to a puree before adding all of the other ingredients.  Then I cooked it at 80ºC for 10 minutes, speed 5, checking it after 8 minutes to see if it had reached 80ºC.  Leave it to cool, then pop into your ice-cream maker until it reaches the desired consistency.  The ice-cream will have a strange grey-pink colour, so I boosted mine with a tiny bit of red colour paste, but it tastes yummy all the same.  Thought I might serve it with a pistachio soufflé…

Wild hibiscus flower ice-cream

December 16, 2011 Chocolate

Michel Roux’s Chocolate Soufflé [also for Thermomix]

Chocolate souffle – the ultimate hit of chocolate, but without the guilty stodge… You can almost convince yourself that this doesn’t count…  This is the joy of soufflés, they satisfy without making you feel as though you’ve eaten a whole tart…  Would be delicious served with pistachio ice-cream…

Ingredients
40g softened butter, to grease dishes
40g caster sugar, to coat dishes
50g cocoa powder, sifted
240g plain chocolate (70% cocoa solids), chopped into small pieces
10 medium egg whites (this is the equivalent of 330g of egg white)
40g caster sugar

For the pastry cream:
350ml milk
80g caster sugar
4 medium egg yolks
30g plain flour

To finish:
icing sugar, to dust


Method:

  • Butter four individual 10cm soufflé dishes and coat the insides with the sugar.
  • To make the pastry cream, put the milk and two-thirds of the sugar in a small pan, and bring slowly to the boil. Whisk the egg yolks and remaining sugar in a bowl to a ribbon consistency, then incorporate the flour. Pour the hot milk on to the yolks, stirring continuously with a whisk. Return to the pan and whisk over a low heat for 1 minute, then pour into a bowl, cover with cling-film, and cool slightly.
  • Preheat the oven to 200°C/Gas 6 and put a baking sheet inside to heat.  Measure 280g of the pastry cream and delicately mix in the cocoa power and the chopped chocolate using a whisk.  (Keep the rest of the pastry cream for another use.)
  • Beat the egg whites to a thick foam, then add the 40g sugar and continue to beat until the form soft peaks. Fold one-third into the pastry cream using a whisk, then delicately fold in the rest with a large spoon; the mixture will be fairly loose.
  • Divide the mixture between the soufflé dishes, to come level with the rim. Stand on the hot baking sheet and cook for 10 minutes. Serve the soufflés as soon as they come out of the oven on warm plates, dusting with a little icing sugar.

Thermomix Version:
  • Butter four individual 10cm soufflé dishes and coat the insides with the sugar.
  • Chop your chocolate in the Thermo bowl and set aside.
  • Put all the pastry cream ingredients into the bowl and cook for 7 minutes at 90C, speed 4. Give it a quick whizz at the end to ensure it’s smooth, then pour into a bowl and cover with cling film until it’s cool.  This stops a skin from forming.  You can also leave the Thermo on stir mode, until you’re ready to use it.
  • Preheat the oven to 200°C/Gas 6 and put a baking sheet inside to heat.  Measure 280g of the pastry cream and delicately mix in the cocoa power and the chopped chocolate using a whisk.  (Keep the rest of the pastry cream for another use.)
  • Put the egg whites into a clean Thermomix bowl, and beat the egg whites to a thick foam on Speed 4 / 6 minutes before adding the sugar.  Whisk for a further 3 minutes until the sugar is fully dissolved. Fold one-third into the pastry cream using a whisk, then delicately fold in the rest with a large spoon; the mixture will be fairly loose.
  • Divide the mixture between the soufflé dishes, to come level with the rim. Stand on the hot baking sheet and cook for 10 minutes. (I think this should be closer to 13 minutes, but that might be the size of my soufflé dishes!)
  • Serve the soufflés as soon as they come out of the oven on warm plates, dusting with a little icing sugar.

Soufflé Tips:

  • One of the key factors in achieving a perfect soufflé is to ensure that all of the ingredients are at the same temperature.  If you’ve chilled the creme patisserie, bring it back to room temperature before you make the soufflés
  • I now double line my soufflé dishes – let’s face it – it takes no more time and gives a more consistent result.  You could use caster sugar on the first layer, and grated chocolate on the second, if you’re prefer.  I’ve found the sugar layer is best as the first layer as the granules allow the soufflé to elevate evenly.  Chill the dishes in-between lining them
  • When filling your dishes, fill roughly half way first, and rap the dishes down onto a board to ensure that the mixture is evenly distributed over the base of the dish – this ensures an even rise… Air pockets can throw the soufflé off track and make it shoot out in strange directions
  • Always, always, smooth the top of your soufflé with a palette knife to ensure a flat surface.  Then take your thumb and run it around the inside edge of the soufflé dish – this frees the mixture and allows it to soar!


  • « Go to Previous Page
  • Go to page 1
  • Interim pages omitted …
  • Go to page 7
  • Go to page 8
  • Go to page 9

Primary Sidebar

Categories

  • ▼Recipe
    • Baking
    • Breakfast
    • Cheese
    • Dessert
    • Eggs
    • Fish
    • Heston Blumenthal
    • Italian
    • Jamie Oliver
    • Marcus Wareing
    • Mediterranean
    • Pasta
    • Patisserie
    • Risotto
    • Smoothie
    • Sous Vide
    • Squash
    • Thermomix
    • Vegan
    • Vegetarian
    • Yotam Ottolenghi

Categories

  • ▼Book Review
    • ⭐️⭐️⭐️⭐️
    • ⭐️⭐️⭐️⭐️⭐️
    • Baking
    • Meat
    • Patisserie
    • Restaurant Cookbook
    • Vegetarian
    • Yotam Ottolenghi

Categories

  • ▼Restaurant
    • 1 Michelin Star
    • 2 Michelin Stars
    • 3 Michelin Stars
    • British
    • Fish
    • French
    • Italian
    • Japanese
    • Peruvian

Categories

  • 101 Cookbooks (1)
  • 3 Michelin Stars (1)
  • Advert (1)
  • Alan Murchison (2)
  • Alba Truffle (1)
  • Almond (1)
  • Angela Hartnett (1)
  • Angler (2)
  • Art Journal (2)
  • Artichokes (1)
  • Axis (1)
  • Azelia’s Kitchen (1)
  • Baking (9)
  • Baldwin (1)
  • Bara Brith (1)
  • Basics (1)
  • Beef (1)
  • Beetroot (2)
  • Ben Spalding (2)
  • Blackberry Soufflé (1)
  • Blackening Spice (1)
  • Blood Oranges (4)
  • ►Book Review (75)
    • Baking (10)
    • Meat (1)
    • Patisserie (6)
    • Restaurant Cookbook (3)
    • Vegetarian (3)
    • Yotam Ottolenghi (2)
    • ⭐️⭐️⭐️⭐️ (16)
    • ⭐️⭐️⭐️⭐️⭐️ (8)
  • Bread (3)
  • Breakfast (1)
  • Breakfast Tart (1)
  • brioche (1)
  • Brockhall Farm (1)
  • Bruschetta (1)
  • Bryn Williams (1)
  • Burrata (1)
  • Butter (1)
  • Buttercream (1)
  • Camembert (1)
  • Canapes (1)
  • caraway (2)
  • Casserole (2)
  • Chelsea Buns (1)
  • Chestnuts (1)
  • Chicken (3)
  • Chickpea (1)
  • Chocolate (4)
  • Chocolate Fondant (1)
  • Christmas (1)
  • Ciabatta (1)
  • Cinnamon (1)
  • Citrus (1)
  • Citrus Drizzle Cake (1)
  • Clams (1)
  • Coconut (2)
  • Coconut Milk (1)
  • Confectionary (1)
  • Creme Patisserie (1)
  • Dan Lepard (1)
  • Dessert (1)
  • detox (1)
  • Doughnuts (1)
  • Dried Fruit (1)
  • Drop Scones (1)
  • Ducasse (1)
  • Duck Egg (1)
  • Eggs (3)
  • El Bulli (1)
  • en Cocotte (1)
  • Epi (1)
  • Eric Treuille (1)
  • fennel (2)
  • Fettuccini (1)
  • Fish (1)
  • FrontPage (28)
  • Fruit Tea (1)
  • Glutamate (1)
  • Goat’s Cheese (1)
  • Gỏi Cuốn (1)
  • Granita (1)
  • Herbs (1)
  • Heritage Tomato (1)
  • Hibiscus Flower (1)
  • Hope and Greenwood (1)
  • Ice-Cream (3)
  • Iced Berry Souffle (1)
  • Icing (1)
  • Italian (1)
  • James Martin (1)
  • Jelly (1)
  • Journal (9)
  • Karen Scott (1)
  • King Oyster Mushroom (3)
  • Kummel (1)
  • L’Ortolan (1)
  • Lamb (1)
  • Lavender (1)
  • Laverstoke Park (1)
  • Lemon (3)
  • Lemon Drizzle Cake (1)
  • Lemon Grass (1)
  • Lemon Meringue Tart (1)
  • Lemon Poppy Seed Muffins (1)
  • Lentils (1)
  • Limewood (1)
  • Liquorice (1)
  • Liquorice Ice-Cream (1)
  • Lobster (3)
  • Lucas Hollweg (1)
  • Luke Holder (1)
  • Macarons (1)
  • Mango (1)
  • Marcus Wareing (1)
  • Mark Lloyd (1)
  • Market (1)
  • Mary Berry (1)
  • Meringue (1)
  • Michael Moore (1)
  • Michel Roux (3)
  • Mint (1)
  • Mister Truffle (2)
  • Modernist Cuisine at Home (1)
  • Moroccan (1)
  • Muffins (3)
  • Murano (1)
  • Mushroom (1)
  • Ollie Dabbous (1)
  • Ollie Fararr (1)
  • Ox cheek (1)
  • Palourde Clams (1)
  • Pancetta (1)
  • Panna Cotta (1)
  • Parmesan (1)
  • Passion Fruit (3)
  • Pasta (1)
  • Patisserie (1)
  • Paul Heathcote (1)
  • Pea (1)
  • Peter Reinhart (1)
  • Petit Fours (1)
  • Philip Howard (1)
  • Pierre Koffman (1)
  • Pierre Koffmann (1)
  • Pimms (1)
  • Pistachio (1)
  • Pistachio Soufflé (2)
  • Pistacho (1)
  • Pork (1)
  • Prawn (1)
  • Quiche (1)
  • Rachel Allen’s 30 Day Muffins (1)
  • Raspberry (2)
  • Ravioli (1)
  • Raymond Blanc (1)
  • ▼Recipe (192)
    • Baking (17)
    • Breakfast (2)
    • Cheese (1)
    • Dessert (7)
    • Eggs (3)
    • Fish (2)
    • Heston Blumenthal (5)
    • Italian (3)
    • Jamie Oliver (1)
    • Marcus Wareing (2)
    • Mediterranean (3)
    • Pasta (3)
    • Patisserie (7)
    • Risotto (1)
    • Smoothie (1)
    • Sous Vide (1)
    • Squash (1)
    • Thermomix (19)
    • Vegan (1)
    • Vegetarian (20)
    • Yotam Ottolenghi (2)
  • ►Restaurant (124)
    • 1 Michelin Star (17)
    • 2 Michelin Stars (9)
    • 3 Michelin Stars (3)
    • British (19)
    • Fish (4)
    • French (4)
    • Italian (3)
    • Japanese (1)
    • Peruvian (1)
  • Richard Bertinet (1)
  • Risotto (1)
  • Roganic (1)
  • Rolls (1)
  • Roux (3)
  • salad (2)
  • Salmon (2)
  • Sardinian Cookery (1)
  • Scandiliscious (1)
  • Sea Trout (1)
  • Sherbet Dab (1)
  • Signe Johansen (1)
  • Silvana de Soissons (1)
  • Simon Rogan (1)
  • Snail Caviar (1)
  • Soda Bread (1)
  • Sorbet (1)
  • Soufflé (11)
  • Soup (1)
  • Sous Vide (2)
  • Spice (1)
  • Stew (1)
  • Stuffing (1)
  • Sugar Baby (1)
  • Sugarwork (1)
  • Sumosan (1)
  • Supper (1)
  • Sweetcorn (1)
  • Sweetcorn Fritters (1)
  • Tamarillo’s (1)
  • Texturas Fizzy (1)
  • Thai (2)
  • The Bertinet Kitchen (1)
  • The Square (1)
  • Thermomix (10)
  • Toffe Fudge Muffins (1)
  • Tom Kitchin (1)
  • Tomato Bread (1)
  • Tony Fleming (4)
  • Tribute Dish (2)
  • Truffle (1)
  • Truffles (6)
  • Umami (1)
  • Uncategorized (1)
  • Vanilla (2)
  • Vegan (1)
  • Vegetables (1)
  • Vegetarian (3)
  • Verveine (1)
  • Vietname Summer Roll (1)
  • Watermelon (1)
  • William Curley (1)
  • yeasted dough (1)

I’m passionate about food, its provenance and its sustainability. As a technical cook, I like to see what’s happening in the kitchens of Michelin starred restaurants, but you’re just as likely to find me at home making sourdough. You can find some of my recipes in In The Mix 2, an award-winning Thermomix cookbook.

I’m also truly blessed – I can open my fridge at any time and know it’s crammed with all manner of loveliness – but that’s not the case for everyone. There are people all around me in the UK who rely on food banks to feed their kids, and themselves, and every box of cereal or teabag makes a difference. You can donate food to your local food bank, or time, or money, and if you want more information the best starting place is http://www.trusselltrust.org.

You can also find me here:

Foodies100 Index of UK Food BlogsFoodies100
The Renaissance Epicurean... London restaurants
Top Food BlogsUK Food Bloggers Association

The Eleven Madison Park Granola

Copyright © 2025 · Cookd Pro Theme On Genesis Framework · WordPress · Log in

Nourished
  • Home
  • Recipes
  • Book Reviews
  • Restaurants
  • Journal
  • About