• Skip to primary navigation
  • Skip to main content
  • Skip to primary sidebar

Nourished

  • Home
  • Recipes
  • Book Reviews
  • Restaurants
    • 3 Michelin Stars
    • 2 Michelin Stars
    • 1 Michelin Star
  • Journal
    • Art Journal
    • The Renaissance Diary
  • About
    • Contact Me
    • Instagram
    • Loves
    • Suppliers
    • Masterchef Links

Vegetarian

October 12, 2014 Baking

Tamarillo Tart Tatin

OLYMPUS DIGITAL CAMERA

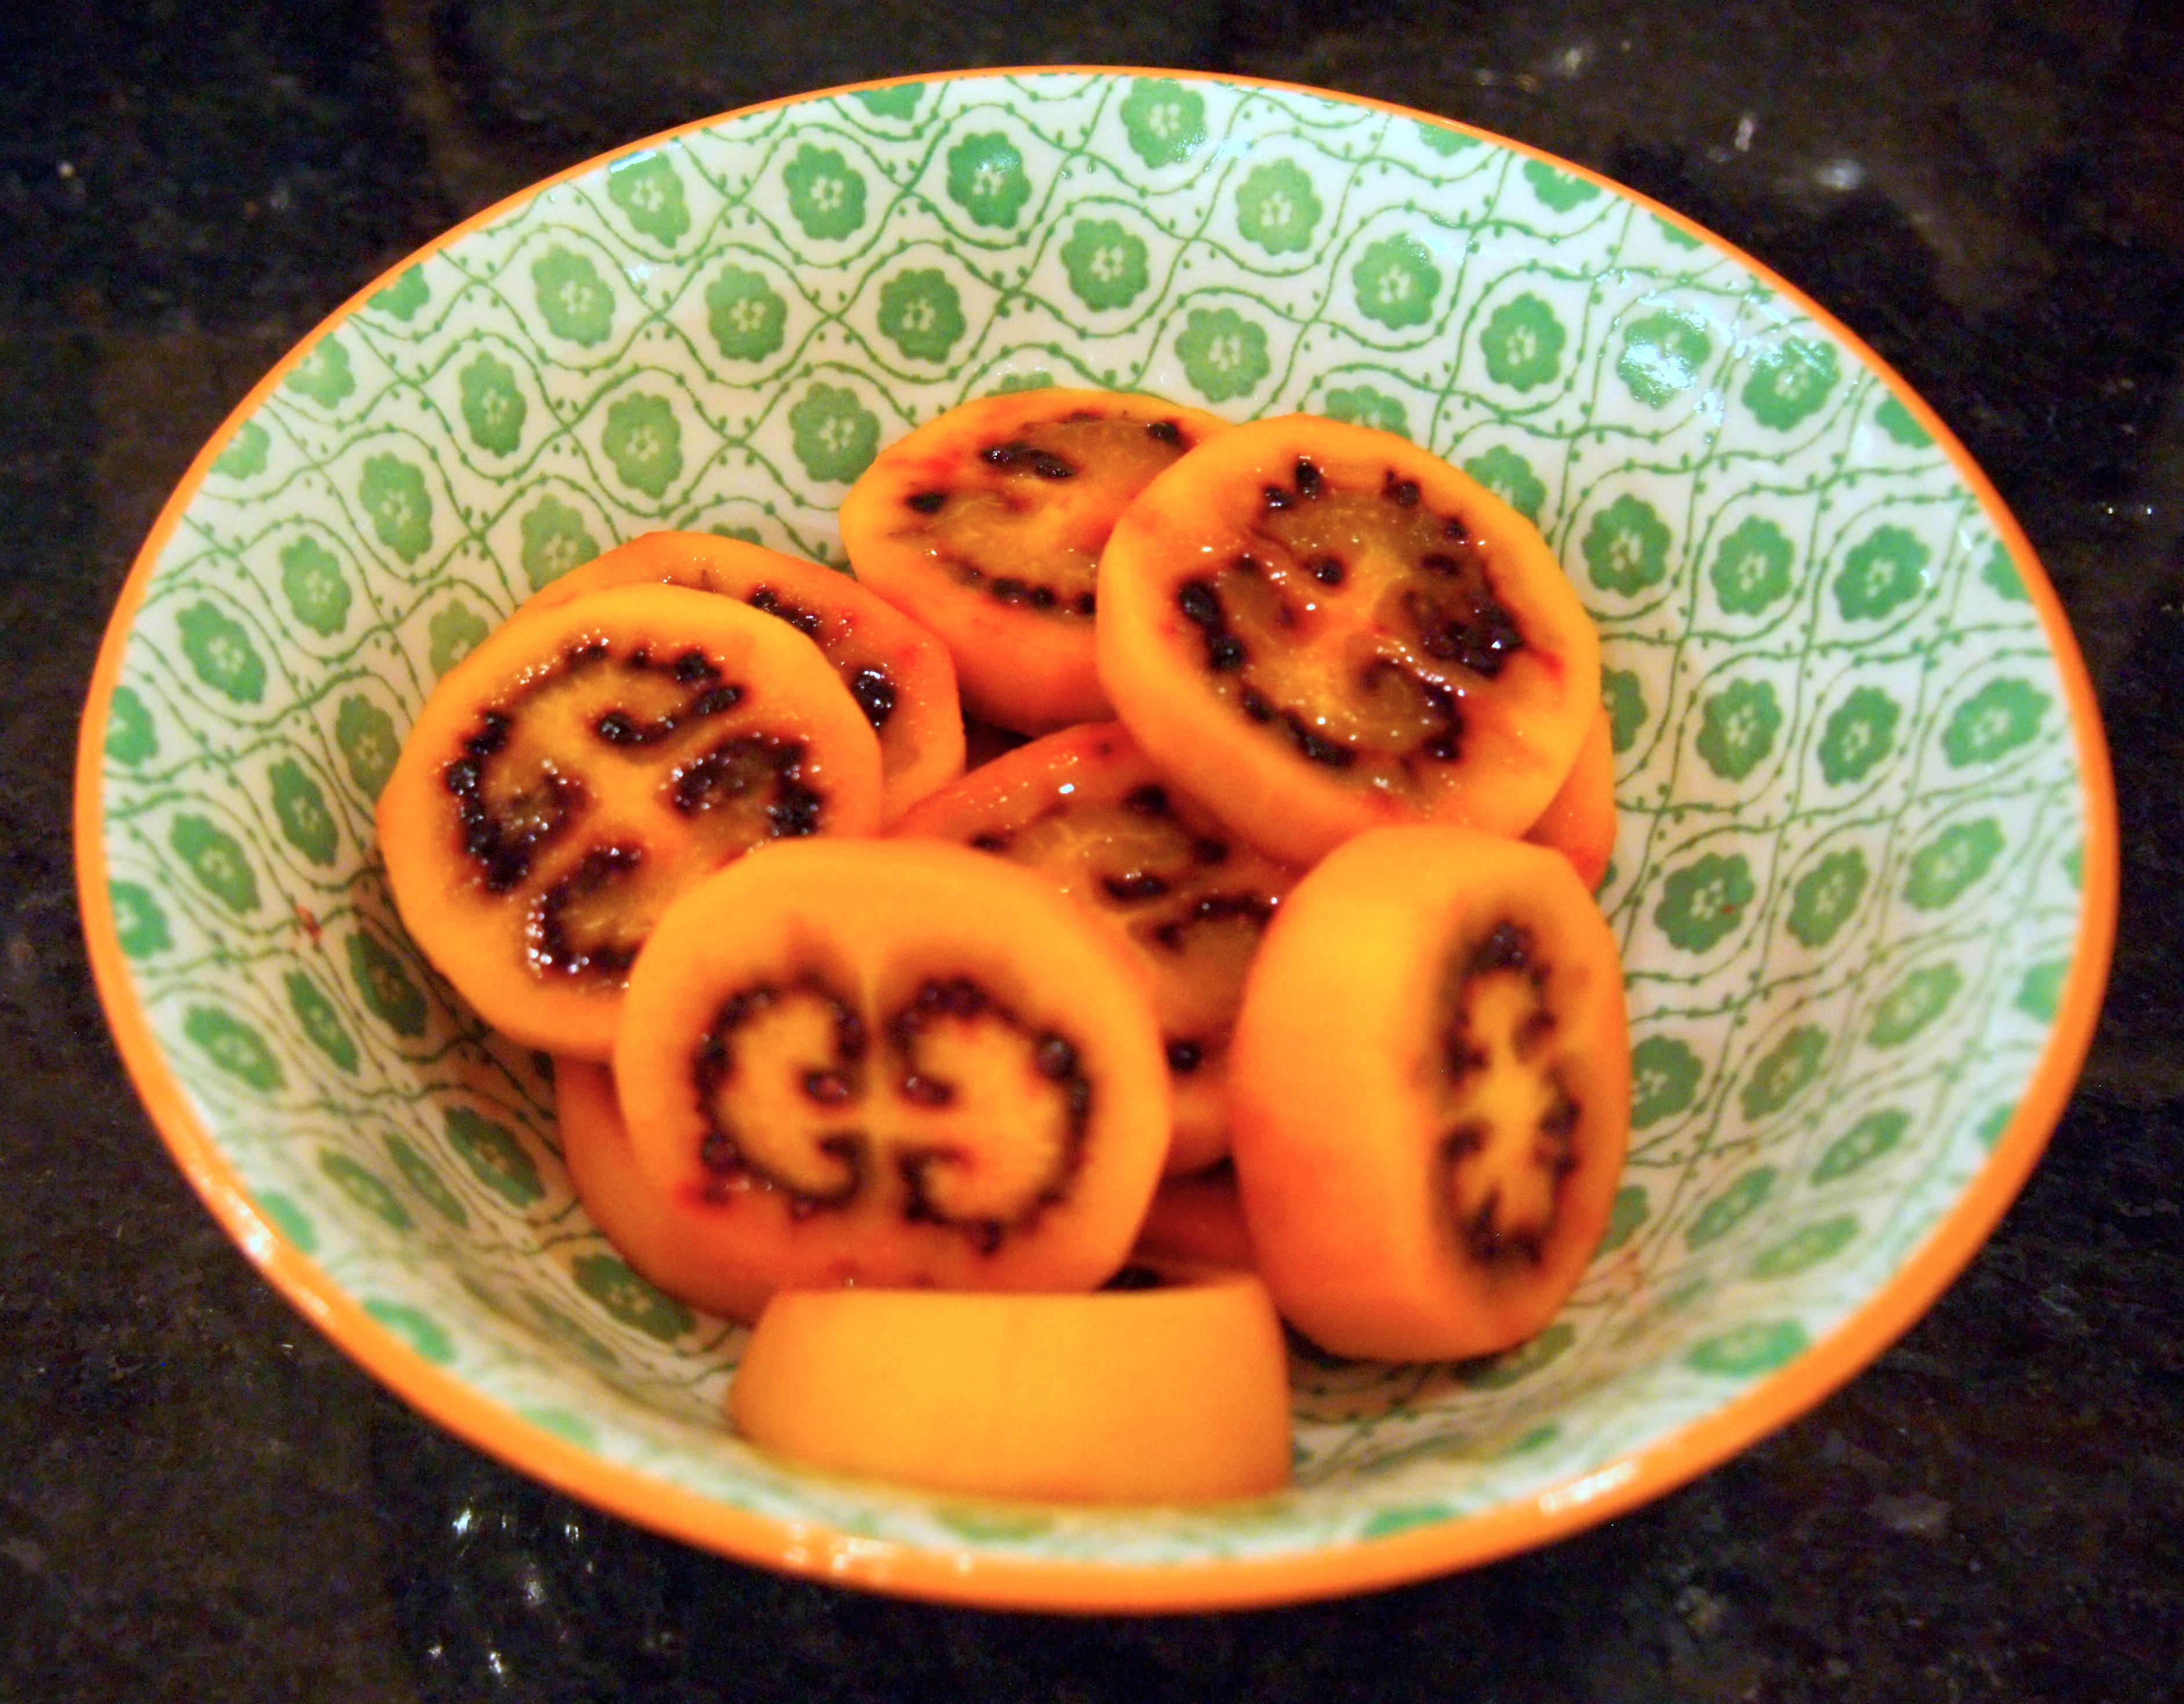
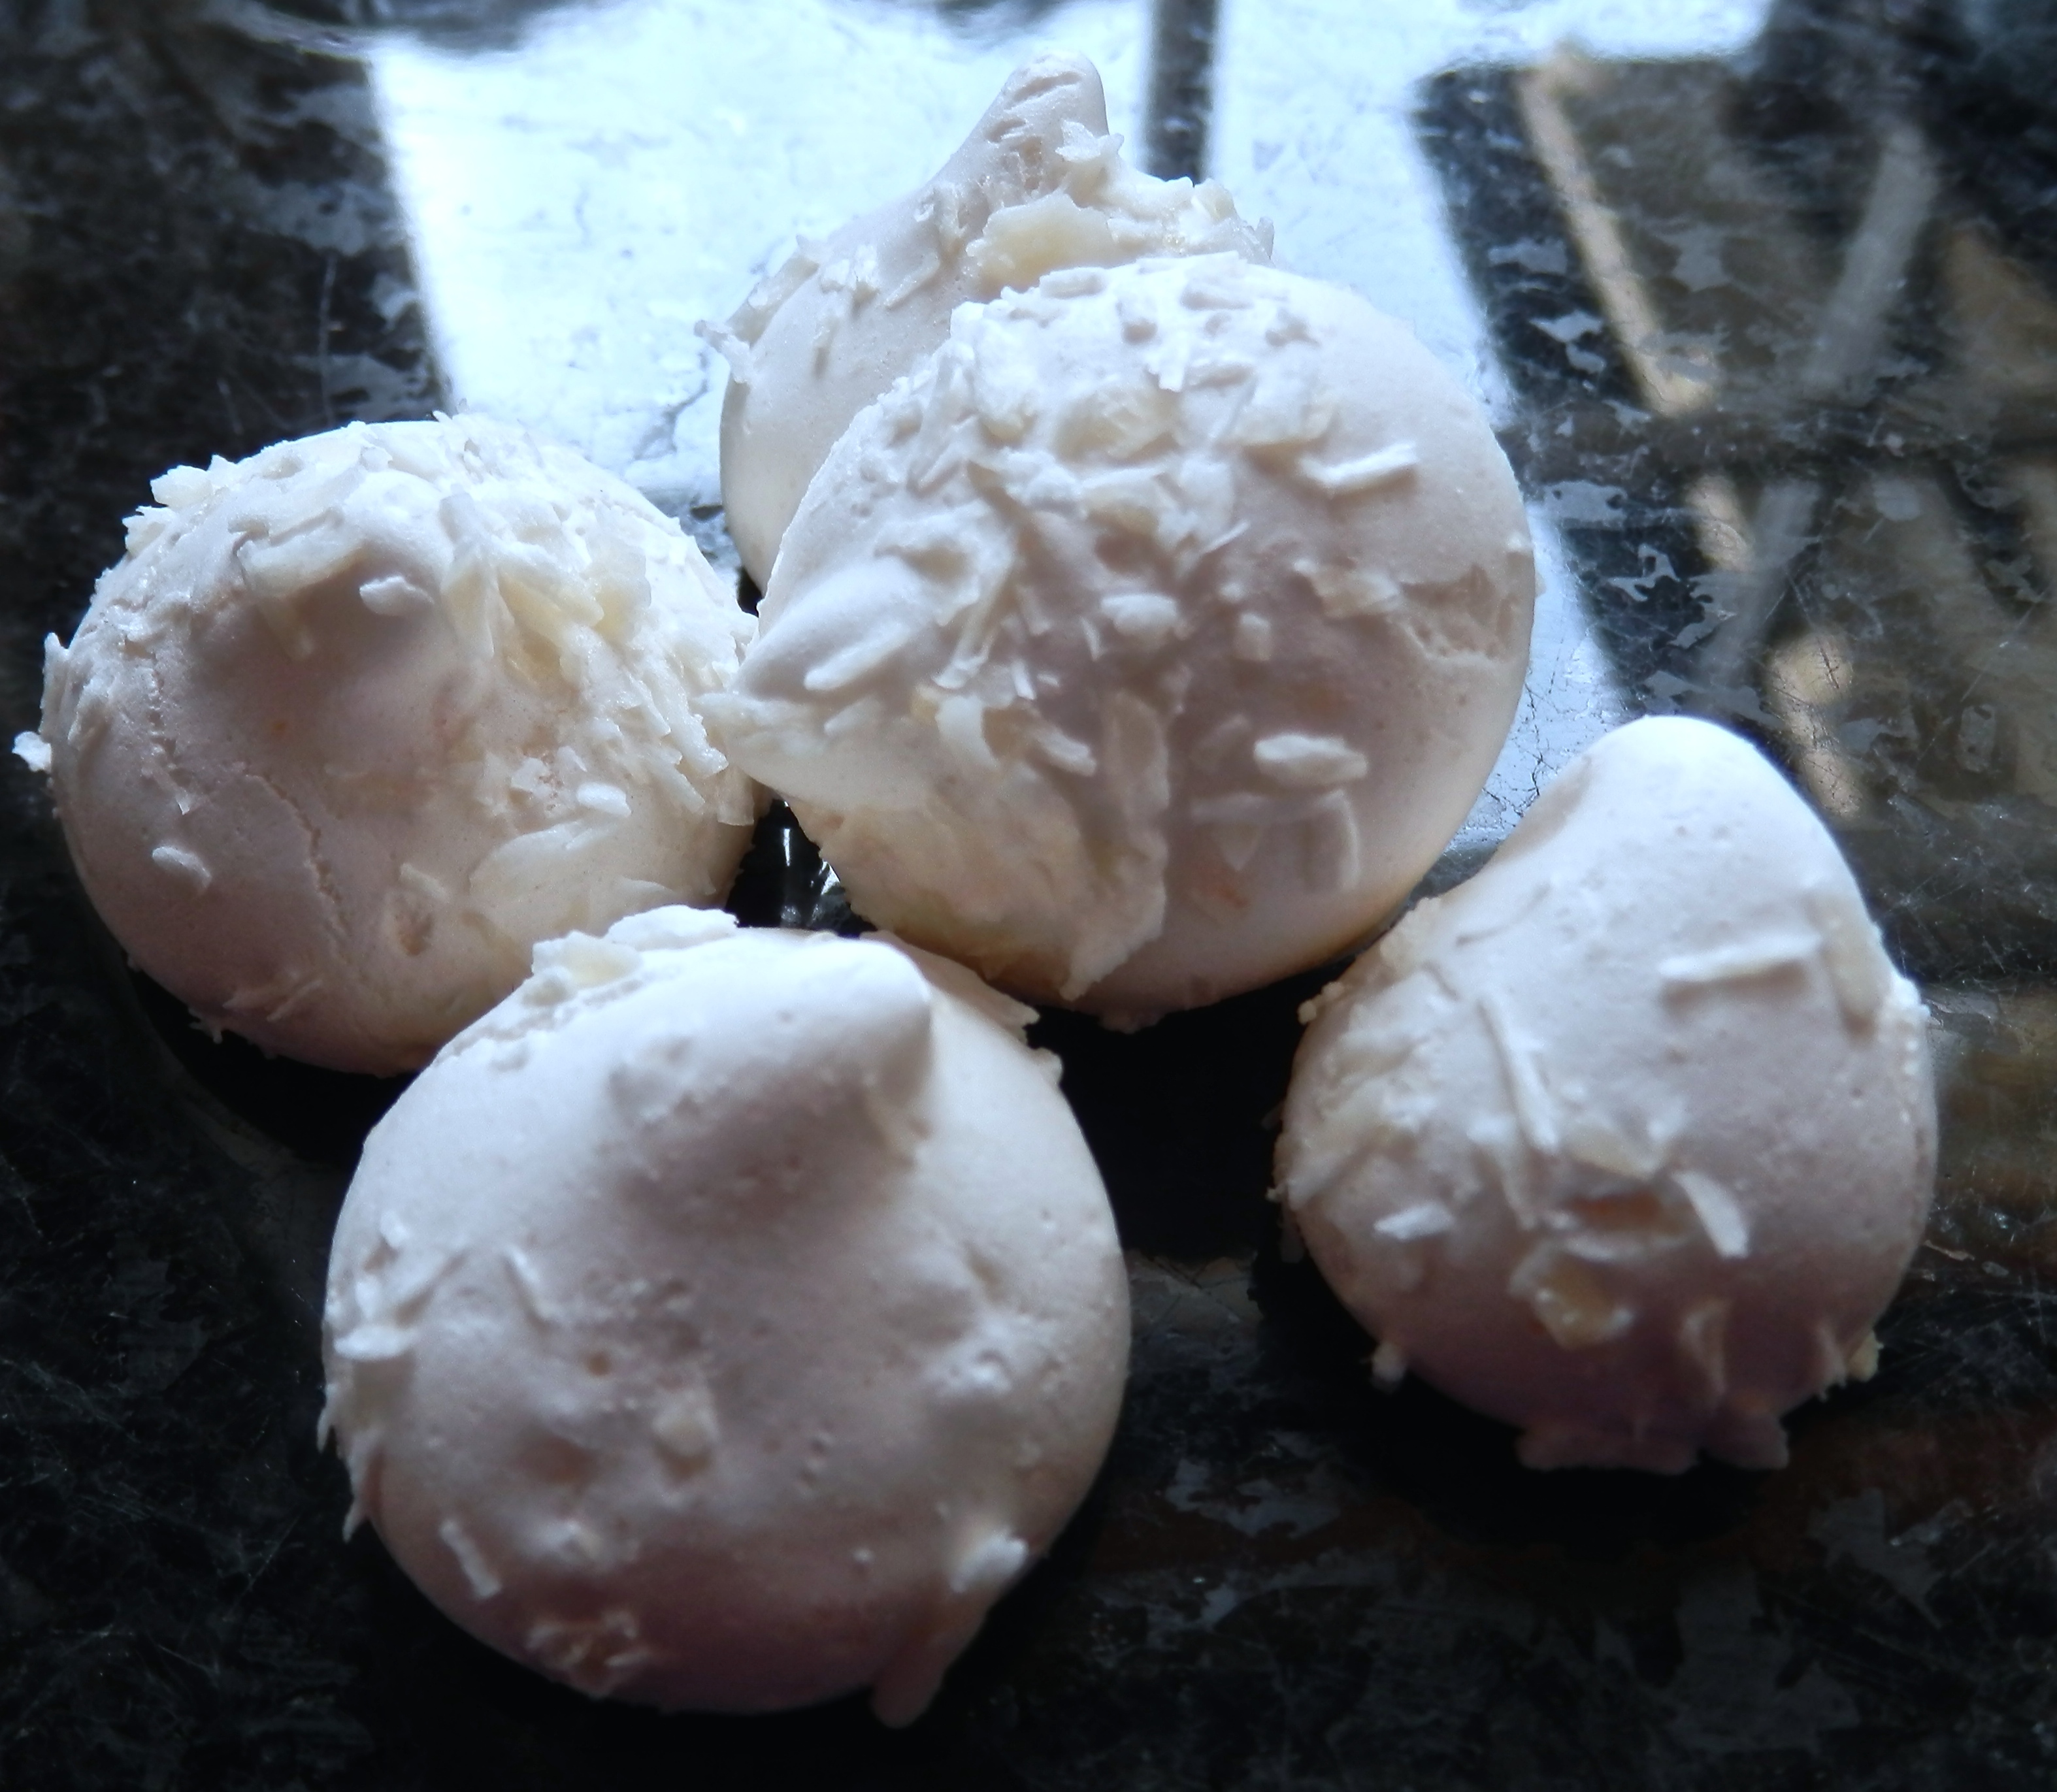
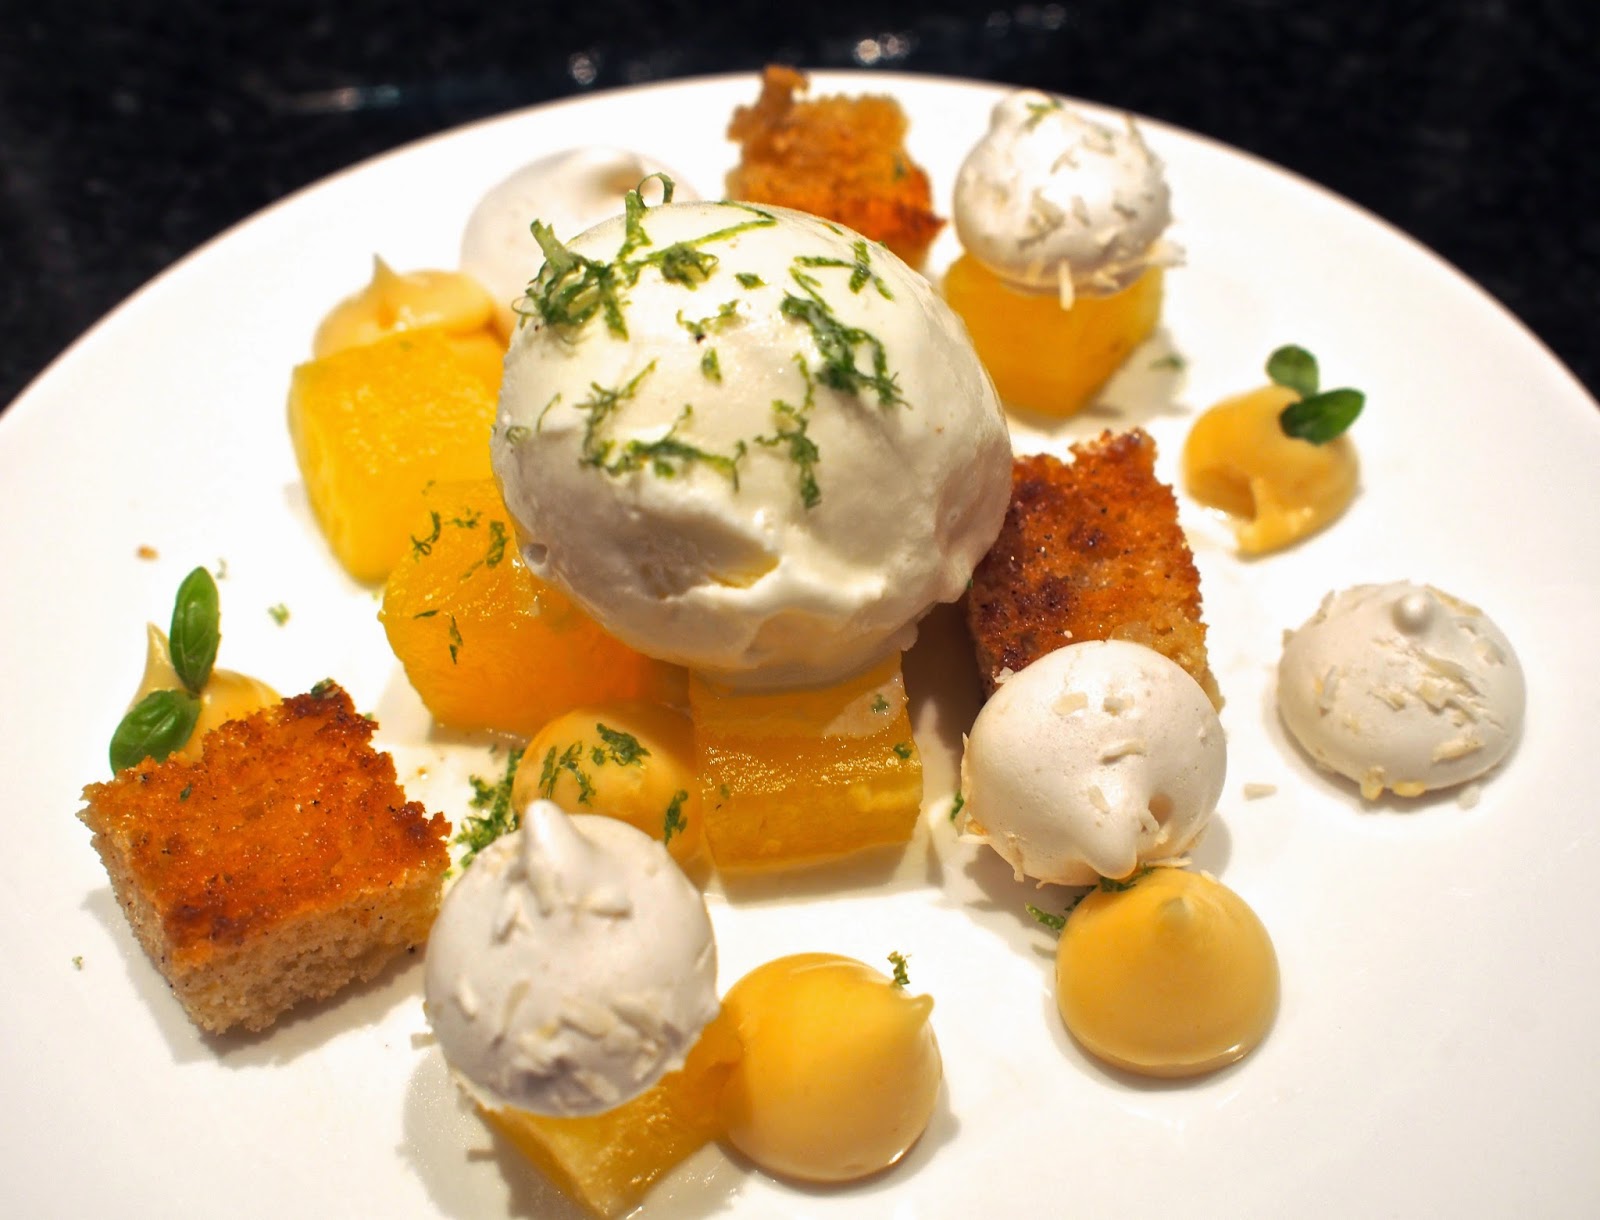
I’m crazy about tamarillos, but since I’ve tried them cooked, I’m coming up with all manner of ways of using them…  Their high glutamate content particularly suits the roasting or caramelisation process, which makes me think of tart tatins.  I’m not crazy about the apple version, which can be very sweet, but I have made plum and tomato versions quite often.  Tamarillos seem like the perfect variation, especially as their tartness lends itself to the process.

…

Read More

October 11, 2014 Bruschetta

Heritage Tomato Bruschetta

Heritage tomatoes have so much more flavour than the industrial variety – sure  they may be a funny shape, or sometimes a little ugly, but beauty occurs in the mouth too.  I’ve been reading an amazing book about umami recently, which is why my timeline is flooded with things like tamarillos, but I wanted to use tomatoes too.  Both have high levels of glutamate, which is a key component in umami – probably explaining why so many of us like them.  By far the most popular tomato dish in our house is the simplest, but with perfectly good ingredients, simplicity really is key.

I’m not really going to give you any more than a cursory recipe – as that’s all it requires.  Cut a ciabatta in half lengthways, and pop it into a hot oven (200ºC or so), and let it become golden.  As you remove it from the oven, smear it with a whole clove of garlic, the roughness of the ciabatta will gate it over the surface.  Concentrate particularly on the crusty edges.  Chop your tomatoes by hand, not in a machine, and include some herbs.

OLYMPUS DIGITAL CAMERA OLYMPUS DIGITAL CAMERA OLYMPUS DIGITAL CAMERA OLYMPUS DIGITAL CAMERA

October 1, 2014 Recipe

Cumin spiced carrot salad

I thought it might be fun to make Indian food for our inaugural book club meeting. Being a handful of girls, it clearly had to include a salad – but I suddenly realised that actually, I’m not sure what an Indian salad looks like…  Having never been to India, I haven’t see any first-hand, and I’ve never seen anything beyond raita, or onion salad on an Indian restaurant menu.  {I even looked at the menu on the Benares website, just to make sure I hadn’t forgotten any} Most vegetarian dishes tend to be cooked rather than raw…

So the thought process began somewhat in reverse: which spices could I use to marry to the other Indian dishes, and which salad ingredients might marry to those spices.

After my intense cardamom overload of late, I thought I’d switch to cumin seeds, which led me to combining them with carrots.  Cumin, caraway, parsley, and carrots are all members of the same Apiaceae family, and compliment each other well.  The rest, as they say, is history… I kept some in the fridge until the following day, and it was just as refreshing then…

Ingredients:
8 large carrots, sliced into shards (or lengthways)
1 tablespoon of cumin seeds
1 teaspoon of caraway seeds
3 tablespoons of white balsamic vinegar
8 spring onions, finely sliced
½ cucumber, peeled, deseeded, and cut into slices
handful of parsley, finely chopped
salt and pepper to season

Method:
Combine all of the ingredients together and leave to meld – you need to leave it for at least an hour to allow the cumin seeds and carrot to soften a little. You will see my bowl is only half full – I put some additional salad leaves into mine, but clearly not while it was ‘curing’, or it would have wilted the leaves

cumin carrot salad

cumin carrot salad

September 28, 2014 Burrata

Burrata, Tamarillo and Fennel Pollen…

OLYMPUS DIGITAL CAMERAI have a whole post on the delights of tamarillo’s, so I shan’t bore you again, except to say that they must be in your top 100 foods to try before you die… Trust me – they’re stunning…  This particular dish makes the most of the tamarillo’s ridiculously high umami levels, and pairs it with silky smooth, creamy burrata.

For those who’ve not tried it, burrata is a combination of mozzarella and cream, and must be eaten as fresh as possible – make sure you buy when you intend to eat it.  The chef who created this dish is Ollie Dabbous, of the eponymous Dabbous restaurant, and is from his long-awaited cookbook.  If you can’t get a table at the restaurant, at least you can try his food at home…

With a dish this simple, it’s crucial that you buy the best possible ingredients.

Ingredients:
2 large tamarillos
25ml extra virgin olive oil
25g caster sugar

Method:

  • Score the base of each tamarillo with a cross
  • Blanch for 5 seconds in a pan of rapidly boiling water, then drain and plunge into a bowl of iced water
  • Peel, then cut lengthways into quarters
  • Pour the olive oil into a baking tray and sprinkle over half the sugar
  • Place the tamarillos in the tray cut-side down and scatter over the remaining sugar
  • Place in an oven on its lowest setting for about 30 minutes, basting regularly with the pan juices
  • Turn the tamarillos on to the other cut side and repeat the process
  • Finally, place on the exterior side and repeat the process once more
  • Remove from the oven and leave to cool

To assemble:
240ml extra virgin olive oil
32 basil leaves
2 burrata, sliced into 4 pieces each
fennel pollen

  • Divide the olive oil between 8 serving bowls
  • Place 4 basil leaves on the right-hand side of each bowl and top with a slice of burrata
  • Sprinkle a pinch of fennel pollen over each one
  • Place a wedge of confit tamarillo alongside

Notes:

  • Yes, that cooking temperature is a little vague.  I tried it first on 35ºC, and frankly I’d have been there all night.  I moved up to 60ºC, then 120ºC, in each instance I had to up the timing.  Given that this is something you can make ahead, just give yourself loads of time, keep them as low as you can, until you reach the desired colour.  By taking mine up to 120ºC I made them a little more candied than confit, and the second time I just took it really slowly
  • Do sprinkle a tiny bit of salt onto the tamarillo, it just sets it off
  • Do use the best olive oil you can for the plating process – I used one we bought cases of in Italy – you can read about it here
  • I’m not sure I’ll do the whole peeling thing in future, but will just whip of the skin with a knife, as I’ve always done
  • Ollie says raw tamarillos are inedible, actually that’s not true – try them – but the skin should be removed before you do
  • It’s worth making a batch – like confit tomatoes, or sun-blush tomatoes, you could keep these in the fridge until you wanted to use them (perhaps not in quarters, but maybe eighths?
OLYMPUS DIGITAL CAMERA
You can purchase Ollie’s book here:


September 13, 2014 Baking

Pain Perdu, Pineapple and Coconut

We haven’t been to Marcus Wareing’s eponymous restaurant since it was re-branded.  It’s a little art-deco jewel-box of a restaurant, but the atmosphere seemed just as hushed at lunchtime as before… Still.  The food was good, and I was particularly enamoured with this dish – a little chef’s joke…  The pineapple tastes of coconut, which initially confuses the senses, especially as you try to work out how… I pressed the waitress, it’s clearly compressed, because of the texture, but what with? And then of course it struck me – Malibu – the scent led me by my nose to my teenage years.  Malibu.  When was the last time you tasted Malibu?  Well, rest assured, in this dish it’s absolutely delicious, as long as you like coconut and pineapple.

The plate comprised Malibu compressed pineapple, a coconut ice-cream, coconut curd, toasted brioche cubes, and coconut meringue.  I wasn’t terribly fond of the coconut curd, so I thought I would experiment with a coconut-milk creme patisserie (in the Thermomix)…  For the coconut meringues I used the Meringue Girls recipe, which I’ve made often before. It’s a very clever little dessert – you can prepare all the elements well in advance (perhaps with the exception of toasting the brioche), and then assemble when you’re ready.  You see.  I make sweeping statements like that.  Yes, it’s a clever dessert, and easy,  if you own a chamber vacuum sealer and a Thermomix.  I’m still posting it, because someone out there will…

As the recipes are quite long, you can find them listed in the Plating section.  The pineapple was cubed (as accurately as your patience will allow), and popped into a vacuum pack bag – I included 40ml of Malibu, and compressed under full pressure.  I left it in the fridge for 48 hours to absorb the flavour.  The compression will also change the texture of the pineapple, making it denser, and less fibrous (it effectively changes the cell structure of the fruit – it’s also an amazing technique to use on watermelon, for example).

To Plate:

Malibu compressed pineapple
Coconut meringues
Coconut-milk creme patisserie
Coconut cream ice-cream
Brioche cubes, dipped in egg and fried in a little butter

Notes:

  • The coconut version of the creme patisserie worked incredibly well – I used 300g of coconut milk, and upped the flour to 45g, but that was because I included 20g of Malibu, and also wanted to be able to pipe the cream into quite firm ‘peaks’…  The coconut flavour was subtle, but discernible, and the texture was exactly like the normal version.  I didn’t refrigerate it, but did whisk through some more malibu before piping onto the plates.

OLYMPUS DIGITAL CAMERA

September 13, 2014 Dessert

Coconut Cream Ice-Cream, with Lime Zest [Thermomix]

OLYMPUS DIGITAL CAMERAThere are lots of recipes for coconut milk ice-cream, especially with the rise of the “raw” diner (where a dish is not cooked in any way), and the number of vegans (who can’t eat any dairy).  My own persuasion of ‘pescetarianism’ is supposed to mean that I don’t eat dairy (because of my osteo-arthritis), but the reality is that I will have the odd cappuccino, the odd ice-cream, and the occasional bit of chocolate.  Luckily I’ve was put-off cream for life whilst working for six months in a bakery on Saturdays – there’s nothing like free cream slices for your break to put-you-off forever!

I wanted to create a coconut milk ice-cream recipe, but I wasn’t particularly concerned with excluding dairy, so adapted an existing recipe, replacing part of the double cream with coconut cream.  Most of the recipes I’d seen that were dairy-free, didn’t seem as smooth as I wanted, often scooping unevenly, so at least this recipe gives you a velvety smooth finish without impacting on the flavour.  I was also making it for a specific dish, so included lots of grated lime zest into the recipe too.

Ingredients:
400ml whole milk
150g granulated sugar
4 large egg yolks
320ml coconut cream (2 small tins)
The peeled zest of two limes, and a further lime, zested finely
A squirt of Coconut Arome (into the cooled base)

Method:

  • The joy of a Thermomix recipe is that you can tip the whole thing in, and walk away.  First I thinly peeled two limes, and pulsed the zest with the sugar.
  • Put the remaining ingredients in the Thermomix bowl and set to 80ºC, speed 5, for around 11 minutes (or until the bases reaches temperature).  Do make sure the custard reaches 80ºC, as this is the pasteurisation point.
  • Strain it, preferably into a bowl over ice, and chill in the fridge.
  • When cool, churn in your ice-cream machine until the consistency is right, then set in the freezer.

Notes:

  • It’s important to strain the ice-cream base, as the zest will have discoloured in the high temperature.  The third lime should be zested into the cold base, to preserve its fresh brilliance.
  • I think I prefer the texture of the base to that of cream, but to be fair, I do love coconut! The texture was particularly creamy without having the buttery overload you get from double cream – you could take down the sugar quantity, if you wanted a sharper, more sorbet like flavour.
  • Don’t forget, homemade ice-cream really does have a short shelf life, eat it soon!
  • To improve the mouth feel of your ice-cream, you can add stabilisers, which delay the formation of ice crystals.  If you make industrial quantities of ice-cream, Oakleaf European can sell you 1kg bags of stabiliser, or Sous Chef can sell you smaller quantities – both use Louis Francis Stab 2000.
OLYMPUS DIGITAL CAMERA

This is my version of Macus’s Pain Perdu, Pineapple and Coconut

September 13, 2014 Baking

The Meringue Girls Meringue Kisses…

OLYMPUS DIGITAL CAMERAI love the Meringue Girls on many, many levels – they’re cute, and they’re cute! They’ve taken something basic and created a niche market – good for them… In addition, their cookbook has brilliant little video clips which can be accessed via the cookbook by scanning a special code on your iPhone. They’re fun, informative, simple, and definitely give you a sense of their personalities: that’s often difficult to achieve in a cookbook.

I’m particularly fond of their meringue kisses, because they’re easy to make, they look fabulous, and you can flavour them in all manner of ways.  They’re the perfect little gift, and make a great item for a charity bake sale.  My most popular flavour are the passion fruit, though the cocoa, raspberry and coconut are popular too.  (The coconut variety taste like a Bounty bar, without the additional calories.) I use Aromes, which are professional patisserie flavours, and these do make a difference.  If you’re going to make a large quantity of a particular flavour, an investment in them is well worth while – they also have the advantage of not adding too much liquid into your recipe.

The Meringue Girls technique is a little different to French Meringue (whisked with cold sugar), or Italian (whisked with a hot sugar syrup, and therefore cooked), or even Swiss (which is whisked over a bain marie to cook, then taken off the heat and whisked until cool).  In this method the sugar is heated in the oven while you’re preparing the whites… It does actually work well, so don’t feel it’s necessary to opt for a different technique.

I’m giving you their basic recipe – do look at their book for different flavour ideas…  Although the method section may seem quite long, do watch the videos included below the instructions – I promise you the Meringue Girls will make it all perfectly obvious in those videos

Ingredients:
150g free-range egg whites (5 medium eggs)
300g caster sugar
For flavourings, see Notes

Method:

  • Start by lining a large baking sheet with baking paper (this is the tray onto which you will pipe the meringues.  In reality this volume of ingredients will certainly fill two normal sized baking sheets, and at least one double oven sheet).
  • Pre-heat the oven to 200ºC.  Line a roasting tray with baking paper, pour in the caster sugar and put it in the oven for about 5 minutes until the edges are just beginning to melt. Heating the sugar will help it dissolve in the egg which more quickly to create a glossy stable mixture.
  • Meanwhile, weigh your egg whites in the free-standing mixer bowl, or a non-plastic bowl.  Make sure your bowl and whisk are free from grease.  Whisk slowly at first, allowing small stabilising bubbles to form, then increase the speed until the egg whites form stiff peaks, and the bowl can be tipped upside down without the egg falling out.
  • Keep an eye on the mixture and stop whisking just before it turns into a cotton woolly appearance, at which point the mixture will be over-whisked and will have lost some of the elasticity in the egg white protein
  • At this point, the sugar should be ready to take out of the oven.  Turn down your oven to 100ºC.  Leave the door ajar to speed up the cooling.
  • With the whites stiff and while whisking again at full speed, add one big tablespoon of the hot sugar ager another to the meringue mixture, ensure that it comes back yup to stiff peaks after each spoonful of sugars. Don’t worry about any small clumps of sugar, but avoid any larger chunks of caramelised sugars from the edges of the roasting tray.
  • Once you have added all of the sugar, continue to whisk on full speed for about 5-7 minutes.  Feel a bit of the mitre between your fingers, and if you can still feel the gritty star, keep whisking at full speed until the sugar has dissolved and the mixture is smooth, and the bowl is a little cooler to the touch.  The mixture will continue to thicken up during this stage.  You know when it’s read to use as it will form a nice smooth, shiny peak on the tip of your upturned finger.
  • To pipe the meringue kisses, turn a piping bag inside out, and place it over a jug or bottle, so that it stays in place.  Using natural good colouring and a clean paintbrush, paint 5 thick strips from the tip of your piping bag to halfway down the bag.
  • Then carefully spoon your stiff meringue mixture into the piping back, and turn the bag back the right way around.  You need to pack the meringue mixture in tightly, ensuring there are no air bubbles.
  • With sharp scissors, cut the tip of the piping bag to the size of a 20p coin.
  • To get the piping bag flowing, use some of the mixture to pipe small dollops onto the four corners of your baking sheets, and use like glue to stick your baking paper to the sheet.
  • Hold the piping bag with both hands, placing your dominant hand at the top of the piping bag and your other hand halfway down the bag.  Use the top hand to apply pressure and the lower hand to control the flow of the kisses.  Squeeze the bag (like and udder!) to form the kisses.  They should have a 5cm diameter and a big peak at the top.  You can use different nozzles for different effects.  For example a star nozzle will give you beautiful little star-like kisses.
  • Once you have assembled your meringues into the desired shapes on your lined baking sheet (leaving a couple of centimetres between each shape), bake for approximately 30-40 minutes.  Take them out of the oven as soon as they lift off the baking paper with their bases intact.
  • Leave them to cool on the baking sheet.

Notes:

  • It’s easier to use a liquid egg white, such as Two Chicks, rather than separating and measuring eggs
  • The Meringue Girls use a ratio of 1:2, egg whites to sugar.  I have seen other ratios, but for meringue kisses, this ratio works fine
  • Room temperature whites achieve more volume than cold whites, so once you’ve measured them, allow them to come to room temperature – usually around 30 minutes
  • Your equipment must be clean of grease – if necessary wipe a cut lemon around the inside of the mixing bowl
  • Flavourings can be added by including an ingredient directly into the mixture (for coconut, you stir 25g desiccated coconut into one batch, and sprinkle 25g over the batch – but I also included a few drops of coconut Arome; for chocolate you take 3 Tbsp of cocoa, including half into the mixture, and scattering the remainder over the meringues before cooking (though I did include a little chocolate flavouring in them too).
  • I don’t take my meringues out of the oven straight away, as I found they had a tendency to crack, from being cooled down too quickly.  I turn off the oven, and stick a wooden spoon into the top of the oven door, propping it ajar…
  • Any extra meringues will keep for two weeks in an air-tight container, though I doubt they’ll last that long, particularly if you have children!
You can watch the Meringue Girls in the following clips:
With Paul Hollywood
How to make the mixture
Colouring and piping the mixture
Giant meringues
The Rainbow Cake
Tips and techniques
You can get the Meringue Girls book here – and it’s well worth having a look – there’s much more in there than just the kisses…
I’ve used coconut kisses as an element in a pineapple and coconut dessert:
Coconut meringues, coconut creme pattisserie,
brioche pain perdu, compressed pineapple, lime sorbet
They are also an intrinsic part of my petit-four collection, along with pâte de fruit, marshmallows, peanut butter fudge, macarons, and truffles.
Huge close up of coconut kisses…
A little bit of a joke, deliberately coloured and squat,
to look a little like little hats for some sugar work I was making
Production line for the school Christmas Fayre, along with
pâte de fruit – there are passion fruit, raspberry, cocoa, and blackberry there
Cocoa and chocolate flavoured meringues 

July 13, 2014 Baking

Coconut Milk Creme Patisserie

231d6-p1010309I use the standard Creme Patisserie recipe on the blog a lot, but in a recent recipe (which contained a coconut curd), I thought I might make a coconut milk variation – after all the fat content of coconut milk is quite high, and the consistency can be similar to milk.  I altered the recipe slightly, but that was because I included 30ml of Malibu, and an increased quantity of flour – I wanted to be able to pipe the creme pat into quite stiff peaks on the plate, for a specific dessert.
Ingredients:

300g coconut milk 60g unrefined caster sugar
30g unsalted good quality butter
30 ml Malibu 45g plain flour
3 free range egg yolks
the seeds from 1 vanilla pod
pinch of salt

Method:

Put all the ingredients into the Thermomix bowl and cook for 7 minutes at 90C, speed 4.

Give it a quick whizz at the end to ensure it’s smooth, then pour into a bowl and cover with cling film until it’s cool.
 
Yes – that’s it!  Keep it in your fridge until you require it.

Oh. And if you’re stupid enough to stick in a block of quite cool butter, do put the lid on properly and start the machine quite slowly.

January 5, 2014 Recipe

Gordon Ramsay’s Baked Spice Porridge

My predictable January health kick survives* – we’ve reached the 5th – and although it’s a Sunday morning, I’ve managed to stall breakfast long enough to make baked porridge.  I’d caught this recipe earlier in the week on Ramsay’s show, and located the recipe online.  I have to say, it’s so much nicer than perhaps it sounds!  Forget that oats are a good source of soluble fibre, help reduce cholesterol, and provide an invaluable source of manganese and non-meat protein – this thing tastes yummy too!

Ingredients:
Serves 4–6
150g (5oz) jumbo rolled oats
seeds from 1 vanilla pod
1 tsp ground cinnamon
1⁄2 tsp freshly grated nutmeg, plus a little extra to sprinkle
50g (2oz) whole blanched almonds
50g (2oz) blanched hazelnuts
75g (3oz) raisins
1 ripe pear, peeled, cored and chopped into small chunks
500ml (18fl oz) milk, plus extra for serving
200ml (7fl oz) double cream
2 tbsp demerara sugar

Method:

  • Preheat the oven to 180C/Gas 4.
  • Combine the oats and vanilla seeds in a mixing bowl – use your fingers to rub the seeds through the oats. Add the spices, nuts, raisins and pear and mix well. Stir in the milk and cream,
  • and then pour the mixture into a baking dish. Dust with a little extra grated nutmeg.
  • Place in the oven and bake for30–35 minutes, or until the oats are completely softened and the liquid absorbed.
  • Heat the grill on its highest setting. Sprinkle the top of the porridge with the sugar and place under the grill for 3–4 minutes, or until the sugar has melted and created a crust.
  • Serve warm, with a little extra milk on the side if desired

Notes:

  • I omitted the cream from mine, but I used whole milk, and upped it to 600ml
  • Do leave your nuts whole if you can, they will soften in the mix
  • I used 100g dried cranberries instead of raisins – I’m not that keen on raisins these days
  • I forgot to put in the pear – damnation – I have some excellent pears too
  • I used my Thiercelin Pain d’Epices spices, because I’m becoming vaguely addicted to the scent – although Hubby did say that it smelled a little like a Christmas pud, so beware
  • If you’re not going to pop your vanilla bean pod into sugar, you could put it into the porridge to cook alongside the other ingredients
  • Hubby had his porridge without milk on the side, but I did, it’s pretty thick otherwise
  • I cooked mine in a Le Creuset dish, which meant that when it cooled down, I was actually able to cut it into strips – like a soft breakfast bar.  It’s actually even more delicious cold – that’s my breakfast for tomorrow sorted, with some fresh fruit, and a splodge of natural yoghurt I’ll be good to go…

The Porridge and Milk

The Baked Porridge

Delicious, but even nicer when set, and cut into slices


January 2, 2014 detox

Puy lentil salad, with roasted vegetables and king oyster mushrooms

It’s inevitable, as predictable as the rising sun – come the first of January and we all feel the call of the detox. I’ve been craving lentils ever since I caught the Nigel Slater show over Christmas – his dish of warm lentil salad, horseradish and rare beef chimed somewhere with my overloaded palate… However I really wanted to make it meat-free, and to incorporate some roasted king oyster mushrooms. The mushrooms are meaty enough – they’re perfect for roasting and absorb the flavour of anything they’re dressed in.  I coated them in porcini oil, and salt and pepper and roasted them for around 30 minutes.

I also roasted some red and golden beetroot in another dish, with fennel, radish, sweet potato and lemon and lime zest.  The lentils came courtesy of one of those ready packs, always a handy standby.  The juice of the lemon and lime were added to the oil from mushrooms as a dressing, and I left the entirety to meld for half an hour before serving.
The puy lentils were earthy and added to the savouriness of the king oyster mushrooms… Granny smith apples added texture and a touch of acidity, and the roasted vegetables were both sweet and crunchy.  For the first time in days I woke with an appetite, and raring to go! Bring on the detox – I’m ready for it now…

King oyster mushrooms

The mushrooms were sliced, and dipped in porcini oil

Sweet potato, radish, fennel, red and yellow beetroot, and lime and lemon zest

The dressed dish, roasted vegetables, king oyster mushrooms and puy lentils

  • « Go to Previous Page
  • Go to page 1
  • Go to page 2

Primary Sidebar

Categories

  • ▼Recipe
    • Baking
    • Breakfast
    • Cheese
    • Dessert
    • Eggs
    • Fish
    • Heston Blumenthal
    • Italian
    • Jamie Oliver
    • Marcus Wareing
    • Mediterranean
    • Pasta
    • Patisserie
    • Risotto
    • Smoothie
    • Sous Vide
    • Squash
    • Thermomix
    • Vegan
    • Vegetarian
    • Yotam Ottolenghi

Categories

  • ▼Book Review
    • ⭐️⭐️⭐️⭐️
    • ⭐️⭐️⭐️⭐️⭐️
    • Baking
    • Meat
    • Patisserie
    • Restaurant Cookbook
    • Vegetarian
    • Yotam Ottolenghi

Categories

  • ▼Restaurant
    • 1 Michelin Star
    • 2 Michelin Stars
    • 3 Michelin Stars
    • British
    • Fish
    • French
    • Italian
    • Japanese
    • Peruvian

Categories

  • 101 Cookbooks (1)
  • 3 Michelin Stars (1)
  • Advert (1)
  • Alan Murchison (2)
  • Alba Truffle (1)
  • Almond (1)
  • Angela Hartnett (1)
  • Angler (2)
  • Art Journal (2)
  • Artichokes (1)
  • Axis (1)
  • Azelia’s Kitchen (1)
  • Baking (9)
  • Baldwin (1)
  • Bara Brith (1)
  • Basics (1)
  • Beef (1)
  • Beetroot (2)
  • Ben Spalding (2)
  • Blackberry Soufflé (1)
  • Blackening Spice (1)
  • Blood Oranges (4)
  • ►Book Review (75)
    • Baking (10)
    • Meat (1)
    • Patisserie (6)
    • Restaurant Cookbook (3)
    • Vegetarian (3)
    • Yotam Ottolenghi (2)
    • ⭐️⭐️⭐️⭐️ (16)
    • ⭐️⭐️⭐️⭐️⭐️ (8)
  • Bread (3)
  • Breakfast (1)
  • Breakfast Tart (1)
  • brioche (1)
  • Brockhall Farm (1)
  • Bruschetta (1)
  • Bryn Williams (1)
  • Burrata (1)
  • Butter (1)
  • Buttercream (1)
  • Camembert (1)
  • Canapes (1)
  • caraway (2)
  • Casserole (2)
  • Chelsea Buns (1)
  • Chestnuts (1)
  • Chicken (3)
  • Chickpea (1)
  • Chocolate (4)
  • Chocolate Fondant (1)
  • Christmas (1)
  • Ciabatta (1)
  • Cinnamon (1)
  • Citrus (1)
  • Citrus Drizzle Cake (1)
  • Clams (1)
  • Coconut (2)
  • Coconut Milk (1)
  • Confectionary (1)
  • Creme Patisserie (1)
  • Dan Lepard (1)
  • Dessert (1)
  • detox (1)
  • Doughnuts (1)
  • Dried Fruit (1)
  • Drop Scones (1)
  • Ducasse (1)
  • Duck Egg (1)
  • Eggs (3)
  • El Bulli (1)
  • en Cocotte (1)
  • Epi (1)
  • Eric Treuille (1)
  • fennel (2)
  • Fettuccini (1)
  • Fish (1)
  • FrontPage (28)
  • Fruit Tea (1)
  • Glutamate (1)
  • Goat’s Cheese (1)
  • Gỏi Cuốn (1)
  • Granita (1)
  • Herbs (1)
  • Heritage Tomato (1)
  • Hibiscus Flower (1)
  • Hope and Greenwood (1)
  • Ice-Cream (3)
  • Iced Berry Souffle (1)
  • Icing (1)
  • Italian (1)
  • James Martin (1)
  • Jelly (1)
  • Journal (9)
  • Karen Scott (1)
  • King Oyster Mushroom (3)
  • Kummel (1)
  • L’Ortolan (1)
  • Lamb (1)
  • Lavender (1)
  • Laverstoke Park (1)
  • Lemon (3)
  • Lemon Drizzle Cake (1)
  • Lemon Grass (1)
  • Lemon Meringue Tart (1)
  • Lemon Poppy Seed Muffins (1)
  • Lentils (1)
  • Limewood (1)
  • Liquorice (1)
  • Liquorice Ice-Cream (1)
  • Lobster (3)
  • Lucas Hollweg (1)
  • Luke Holder (1)
  • Macarons (1)
  • Mango (1)
  • Marcus Wareing (1)
  • Mark Lloyd (1)
  • Market (1)
  • Mary Berry (1)
  • Meringue (1)
  • Michael Moore (1)
  • Michel Roux (3)
  • Mint (1)
  • Mister Truffle (2)
  • Modernist Cuisine at Home (1)
  • Moroccan (1)
  • Muffins (3)
  • Murano (1)
  • Mushroom (1)
  • Ollie Dabbous (1)
  • Ollie Fararr (1)
  • Ox cheek (1)
  • Palourde Clams (1)
  • Pancetta (1)
  • Panna Cotta (1)
  • Parmesan (1)
  • Passion Fruit (3)
  • Pasta (1)
  • Patisserie (1)
  • Paul Heathcote (1)
  • Pea (1)
  • Peter Reinhart (1)
  • Petit Fours (1)
  • Philip Howard (1)
  • Pierre Koffman (1)
  • Pierre Koffmann (1)
  • Pimms (1)
  • Pistachio (1)
  • Pistachio Soufflé (2)
  • Pistacho (1)
  • Pork (1)
  • Prawn (1)
  • Quiche (1)
  • Rachel Allen’s 30 Day Muffins (1)
  • Raspberry (2)
  • Ravioli (1)
  • Raymond Blanc (1)
  • ▼Recipe (192)
    • Baking (17)
    • Breakfast (2)
    • Cheese (1)
    • Dessert (7)
    • Eggs (3)
    • Fish (2)
    • Heston Blumenthal (5)
    • Italian (3)
    • Jamie Oliver (1)
    • Marcus Wareing (2)
    • Mediterranean (3)
    • Pasta (3)
    • Patisserie (7)
    • Risotto (1)
    • Smoothie (1)
    • Sous Vide (1)
    • Squash (1)
    • Thermomix (19)
    • Vegan (1)
    • Vegetarian (20)
    • Yotam Ottolenghi (2)
  • ►Restaurant (124)
    • 1 Michelin Star (17)
    • 2 Michelin Stars (9)
    • 3 Michelin Stars (3)
    • British (19)
    • Fish (4)
    • French (4)
    • Italian (3)
    • Japanese (1)
    • Peruvian (1)
  • Richard Bertinet (1)
  • Risotto (1)
  • Roganic (1)
  • Rolls (1)
  • Roux (3)
  • salad (2)
  • Salmon (2)
  • Sardinian Cookery (1)
  • Scandiliscious (1)
  • Sea Trout (1)
  • Sherbet Dab (1)
  • Signe Johansen (1)
  • Silvana de Soissons (1)
  • Simon Rogan (1)
  • Snail Caviar (1)
  • Soda Bread (1)
  • Sorbet (1)
  • Soufflé (11)
  • Soup (1)
  • Sous Vide (2)
  • Spice (1)
  • Stew (1)
  • Stuffing (1)
  • Sugar Baby (1)
  • Sugarwork (1)
  • Sumosan (1)
  • Supper (1)
  • Sweetcorn (1)
  • Sweetcorn Fritters (1)
  • Tamarillo’s (1)
  • Texturas Fizzy (1)
  • Thai (2)
  • The Bertinet Kitchen (1)
  • The Square (1)
  • Thermomix (10)
  • Toffe Fudge Muffins (1)
  • Tom Kitchin (1)
  • Tomato Bread (1)
  • Tony Fleming (4)
  • Tribute Dish (2)
  • Truffle (1)
  • Truffles (6)
  • Umami (1)
  • Uncategorized (1)
  • Vanilla (2)
  • Vegan (1)
  • Vegetables (1)
  • Vegetarian (3)
  • Verveine (1)
  • Vietname Summer Roll (1)
  • Watermelon (1)
  • William Curley (1)
  • yeasted dough (1)

I’m passionate about food, its provenance and its sustainability. As a technical cook, I like to see what’s happening in the kitchens of Michelin starred restaurants, but you’re just as likely to find me at home making sourdough. You can find some of my recipes in In The Mix 2, an award-winning Thermomix cookbook.

I’m also truly blessed – I can open my fridge at any time and know it’s crammed with all manner of loveliness – but that’s not the case for everyone. There are people all around me in the UK who rely on food banks to feed their kids, and themselves, and every box of cereal or teabag makes a difference. You can donate food to your local food bank, or time, or money, and if you want more information the best starting place is http://www.trusselltrust.org.

You can also find me here:

Foodies100 Index of UK Food BlogsFoodies100
The Renaissance Epicurean... London restaurants
Top Food BlogsUK Food Bloggers Association

The Eleven Madison Park Granola

Copyright © 2025 · Cookd Pro Theme On Genesis Framework · WordPress · Log in

Nourished
  • Home
  • Recipes
  • Book Reviews
  • Restaurants
  • Journal
  • About