• Skip to primary navigation
  • Skip to main content
  • Skip to primary sidebar

Nourished

  • Home
  • Recipes
  • Book Reviews
  • Restaurants
    • 3 Michelin Stars
    • 2 Michelin Stars
    • 1 Michelin Star
  • Journal
    • Art Journal
    • The Renaissance Diary
  • About
    • Contact Me
    • Instagram
    • Loves
    • Suppliers
    • Masterchef Links

Recipe

December 30, 2012 Baking

Thermomix Sauces: Béarnaise

There are conventionally five mother sauces, of which hollandaise is the probably the richest, with it’s combination of egg yolks and melted butter.  I’m not always massively fond of hollandaise, as it often lacks flavour beyond the butter.  However I absolutely adore a number of variations, especially blood orange hollandaise (Maltaise sauce), beurre blanc, and most particularly béarnaise sauce, with its fragrant addition of tarragon.

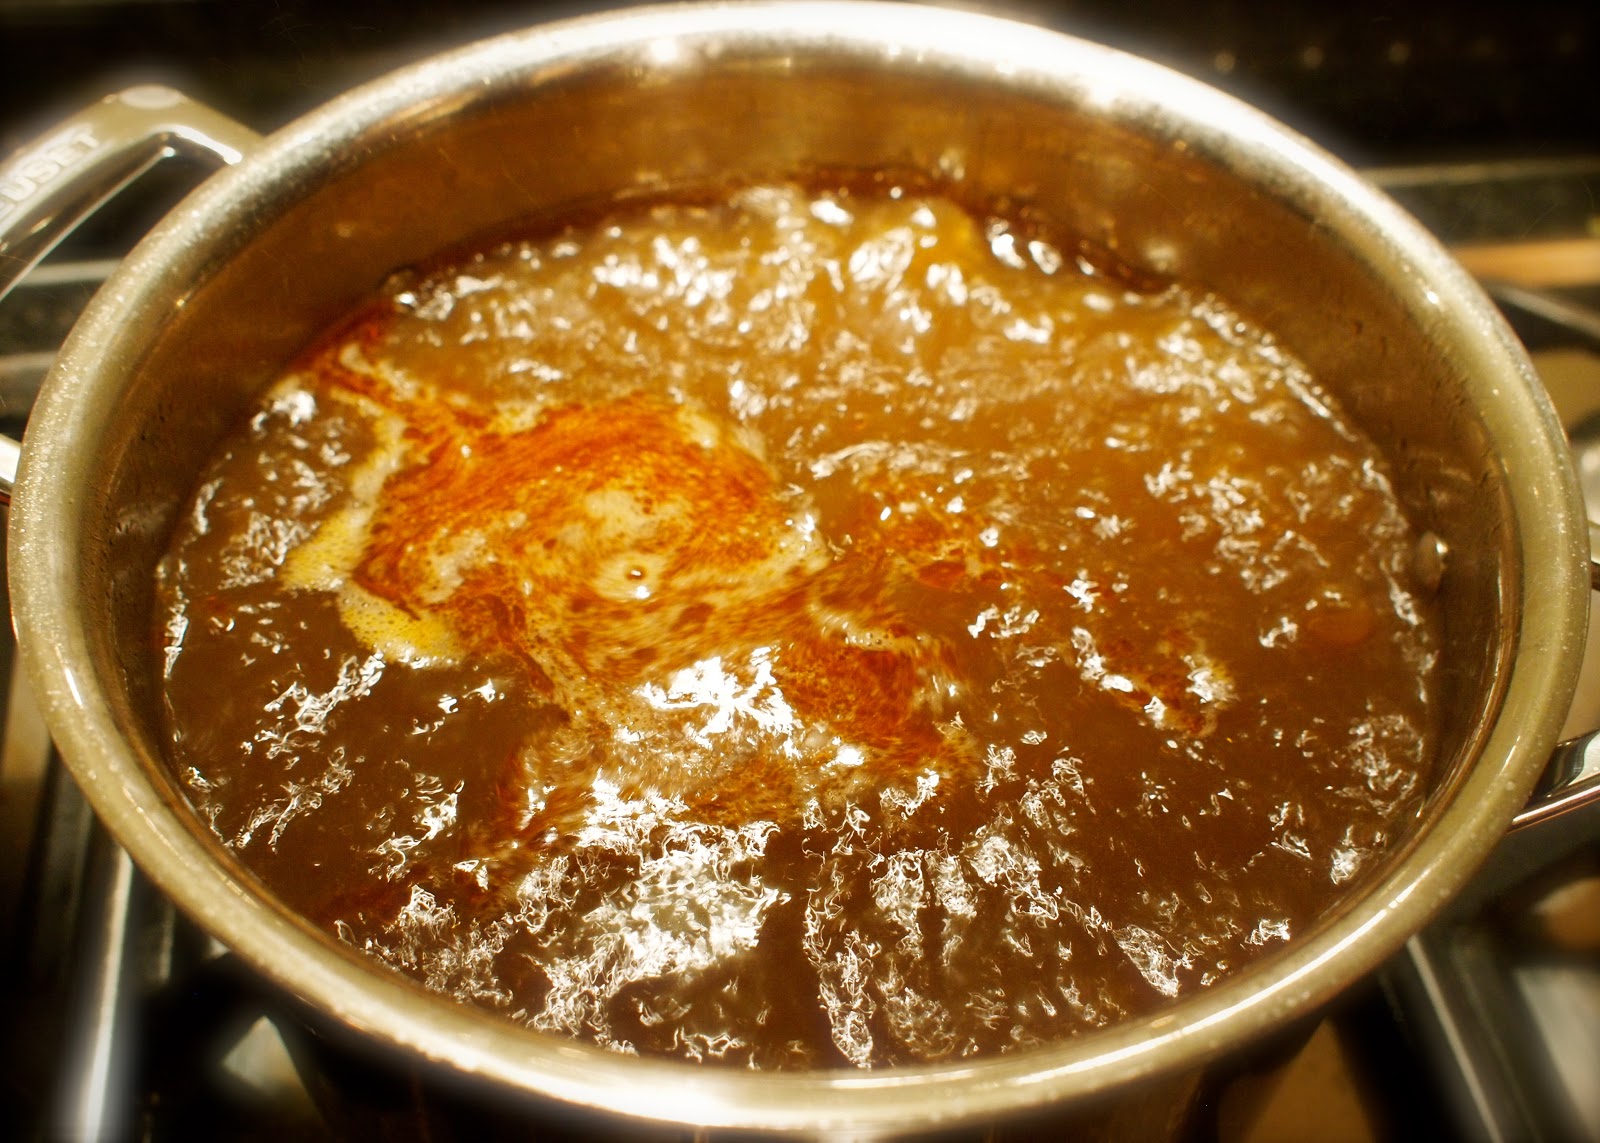
Béarnaise is generally made by reducing down a number of key ingredients common to Hollandaise (shallots, white wine vinegar, and tarragon stalks).  However most restaurants make much better Béarnaise than we can at home, because they have the time to increase the intensity over a longer period of time.  Where we’re reducing down those three key ingredients, most chefs I know actually use their own reduction which is made in batches in advance, and it often includes their own home-made tarragon vinegar – this really ups the flavour of the reduction.

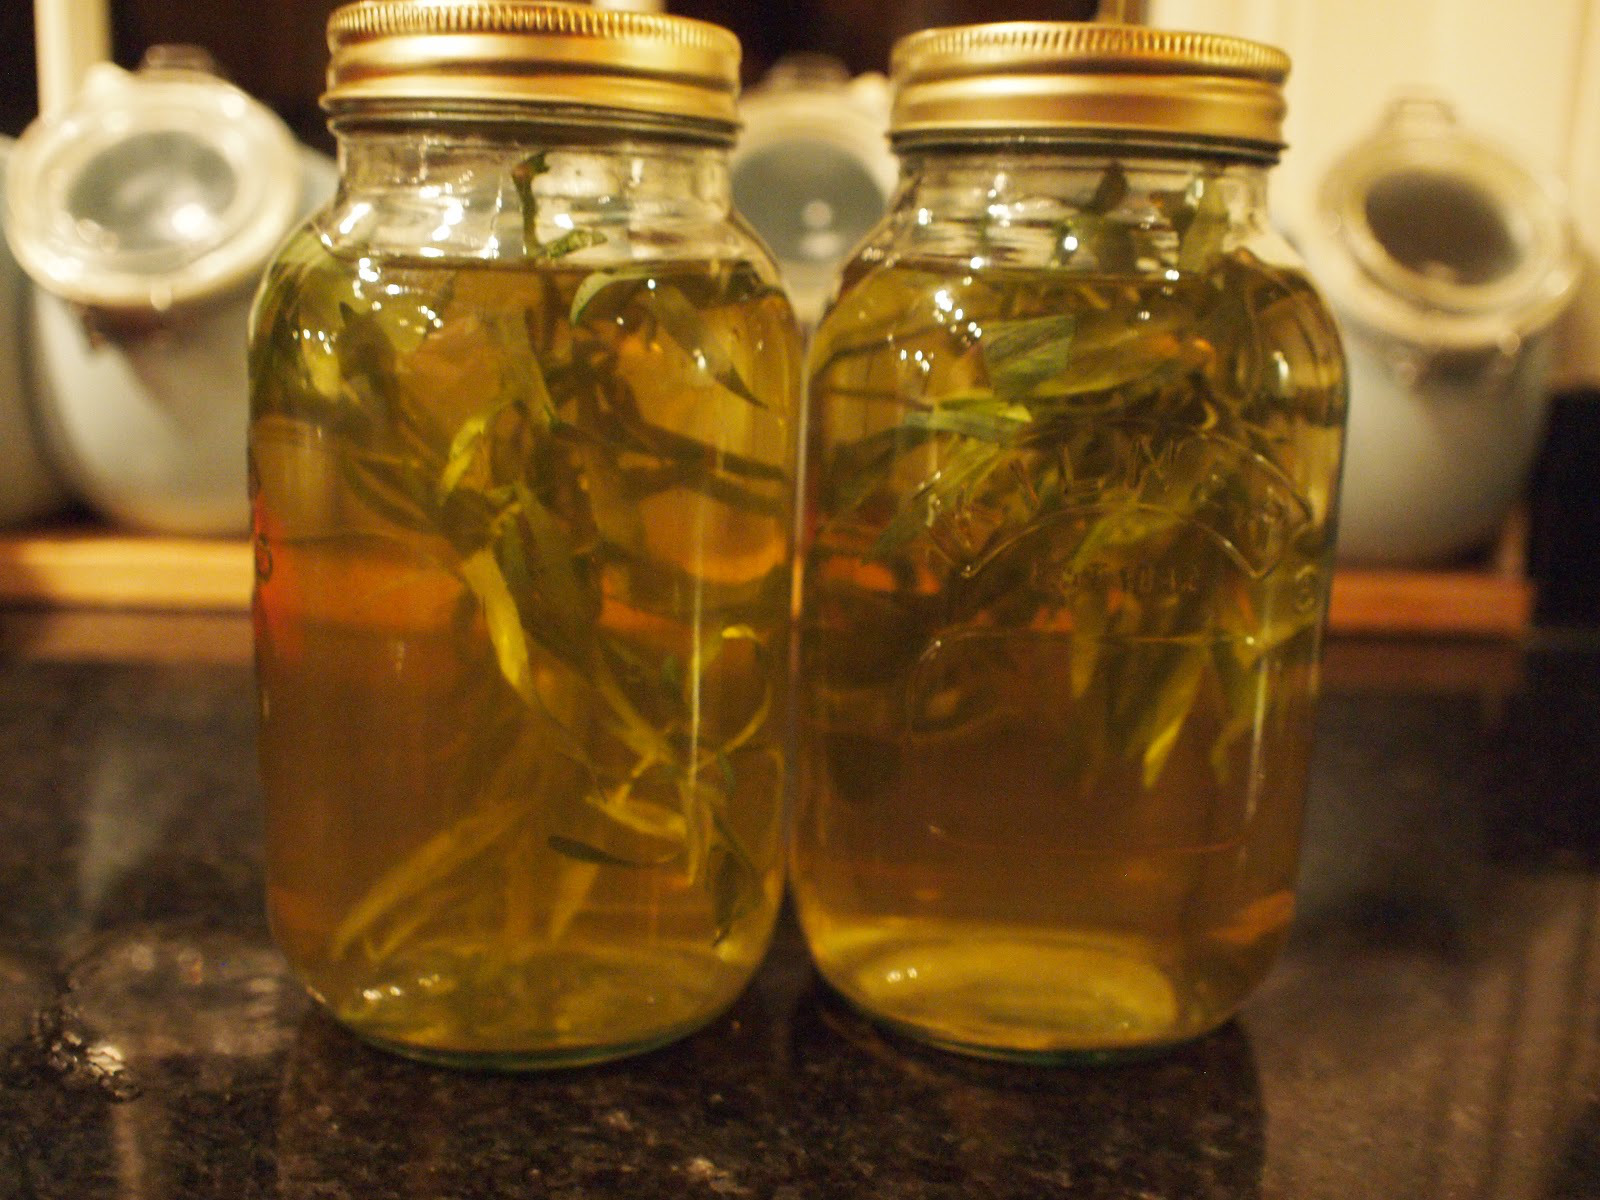
With that in mind, I made some tarragon vinegar a couple of weeks ago, simply by heating some white wine vinegar and storing in a dark place with several sprigs of tarragon in the jar.  After a couple of weeks, strain the liquid, and insert some nice new sprigs of tarragon.

A second consideration for me in developing this recipe is that I’m determined to make it in my Thermomix, as this is precisely what it’s so good at making!

One of my favourite chefs gave me his reduction recipe for beurre blanc, and this forms the basis of my Bearnaise recipe.

Reduction for Buerre Blanc, Béarnaise and Hollandaise
1 bottle of decent white wine (750ml)
500ml tarragon vinegar
1 bunches of tarragon stalks
1/2 bay leaf
Sprig of thyme
Peppercorns
7 sliced shallots

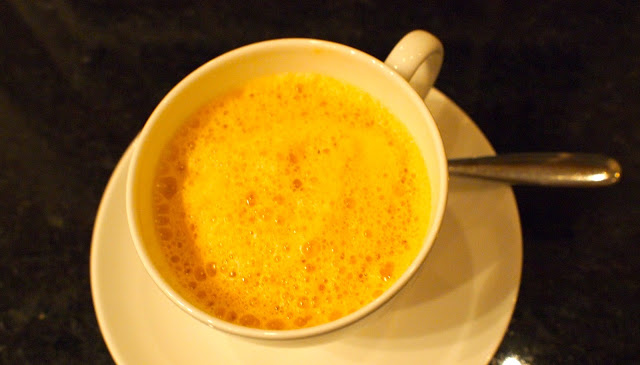
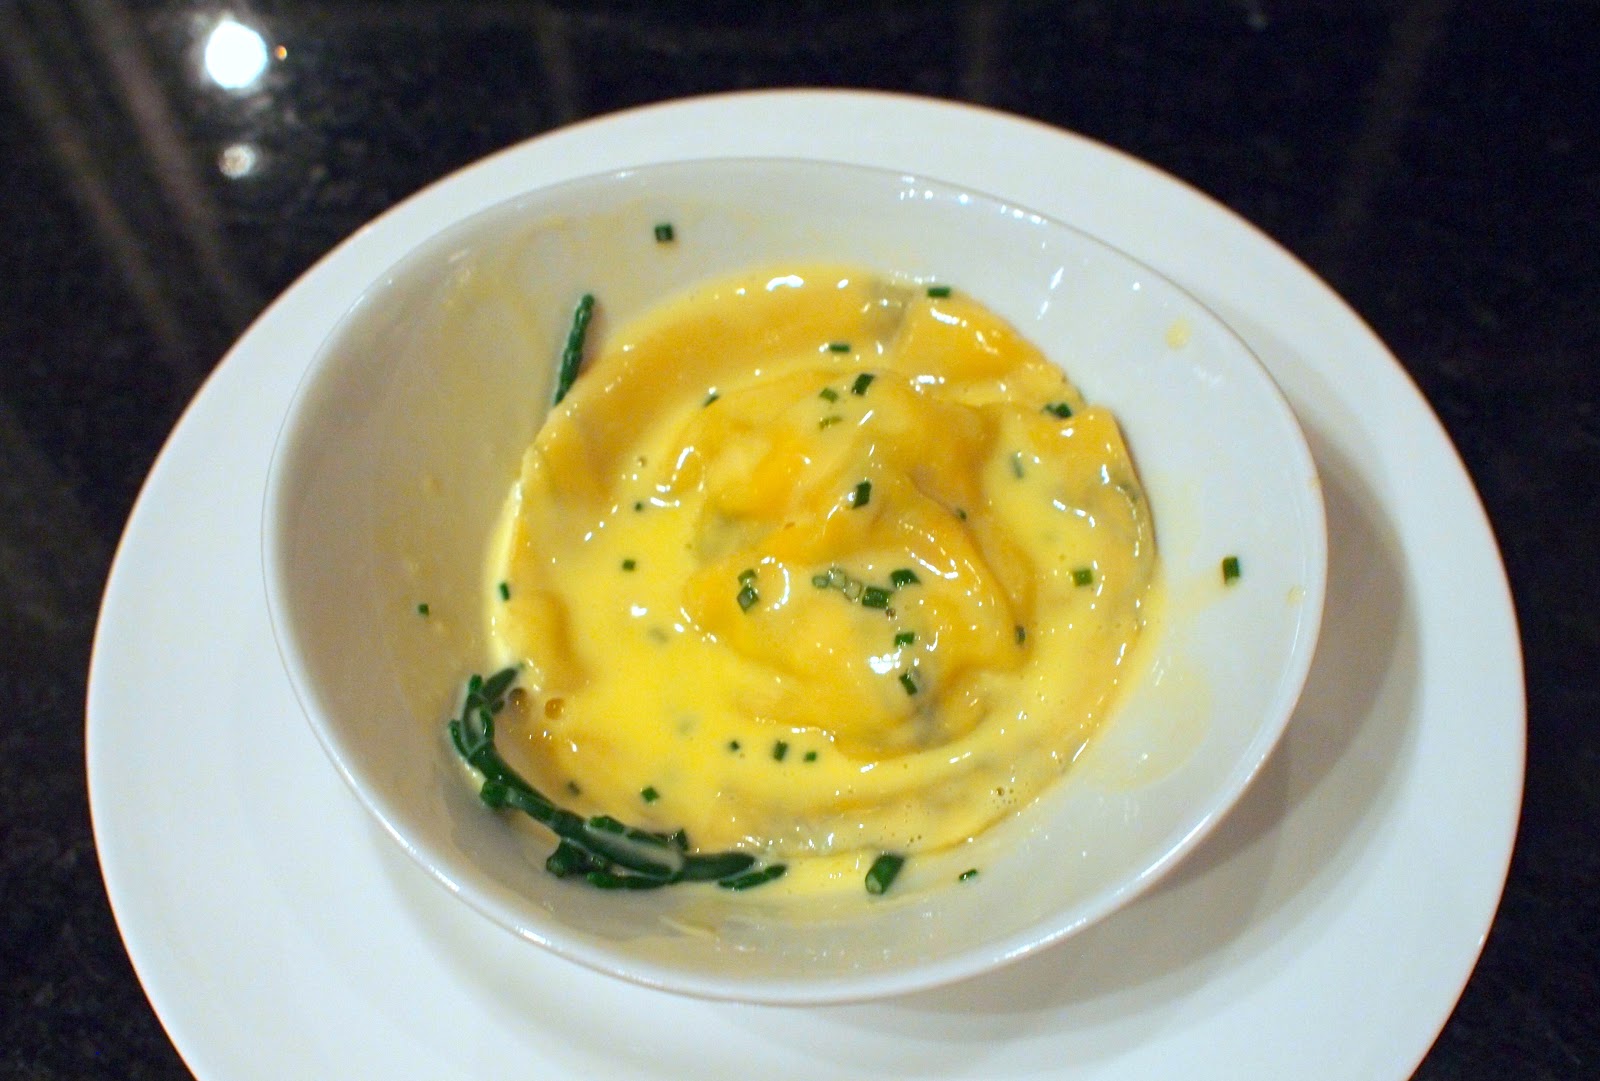
When you’re ready to make the relevant sauce, use approximately 200g of the reduction for six servings.

Thermomix Béarnaise Sauce
200g of the reduction
pinch salt
pinch black pepper
400 g butter
5 egg yolks

Preparation

  • Put the shallot reduction into the Thermo and pulse for a few seconds
  • Insert the butterfly and add remaining ingredients.
  • Process at 80C, speed 3 for 6 minutes.
  • Press through a fine sieve and serve.
You can keep the sauce at 60oC for over an hour on speed 2/3.

I prefer my Béarnaise a little acidic – if you prefer a more buttery version, just keep adding butter until you reach a suitable flavour – and don’t forget to season the sauce!

December 30, 2012 Heston Blumenthal

Heston Blumenthal’s Macaroni Cheese

Whenever I get a little bored, or I’m sitting in the bath, I delve into my i-pad espisodes of How to Cook Like Heston…  I like the combination of science, technique and, ultimately, gastronomy – it always has my food brain working overtime… After a particularly late night hosting our annual Christmas quiz, I delved into the episodes again, and looking at my groaning cheese boards (yes, plural), thought I’d better get stuck into some of his cheese recipes.

Feeling slightly jaded, it was definitely the macaroni cheese which caught my attention… Not normally something I’d crave, but the thought of fat-laden carbs was definitely appealing to some bit of me!  Mmmm…. Macaroni cheese – definitely comfort food! [There’s a bit more about the science of cheese melting at the bottom]

Ingredients
200g macaroni
½ tsp salt
15ml truffle oil
300ml dry white wine
300ml brown chicken stock, infused for 20 minutes with Berkswell cheese rind, keep warm
80g Spenwood cheese, finely grated [okay, I’m using Parmesan, a similar style]
10g cornflour [coating the cheese in cornflour prevents clumping together]
80g soft cream cheese
Black pepper
15g goat’s cheese, diced (I’m using the fabulous Fresco Angelico from Brockhall Farm!!)
Berkswell cheese, for gratinating (and this will be my Keene’s cheddar in this instance)

Method

  • Preheat the grill. Place 400ml of water, the pasta and the salt in a pan over medium-high heat. Cook until the pasta is done and all of the water has disappeared. Toss the pasta with the truffle oil. [This releases the starch into the pan, rather than rinsing it away in any drained water]
  • In a small saucepan, reduce the white wine over a high heat to 30ml. Add the warm chicken stock to the reduced wine. Mix the grated cheese with the cornflour and add to the pan. Stir until the cheese has been incorporated into the sauce, then add the pasta.
  • Cook over a medium heat until the pasta is warmed through, then stir in the cream cheese. Season with freshly ground black pepper.
  • Half fill an ovenproof baking dish with the pasta, sprinkle with diced goat’s cheese and add the remaining macaroni on top. [Heston bakes his inside a hollowed cheddar wheel]
  • Sprinkle some more cheese on top and place under the grill to melt and gratinate the cheese. Serve immediately.
What can I tell you? Feeling jaded? Reach for this ultra-rich, flavoured-packed, mac and cheese! It was everything I wanted it to be!

[Make sure you use the right macaroni – I happened to have small gluten-free macaroni made with maize and rise flour, which I’d bought in for my gluten-intolerant niece.  It would have worked much better with a durum wheat, larger style macaroni.]

Coating the hard cheese in cornflour prevents it clumping together

You can see the starch released around the sides of the pan

Adding cream cheese increases the creaminess of the sauce

You can clearly see the unmelted goat’s cheese cubes in the gratinated mac

This dish is very rich, you wouldn’t want a huge helping!!
Lot of cheese to use up!

Part of the point of the show was to discuss the properties of different kinds of cheese, and their suitability for different dishes.  Heston, Otto and Jockey each ironed a different type of cheese (yes, ironed), to test their melting points.  The medium cheese melted on the lowest setting of the iron, but the fresh, soft goats cheese wouldn’t melt at all – the water merely evaporated and left a layer of cheese behind.  The hard cheese did melt, but only after Heston moved the temperature up significantly.

The goal in most of his cheese recipes is to either release the fat and protein, or to impair that release.  In this dish Heston coats the hard cheese in cornflour to restrict the release of the protein and fat – resulting in a much smoother sauce with no clumping.  The sauce shouldn’t be boiled, as that would begin to release the fat and protein again, resulting in a less silky sauce.

The goat’s cheese was added in cubes to the dish precisely because it didn’t melt like the others – and the resulting pockets of spiky goats cheese enhance the overall cheesiness of the dish.

If you’re reading this outside of the United Kingdom, I think you can watch the relevant section on You Tube – but the copyright is protected inside the United Kingdom, sorry!  You can find more of the recipes from the series here >

December 26, 2012 Bread

Black Olive, and Caraway and Onion Rolls

I have several, no, many bread books, which get used to varying degrees. However when I need a basic do-ahead recipe which will be transformed into a variety of uses, I head straight for Peter Reinhart’s Artisan Breads Every Day.

I’ve made any number of variations of this recipe – sun blushed tomato bread, cinnamon and raisin, but my favourites are onion and caraway, and olive bread. The joy of this recipe is that the dough can sit in your fridge until you’re ready…
I like to speed the process up further by cheating – we all know I like a good cheat! The olive bread is made using half a jar of these olives kneaded into the dough.
The onion and caraway contains onions softened in olive oil, and about a tablespoon of caraway seeds.  You will need to add a little additional flour to the dough to compensate for the olive oil.  The onion adds a warmth to the front of the palate, and the caraway breathes cool fragrance onto the back – my personal favourite…
You can add anything you like – and as you can use the dough in batches, you can take out as much as you need, and varying according to what you fancy.  I keep meaning to try blue cheese and walnuts for example.  Have a play – let me know your favourite combinations…

French Bread Recipe

Ingredients:
5-1/3 cups (24 oz / 680 g) unbleached bread flour
2 teaspoons (0.5 oz / 14 g) salt, or 1 tablespoon coarse kosher salt
2-1/4 teaspoons (0.25 oz / 7 g) instant yeast
2 cups (16 oz / 454 g) lukewarm water (about 95°F or 35°C)

Ahead of time:

  • Combine all of the ingredients in a mixing bowl. If using a mixer, use the paddle attachment and mix on the lowest speed for 1 minute. If mixing by hand, use a large spoon and stir for 1 minute, until well blended and smooth. If the spoon gets too doughy, dip it in a bowl of warm water. The dough should form a coarse shaggy ball. Let it rest, uncovered, for 5 minutes.
  • Switch to the dough hook and mix on medium-low speed for 2 minutes or knead by hand for about 2 minutes, adjusting with flour or water as needed. The dough should be smooth, supple, and tacky but not sticky.
  • Whichever mixing method you use, knead the dough by hand on a lightly floured work surface for about 1 minute more, then transfer it to a clean, lightly oiled bowl. Cover the bowl with plastic wrap, then immediately refrigerate overnight or for up to 4 days. If the dough feels too wet and sticky, do not add more flour; instead, stretch and fold it one or more times at 10-minute intervals, as shown on page 18, before putting it in the refrigerator. (If you plan to bake the dough in batches over different days, you can portion the dough and place it into two or more oiled bowls at this stage.)

On Baking Day:

  • Remove the dough from the refrigerator about 2 hours before you plan to bake. Gently transfer it to a lightly floured work surface, taking care to degas it as little as possible. For baguettes and batards, divide the cold dough into 10-ounce (283 g) pieces; for 1 pound boules, divide the dough into 19-ounce (53 g) pieces; and for freestanding loaves, use whatever size you prefer.
  • Form the dough into batards and/or baguettes (see pages 21 and 22) or boules (see page 20). Mist the top of the dough with spray oil, loosely cover with plastic wrap, and proof at room temperature for about 1-1/2 hours, until increased to 1-1/2 times its original size.
  • About 45 minutes before baking, preheat the oven to 550°F (288°C) or as high as it will go, and prepare the oven for hearth baking (see page 30).
  • Remove the plastic wrap from the dough 15 minutes prior to baking; if using proofing molds, transfer the dough onto a floured peel.
  • Just prior to baking, score the dough 1/2 inch deep with a serrated knife or razor. Transfer the dough to the oven, pour 1 cup of hot water into the steam pan, then lower the oven temperature to 450°F (232°C).
  • Bake for 12 minutes, then rotate the pan and bake for another 15 to 25 minutes, until the crust is a rich golden brown, the loaves sound hollow when thumped, and the internal temperature is about 200°F (93°C) in the center. For a crisper crust, turn off the oven and leave the bread in for another 5 minutes before removing.
  • Cool the bread on a wire rack for at least 45 minutes before slicing or serving.

Variation:

  • By simply varying the method so that the shaped loaves undergo cold fermentation, rather than the freshly mixed bulk dough, you can create a spectacular loaf with a distinctive blistered crust. After the dough is mixed and placed in a clean, oiled bowl, let it rise at room temperature for about 90 minutes, until doubled in size. Divide and shape as described above, mist with spray oil, then cover the shaped dough loosely with plastic wrap and refrigerate it overnight, away from anything that might fall on it or restrict it from growing.
  • The next day, remove the dough from the refrigerator 1 hour before baking. It should have grown to at least 1-1/2 times its original size. Prepare the oven for hearth baking, as described on page 30. While the oven is heating, remove the plastic wrap and let the dough sit uncovered for 10 minutes. Score the dough while it’s still cold, then bake as described above.
Black olive rolls
Onion and caraway rolls
Glazed knot rolls

There are lots more excellent recipes in Peter’s book – you can buy it here >

December 19, 2012 Beetroot

Beetroot and Kummel Cured Salmon, with a cucumber salad

I was at a shooting party recently and was served beetroot and vodka cured salmon as a starter – it was absolutely delicious.  Light, tangy, the cucumber salad adding a refreshing bite.  I found a number of variations on-line which I’ve adapted to produce my perfect variation – it’s a bit more Scandinavian than the original, and a little more fragrant.

For the salmon
500-600g (1lb 2oz-1lb 5oz) side of salmon, boned, with skin left on
1tbsp coriander seeds
1tbsp fennel seeds

1tbsp caraway seeds
1tbsp cumin seeds
½tsp black peppercorns
2tbsp coarse sea salt
1½tbsp granulated sugar

3tbsp Kummel
zest ½ lemon
150g (5oz) raw beetroot, peeled and grated (wear gloves)
3tbsp grated horseradish
2 sprigs flat-leaf parsley, roughly chopped

For the cucumber salad 1 cucumber, peeled, deseeded and ribboned
Handful of breakfast radishes, finely sliced (optional)
A few candy beetroot, finely sliced (optional)

For the salad dressing

3tbsp white wine vinegar
1tbsp caster sugar
3 sprigs dill, roughly chopped 

Preparation:

  • Check the salmon for any small pin bones, and remove with fish tweezers if necessary
  • Mix together the spices, grinding to a not too-fine powder in a pestle and mortar or spice blender
  • Add the remaining ingredients and mix together until evenly distributed
  • If using a chamber vacuum packer, distribute a small amount of the mixture on the bottom of the bag, and put in the salmon fillet, skin side down.  Put the remaining mixture into the bag and seal at normal pressure.  The salmon can remain like this in the fridge for several days.
  • If you don’t have a vac-pac, line a baking tray with cling film, and place the salmon fillet onto it, skin side down.  Cover with the marinade, and wrap fully in cling film.  The cure will draw out some of the fish’s moisture, and result in a firmer flesh.  To enhance this, you can place another baking sheet on top of the fish and weight it down.  The mixture needs to be left for at least 24 hours, and the colour will develop the longer you leave it.  On colour, you could also consider using golden beetroot at this time of the year, which will give the salmon a brighter colour.
  • Open (or uncover) the fish, and clean off the marinade under cold water… Try to avoid getting too much water into the grain of the fish, and then pat dry with kitchen paper. 
  • Prepare the cucumber by slicing it finely on a mandolin.  Pop it into a colander and sprinkle it with 2tsp of salt.  This will crisp up the cucumber and draw out any excess fluid… Rinse of the cure and dry the cumber (I usually spin mine gently in a salad spinner, rather than squeezing it). 
  • If using the radishes, slice them to a similar thickness on a mandolin or by hand.  They accentuated the pepperiness of the horseradish, and echo the pinkness of the salmon cure 
  • If using the candy beetroot, keep them away from the other ingredients until the last minute, as the colours can leech from the candy stripes
  • Mix together the dressing, and when you’re ready to serve, dress the cucumber (and optional elements) with the dressing and leave for 5 minutes.
  • Slice the salmon finely with a salmon knife – do not put your hand on the salmon, and cut the pad off your finger, as I did one Christmas morning!  Serve the salmon and salad together.  You could also grate chilled horseradish over the dish at the last minute – Alain Passard did this on one dish we had, and it made a delightful addition!
This is the slightly spicier cure for the red beetroot salmon 
This is the lighter and more citrussy cure for the golden beetroot cured salmon

The top piece of salmon has the golden beetroot and lighter cure,
the second piece the red beetroot and slightly spicier cure.

The top piece of salmon has the golden beetroot and lighter cure,
the second piece the red beetroot and slightly spicier cure.

December 10, 2012 Chocolate

Chocolate Fondant

Chocolate fondant, the nemesis of many a Masterchef contestant!  I’ve no idea why they will insist on trying to make a fondant without choosing a recipe which guarantees success.  This recipe by the charming Mark Lloyd is delicious (I had it at his pop-up in London), and it’s always struck me as more likely to succeed because of the addition of the liquid glucose.  I can assume you it works perfectly!

Ingredients
75g unsalted butter, cut into dice
115g dark, dark chocolate (72%) , broken into even chunks
50mls or large tablespoon of liquid glucose, just slightly warmed
2 large, free range eggs, beaten to break the yolks
45g of Plain Flour

Method

  • Melt together the chocolate and butter over a pan of simmering water, making sure the water is gently simmering and isn’t touching the bottom of the bowl…
  • In a bowl or food processor, whisk the eggs and glucose together until mixed completely.
  • Now whisk in the flour, then add the melted butter and chocolate, keep stirring until the mix is even coloured.
  • When you are ready to cook them have you oven set at 190c and ¾ fill your frozen mould, gently tap to remove any air bubbles and bake for 7-8 minutes, remove from the oven, leave them for a minute to relax, then place the plate over the mould, tip over and they should turn out out, now get them to the table quick as there is nothing worse than bursting them before they get there!

Mixing the glucose, eggs and melted chocolate

Fill the dariole mould 3/4 full, having
coated it twice in melted butter and cocoa powder

Leave the fondant for one minute in its mould, before turning out 

Et voila, oozing unctuous chocolate, pouring from a crisp shell

November 25, 2012 Philip Howard

Philip Howard’s Foie Gras Ballotine…

For well over a decade The Square has been one of our favourite restaurants.  The chef-proprietor is Philip Howard – a very talented, if mercurial chef, and The Square has held two michelin stars since 1998. So you can imagine that I couldn’t have been happier when The Square cookbook finally thudded it’s way through my door…  

I’d actually waited for over a year for it to arrive, and the anticipation was palpable.  I was absolutely delighted to find a number of signature dishes in the book – including one of my favourites – the foie gras ballotine. One of us will invariably order when dining there, and it had to be the first recipe I’d try from the book.  Actually, it turned out to be a very simple recipe, with absolutely outstanding results – it’s not the cheapest thing to prepare, but for a feast I absolutely urge you to have a go…

Philip gives instructions on how to de-vein the foie gras.  There’s also an excellent description with photographs in the Club Gascon book by Pascal Aussignac. 

I’d actually purchased duck foie gras which has already been deveined, so I skipped these parts of the recipe.


Ingredients:

Foie Gras
2 lobes of fresh foie-gras, weighing about 750g in total
1.5kg rock salt

Golden Raisin Purée
200ml apple juice
300g golden raisins
100g caster sugar
1 tablespoon sherry vinegar

Camomile, apricot and sauternes jelly
250g caster sugar
150g ripe apricots, halved and stoned
10g camomile tea
20g acacia honey
6 gelatine leaves
50ml Sauternes

To serve
Brioche

Method:
Each lobe of foie gras will have a larger and smaller piece.  Carefully prise these apart and cut the connecting vein to separate them completely.  Scatter a third of the salt over the base of a dish.  Gently place the lobes on the salt and press lightly. Cover them with the remaining salt, ensuring the foie gras has contact with the salt. Leave to cure at room temperature for three hours.

Curing the foie gras in sea-salt

De-Veining the Foie Gras

Gently life the foie gras out of the salt; it should now be soft and supple.  Rinse under cold running water, not excessively, but ensuring no salt remains in the creases and crevices.  Pat the foie gras dry.  Each piece has a network of veins and arteries concealed within it and, while it is soft, it is relatively easy to excavate them with a butter knife or smallish blunt knife.  Start with the two smaller pieces.  The process is intrusive and do not worry of you feel you are damaging the liver – this is inevitable, but in all the manoeuvring of the flat knife the underside of the foie gras will remain intact.  Try not to scrape past the boundaries of the edges of the foie gras.  Two main arteries enter the smaller piece of foie gras, one in the centre of the upper side and the other at one end.  Use your fingers to locate these and, starting with the one in the centre, pinch the artery, raise it gently and, using the knife, methodically scrape away the foie gras to reveal the network of arteries that run into the liver from this point. Continue to hold the main artery and, when you have unearthed the finer ones, pull slightly harder, teasing underneath the tips of the arteries until one by one they pull away and uproot themselves from the liver.  Discard the artery.  Now pinch the main artery where it enters the end of the lobe.  This one fans out underneath the first network and spreads its capillaries to the sides and other end.  Gently scrape the knife against this main tube and follow it down towards the other end, revealing it and its offshoots as you go.  Repeat the same process as above to remove this slightly larger network.  Some arteries may snap; gentle investigation with the knife will reveal them and they can simply be pulled out with tweezers.  Whilst the foie gras is opened out, season the exposed centre with a little salt and pepper, fold the outside towards the centre in an attempt to reshape it, then gently transfer it to a tray and set aside in a cold place.   Repeat for the smaller piece.  Follow a very similar process for the two larger pieces of foie gras.  Again, one artery enters the middle of the lobe and the other the thick end and they fan out in a similar fashion to those in the smaller lobe.  Once all the foie gras has been de-veined, put it in the fridge for about 30 minutes, to firm it up to the point where it can be handled.

[Now you know why I bought some de-veined foie gras!!!]

Lay a sheet of cling film out on the work surface so it is running away from you. Repeat with the second length, ensuring it overlaps the first by about 10cm. Similarly lay 2 more sheets on top of the first to yield a large sheet of double-thickness cling film.  Place one large and one small piece of the foie gras in the middle, towards the end near you, and roll it up in a tight, sausage-like ballotine.

Once cured, the foie gras is softer and more malleable

Roll the foie gras into a ballotine

Secure with one end with a piece of string. Hold the other end of cling film and roll the ballotine along the length of the work surface – this will tighten the roll. Secure the second end with a piece of string. Repeat with the the other 2 pieces of foie gras. [I put the smooth surface on the bottom of the parcel, to ensure that when rolled up it would give a cleaner edge]

Fill a large container with iced water, lower the ballotines and leave them for 2 hours. Transfer to the fridge and leave to set overnight.

  
The ballotine needs to be iced for two hours, 
and then set in the fridge overnight

Raisin purée

Bring the apple juice to a simmer, pout it on to the raisins and leave to soak overnight. The next day, drain, reserving the apple juice. Put the sugar and 25ml water in a heavy-based pan and place over a high heat. Cook until the water evaporates and the sugar starts to caramelise. Swirl the pan carefully and when the sugar has turned a right golden colour, add the raisins and vinegar and cook for 1 minute. Transfer to a blender and blend to a smooth purée, adding a little of the reserved apple juice if it is too thick to churn in the machine. Pass through a fine sieve, transfer to a squeezy bottle and set aside. 

Camomile, apricot and Sauternes jelly 

Place the sugar in a heavy-based pan and cover with 250ml water. Please over a high heat and bring to the boil. Add the apricots, turn the heat down to return it to a base simmer., then cover and cook for 15 minutes, until the apricots are soft. Stir in the camomile tea, remove from the heat and leave to cool. Drain through a colander into a bowl and them through a fine sieve into a saucepan. Discard the apricots. Ad the honey to the pan and return to the boil for 30 seconds. Turn off the hear. Soak the gelatine in cold water for about 5 minutes, until softened. Remove from the water, add to the pan and whisk briefly until dissolved. Stir in the Sauternes, then pour into a bowl and leave to cool. Cover and chill.

To serve 

Lightly toast the brioche. Using a knife dipped in hot water, cut 16 slices of foie gras from the ballotines, each about 8mm thick. Peel of the cling film. Scoop 16 dessertspoons of jelly from the bowl and set aside on a chilled plate or tray. Lay out 8 large chilled plates. Place 2 slices of ballotine on each plate and sit a scoop of jelly alongside each. Garnish the plates with several 1cm dots of raison purée.

Serve immediately, while still cool, with toasted brioche on the side.

The finished product, absolutely delicious!

Yes I cheated – I didn’t have time to make the jelly and the purée, but I did have some excellent F&M Honey and Sauternes savour in the fridge, which actually though a little dense, worked perfectly.

You can find more fabulous recipes in The Square cookbook, and the Club Gascon book has a whole section dedicated to foie gras recipes. >

November 25, 2012 Fish

Steamed turbot, crushed potatoes with crab, and buerre noisette…

My on-going lack of a gas supply has resulted in me turning to some alternative methods of cooking.  I wanted to pan-fry some turbot, in a loose tribute to Tony Fleming’s dish, but actually as his was steamed, it suddenly motivated me to get the steamer out of the cupboard – I’m quite sure it’s not even been used a dozen times – but now it was going to come into it’s own!  Needless to say the children had eaten all my lovely tomatoes – so the sauce vierge was also going out of the window.  I swapped over to a beurre noisette and capers – and here you have it…

The potatoes would apparently take 45 minutes in a steamer (45 minutes ?!?!?!), and the thickness of the turbot looked as though it would take 15 minutes.

I cooked the buerre noisette on a portable induction hob, ensuring that the butter had gone to a golden colour – then throw in some capers – and in my case, a little white balsamic vinegar, my new addiction.

The potatoes were crushed with a little white crab meat, and some sorrel and butter….

Overall, actually pretty quick, extremely effective and the steamer may find a place slightly higher in my list of gadgets than previously…


November 23, 2012 Baking

Creme Patisserie [Thermomix]

Whenever people ask me what I make in my Thermomix, the first thing that springs to mind is flawless, effortless creme patisserie.  It’s just ridiculously easy in a Thermo, and rather time consuming when made in the conventional way.  Once you have creme patisserie, you can make perfect fruit tarts, glorious soufflés and immaculate pain au raisin!

Ingredients:

300ml full fat milk
60g unrefined caster sugar
30g unsalted good quality butter
30g plain flour
3 free range egg yolks
the seeds from 1 vanilla pod
pinch of salt


Method:

  • Put all the ingredients into the Thermomix bowl and cook for 7 minutes at 90C, speed 4.
  • Give it a quick whizz at the end to ensure it’s smooth, then pour into a bowl and cover with cling film until it’s cool.   There’s also a pistachio creme patisserie on my PK Pistachio Souffle recipe.
  • Yes – that’s it!  Keep it in your fridge until you require it.
Oh. And if you’re stupid enough to stick in a block of quite cool butter, do put the lid on properly and start the machine quite slowly.

November 12, 2012 Angler

Lobster Bisque…

The recipe for this gorgeous mouthful of sea was donated to me by the lovely Tony Fleming – it’s the recipe he uses at the Angler restaurant.  I promised not to give away all his secrets, so here I’ve documented a similar recipe to help you along your way, together with my photos…  Do try this, it may be laborious, but it’s well worth the effort!
Just as a point of clarification, this isn’t technically a bisque, as bisque traditionally denotes that some of the shell has been ground into the soup, and this obviously gives you the slightly grainy texture you sometimes have. That said, it’s the perfect way to use up the leftover lobster shells from the lobster and scallop ravioli.
Lobster bisque

Ingredients

lobster shells
prawn shells
splash of brandy
2 tbsp/1fl oz olive oil
½ lemon
1 onion or 2 shallots
3 cloves garlic
2 sticks celery
2 carrots
6 tomatoes
1 tsp paprika
1 bay leaf
salt and pepper
2 glasses white wine
50g/2oz tomato purée
double cream
few knobs of unsalted butter

Preparation method

  • In a large saucepan, fry lobster shells and prawn shells in a little olive oil for 5 mins. 
  • Add splash of brandy and flambé. 
  • Add chopped onion or shallots, garlic, celery and carrot, and fry for a further 5 mins. 
  • Add chopped tomatoes, paprika, bay leaf and seasoning, and stir well. Add lemon juice, white wine, tomato purée and water to cover. 
  • Bring to boil and then gently simmer for 1 hour, skimming the surface periodically to remove scum.
  • Pass through a fine-meshed sieve and return to saucepan and gently reduce to half the volume. Gently whisk in double cream and butter until sauce thickens, and add seasoning to taste. 
Roast your lobster carcasses, then flambé them

Boil your ‘stock’ for 40 minutes or so before straining through muslin

Reduce your ‘stock’ down until it is thick and dark

When ready to serve, mix with cream until you reach the desired flavour intensity

November 12, 2012 Angler

Lobster and Scallop Ravioli, with Buerre Blanc…

The lovely Tony Fleming kindly gave me the recipe he uses at the Angler restaurant, and it was delicious.  I agreed not to print his recipe in full, so instead I’ve included a couple of master recipes that are very similar to help you along your way, and I can show you the pics…

Beurre Blanc

Ingredients

2 shallots, finely chopped
60ml/2fl oz white wine vinegar
60ml/2fl oz dry white wine
125g/4½oz cold unsalted butter, cut into small chunks
salt and freshly ground white pepper
fresh chives, finely chopped, to garnish

Preparation method

  • For the beurre blanc, place the shallots, vinegar, wine and 60ml/2fl oz water into a saucepan. Set over a moderate heat until almost no liquid remains. 
  • Turn the heat down to a low setting and whisk in the butter one piece at a time, allowing each piece to melt and homogenise before adding the next (it is also a good idea to occasionally take the pan off the heat, then returning it when it is becoming too cool.) 
  • Once all the butter has been used the sauce should be pale and have a thin, custard-like consistency. Keep warm. 

Lobster Ravioli

Ingredients

300g/10½oz ’00’ pasta flour, plus extra for dusting
4 free-range eggs
2 x 750g/1lb 10oz cooked lobster
200g/7oz raw shelled king prawns
75ml/3fl oz double cream
salt and freshly ground black pepper
1 small bunch basil
olive oil

Preparation method

  • For the ravioli, place the flour and three of the eggs into a food processor and pulse until it forms small crumbs. Remove the mixture from the food processor and pull together to form a dough. 
  • Knead the dough lightly for 2-3 minutes until it is smooth and elastic then wrap in cling film and place in the fridge for 20 minutes. 
  • Flour the pasta machine and turn it to the lowest (thickest) setting. Feed the dough through the machine, turning the handle with one hand and holding the dough as it comes through the machine with the other. 
  • Change the setting on the pasta machine to the next-thickest setting, flour it again and feed the pasta sheet through the machine again, as before. Repeat this process 3-4 more times, flouring the machine and changing the setting down each time – it helps to cut the pasta into smaller pieces as you work to prevent it drying out. Cover any pasta you are not working on with cling film. Set the pasta aside. Any extra dough can be frozen for use on another occasion. 
  • Cut the lobster in half lengthways and remove all the meat – taking care to keep the claw meat intact. Cut the lobster meat into 1cm/½in thick slices. 
  • Place the prawns and cream into a food processor and blend to a purée, then season with salt and freshly ground black pepper. 
  • Lay a sheet of pasta onto a lightly-floured work surface and place spoonfuls of the prawn mixture at intervals along the sheet, leaving a gap of about 6cm2½in between each pile. Top each pile with a piece of lobster and a basil leaf. 
  • Beat the remaining egg in a small bowl or cup. Brush the pasta around the seafood with the beaten egg. 
  • Top with a second sheet of pasta and press down lightly around the edges of the seafood. Stamp out the ravioli using a circular cutter about 5cm/2in diameter, lay them on a baking tray and cover with cling film until ready to cook. You should have 20 ravioli. 
  • To cook the ravioli, bring a large pan of salted water to the boil and gently lower the ravioli into the pan. Cook for 1-2 minutes until they float to the top of the water then remove with a slotted spoon and drain on kitchen paper. Toss with a little olive oil, salt, and freshly ground black pepper and keep warm. 
The pasta dough, with dill interleaved between the sheets and re-rolled
Lobster and scallop mousse, with chives

Parcelling up the ravioli 
The ravioli(o)
The finished product, served with samphire and a chive beurre blanc
  • « Go to Previous Page
  • Go to page 1
  • Interim pages omitted …
  • Go to page 4
  • Go to page 5
  • Go to page 6
  • Go to page 7
  • Go to page 8
  • Interim pages omitted …
  • Go to page 11
  • Go to Next Page »

Primary Sidebar

Categories

  • ▼Recipe
    • Baking
    • Breakfast
    • Cheese
    • Dessert
    • Eggs
    • Fish
    • Heston Blumenthal
    • Italian
    • Jamie Oliver
    • Marcus Wareing
    • Mediterranean
    • Pasta
    • Patisserie
    • Risotto
    • Smoothie
    • Sous Vide
    • Squash
    • Thermomix
    • Vegan
    • Vegetarian
    • Yotam Ottolenghi

Categories

  • ▼Book Review
    • ⭐️⭐️⭐️⭐️
    • ⭐️⭐️⭐️⭐️⭐️
    • Baking
    • Meat
    • Patisserie
    • Restaurant Cookbook
    • Vegetarian
    • Yotam Ottolenghi

Categories

  • ▼Restaurant
    • 1 Michelin Star
    • 2 Michelin Stars
    • 3 Michelin Stars
    • British
    • Fish
    • French
    • Italian
    • Japanese
    • Peruvian

Categories

  • 101 Cookbooks (1)
  • 3 Michelin Stars (1)
  • Advert (1)
  • Alan Murchison (2)
  • Alba Truffle (1)
  • Almond (1)
  • Angela Hartnett (1)
  • Angler (2)
  • Art Journal (2)
  • Artichokes (1)
  • Axis (1)
  • Azelia’s Kitchen (1)
  • Baking (9)
  • Baldwin (1)
  • Bara Brith (1)
  • Basics (1)
  • Beef (1)
  • Beetroot (2)
  • Ben Spalding (2)
  • Blackberry Soufflé (1)
  • Blackening Spice (1)
  • Blood Oranges (4)
  • ►Book Review (75)
    • Baking (10)
    • Meat (1)
    • Patisserie (6)
    • Restaurant Cookbook (3)
    • Vegetarian (3)
    • Yotam Ottolenghi (2)
    • ⭐️⭐️⭐️⭐️ (16)
    • ⭐️⭐️⭐️⭐️⭐️ (8)
  • Bread (3)
  • Breakfast (1)
  • Breakfast Tart (1)
  • brioche (1)
  • Brockhall Farm (1)
  • Bruschetta (1)
  • Bryn Williams (1)
  • Burrata (1)
  • Butter (1)
  • Buttercream (1)
  • Camembert (1)
  • Canapes (1)
  • caraway (2)
  • Casserole (2)
  • Chelsea Buns (1)
  • Chestnuts (1)
  • Chicken (3)
  • Chickpea (1)
  • Chocolate (4)
  • Chocolate Fondant (1)
  • Christmas (1)
  • Ciabatta (1)
  • Cinnamon (1)
  • Citrus (1)
  • Citrus Drizzle Cake (1)
  • Clams (1)
  • Coconut (2)
  • Coconut Milk (1)
  • Confectionary (1)
  • Creme Patisserie (1)
  • Dan Lepard (1)
  • Dessert (1)
  • detox (1)
  • Doughnuts (1)
  • Dried Fruit (1)
  • Drop Scones (1)
  • Ducasse (1)
  • Duck Egg (1)
  • Eggs (3)
  • El Bulli (1)
  • en Cocotte (1)
  • Epi (1)
  • Eric Treuille (1)
  • fennel (2)
  • Fettuccini (1)
  • Fish (1)
  • FrontPage (28)
  • Fruit Tea (1)
  • Glutamate (1)
  • Goat’s Cheese (1)
  • Gỏi Cuốn (1)
  • Granita (1)
  • Herbs (1)
  • Heritage Tomato (1)
  • Hibiscus Flower (1)
  • Hope and Greenwood (1)
  • Ice-Cream (3)
  • Iced Berry Souffle (1)
  • Icing (1)
  • Italian (1)
  • James Martin (1)
  • Jelly (1)
  • Journal (9)
  • Karen Scott (1)
  • King Oyster Mushroom (3)
  • Kummel (1)
  • L’Ortolan (1)
  • Lamb (1)
  • Lavender (1)
  • Laverstoke Park (1)
  • Lemon (3)
  • Lemon Drizzle Cake (1)
  • Lemon Grass (1)
  • Lemon Meringue Tart (1)
  • Lemon Poppy Seed Muffins (1)
  • Lentils (1)
  • Limewood (1)
  • Liquorice (1)
  • Liquorice Ice-Cream (1)
  • Lobster (3)
  • Lucas Hollweg (1)
  • Luke Holder (1)
  • Macarons (1)
  • Mango (1)
  • Marcus Wareing (1)
  • Mark Lloyd (1)
  • Market (1)
  • Mary Berry (1)
  • Meringue (1)
  • Michael Moore (1)
  • Michel Roux (3)
  • Mint (1)
  • Mister Truffle (2)
  • Modernist Cuisine at Home (1)
  • Moroccan (1)
  • Muffins (3)
  • Murano (1)
  • Mushroom (1)
  • Ollie Dabbous (1)
  • Ollie Fararr (1)
  • Ox cheek (1)
  • Palourde Clams (1)
  • Pancetta (1)
  • Panna Cotta (1)
  • Parmesan (1)
  • Passion Fruit (3)
  • Pasta (1)
  • Patisserie (1)
  • Paul Heathcote (1)
  • Pea (1)
  • Peter Reinhart (1)
  • Petit Fours (1)
  • Philip Howard (1)
  • Pierre Koffman (1)
  • Pierre Koffmann (1)
  • Pimms (1)
  • Pistachio (1)
  • Pistachio Soufflé (2)
  • Pistacho (1)
  • Pork (1)
  • Prawn (1)
  • Quiche (1)
  • Rachel Allen’s 30 Day Muffins (1)
  • Raspberry (2)
  • Ravioli (1)
  • Raymond Blanc (1)
  • ►Recipe (192)
    • Baking (17)
    • Breakfast (2)
    • Cheese (1)
    • Dessert (7)
    • Eggs (3)
    • Fish (2)
    • Heston Blumenthal (5)
    • Italian (3)
    • Jamie Oliver (1)
    • Marcus Wareing (2)
    • Mediterranean (3)
    • Pasta (3)
    • Patisserie (7)
    • Risotto (1)
    • Smoothie (1)
    • Sous Vide (1)
    • Squash (1)
    • Thermomix (19)
    • Vegan (1)
    • Vegetarian (20)
    • Yotam Ottolenghi (2)
  • ►Restaurant (124)
    • 1 Michelin Star (17)
    • 2 Michelin Stars (9)
    • 3 Michelin Stars (3)
    • British (19)
    • Fish (4)
    • French (4)
    • Italian (3)
    • Japanese (1)
    • Peruvian (1)
  • Richard Bertinet (1)
  • Risotto (1)
  • Roganic (1)
  • Rolls (1)
  • Roux (3)
  • salad (2)
  • Salmon (2)
  • Sardinian Cookery (1)
  • Scandiliscious (1)
  • Sea Trout (1)
  • Sherbet Dab (1)
  • Signe Johansen (1)
  • Silvana de Soissons (1)
  • Simon Rogan (1)
  • Snail Caviar (1)
  • Soda Bread (1)
  • Sorbet (1)
  • Soufflé (11)
  • Soup (1)
  • Sous Vide (2)
  • Spice (1)
  • Stew (1)
  • Stuffing (1)
  • Sugar Baby (1)
  • Sugarwork (1)
  • Sumosan (1)
  • Supper (1)
  • Sweetcorn (1)
  • Sweetcorn Fritters (1)
  • Tamarillo’s (1)
  • Texturas Fizzy (1)
  • Thai (2)
  • The Bertinet Kitchen (1)
  • The Square (1)
  • Thermomix (10)
  • Toffe Fudge Muffins (1)
  • Tom Kitchin (1)
  • Tomato Bread (1)
  • Tony Fleming (4)
  • Tribute Dish (2)
  • Truffle (1)
  • Truffles (6)
  • Umami (1)
  • Uncategorized (1)
  • Vanilla (2)
  • Vegan (1)
  • Vegetables (1)
  • Vegetarian (3)
  • Verveine (1)
  • Vietname Summer Roll (1)
  • Watermelon (1)
  • William Curley (1)
  • yeasted dough (1)

I’m passionate about food, its provenance and its sustainability. As a technical cook, I like to see what’s happening in the kitchens of Michelin starred restaurants, but you’re just as likely to find me at home making sourdough. You can find some of my recipes in In The Mix 2, an award-winning Thermomix cookbook.

I’m also truly blessed – I can open my fridge at any time and know it’s crammed with all manner of loveliness – but that’s not the case for everyone. There are people all around me in the UK who rely on food banks to feed their kids, and themselves, and every box of cereal or teabag makes a difference. You can donate food to your local food bank, or time, or money, and if you want more information the best starting place is http://www.trusselltrust.org.

You can also find me here:

Foodies100 Index of UK Food BlogsFoodies100
The Renaissance Epicurean... London restaurants
Top Food BlogsUK Food Bloggers Association

The Eleven Madison Park Granola

Copyright © 2025 · Cookd Pro Theme On Genesis Framework · WordPress · Log in

Nourished
  • Home
  • Recipes
  • Book Reviews
  • Restaurants
  • Journal
  • About